VSCode Setup
Categories: DevOps Breadcrumb: /toolsA key to learning in this class is understanding how to make a GitHub Pages project. This guide will setup and run the project. At the end, you will have a student Website that can be used for blogging classroom learnings and progress.
Git Identification
Set up your personal GitHub variables to ensure your commits are associated with your GitHub account. This is required before syncing code to GitHub. These configurations are essential for tracking contributions and collaborating effectively.
- Set your email address: Use the email associated with your GitHub account.
git config --global user.email "youremail@gmail.com"
- Set your GitHub user.name: Use your GitHub ID..
git config --global user.name yourGHID
- Verify your configurations:
git config --global --list
This command will display your global Git configurations, including the email and username you just set. If there are any errors, repeat the git config commands to correct them.
Starting a Project
The following commands are universal for all machine types, terminals, and projects. The previous installation steps ensured that all machine types have compatible tools. Follow these steps in order:
-
Open a Linux-supported Terminal.
-
Move to your home directory:
cd -
Setup a directory for projects:
mkdir -p opencs cd opencs git clone https://github.com/open-coding-society/student.git -
Prepare project prior to opening VS Code:
# Move to the project directory cd student # Create a virtual environment using the provided script scripts/venv.sh # Activate the virtual environment (observe the prompt change) source venv/bin/activate # Install Python packages for the project pip install -r requirements.txt # Verify Jupyter kernels, ensure python3 is listed jupyter kernelspec list # Install Ruby gems required for Jekyll (GitHub Pages) bundle install # Open the project in VS Code code . -
Authenticate with GitHub:
- At some point, you may be prompted to authenticate with GitHub. Follow the dialog and instructions.
- KASM A keyring may appear; ensure you authenticate. Using credentials similar to GitHub should work.
-
For WSL Users Only:
- Ensure that VS Code is opened in WSL. Check the bottom-left corner of the VS Code window to confirm. This is critical for success!
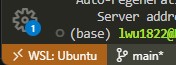
- Ensure that VS Code is opened in WSL. Check the bottom-left corner of the VS Code window to confirm. This is critical for success!
Software Development Life Cycle (SDLC)
The development cycle involves iterative steps of running the server, making changes, testing, committing, and syncing changes to GitHub. This process ensures that your website is updated and functioning correctly both locally and on GitHub Pages.
SDLC Workflow
+-------------------+       +-------------------+       +-------------------+       +-------------------+       +-------------------+
|                   |       |                   |       |                   |       |                   |       |                   |
|    Run Server     | ----> |   Make Changes    | ----> |     Test          | ----> |    Commit         | ----> |     Sync          |
|                   |       |                   |       |                   |       |                   |       |                   |
+-------------------+       +-------------------+       +-------------------+       +-------------------+       +-------------------+
        |                           |                           |                           |                           |
        v                           v                           v                           v                           v
 Start Local Server           Edit Code Files            Verify Changes             Save Changes Locally        Push Changes to Remote
Open Project and Make
All students are building a GitHub Pages website. These steps get your website running on your desktop (local or cloud).
-
Open a terminal
-
Navigate to your project directory
cd ~/opencs/portfolio/student -
Activate virtual environment
source venv/bin/activate -
Open VSCode
code . -
Open a VSCode Terminal
-
Type
makeThis runs a build to a local server. Repeat this command as often as you make changes. -
Hover then Cmd or Ctl Click on the Server address http://127.0.0.1 … provided in the terminal output from the make command.
### Congratulations!!! An output similar to below means tool and equipment success ###
johnmortensen@Johns-MBP portfolio_2025 % make
Stopping server...
Stopping logging process...
Starting server...
Server PID: 48190
Terminal logging starting, watching server...
Server started in 3 seconds
Configuration file: /Users/johnmortensen/vscode/portfolio_2025/_config.yml
To use retry middleware with Faraday v2.0+, install `faraday-retry` gem
            Source: /Users/johnmortensen/vscode/portfolio_2025
       Destination: /Users/johnmortensen/vscode/portfolio_2025/_site
 Incremental build: disabled. Enable with --incremental
      Generating...
      Remote Theme: Using theme jekyll/minima
                    done in 2.493 seconds.
 Auto-regeneration: enabled for '/Users/johnmortensen/vscode/portfolio_2025'
    Server address: http://127.0.0.1:4100/portfolio_2025/
Make workflow (local build: make, make clean, make stop, make convert)
These commands are used to build and manage a localhost version of the website. The purpose of this is to verify and test code changes prior to pushing changes to GitHub Pages.
-
make: Runs the local server. -
make clean: Stops the local server and cleans the files. -
make stop: Stops the local server. This means you will be unable to access your blog on http://localhost until you runmakeagain. -
make convert: Converts Jupyter Notebook files. Run this if your.ipynbfiles are not updating on the server; it may assist in finding the error.
VSCode Commit and Sync Workflow
All students will be writing and changing code. These steps allow you to change the website, first locally and then on public location.
+-------------------+       +-------------------+       +-------------------+       +-------------------+
|                   |       |                   |       |                   |       |                   |
|   VS Code Editor  | ----> |   Local Git Repo  | ----> |   Remote GitHub   | ----> |   GitHub Pages    |
|                   |       |                   |       |                   |       |                   |
+-------------------+       +-------------------+       +-------------------+       +-------------------+
        |                           |                           |                           |
        |                           |                           |                           |
        v                           v                           v                           v
    Save Files                Commit Changes               Sync Changes                Public Website
   Local Website
Detailed Steps
-
Save Files in VS Code:
- Edit your files.
- Save the changes (Cmd + S on Mac or Ctrl + S on Windows/Linux).
- Verify changes on the local webserver.
-
Commit Changes in VSCode:
- Click on the “Source Control” icon in the left sidebar.
- Stage your changes by clicking the plus sign next to the files.
- Enter a commit message.
- Click the “Commit” button.
-
Sync Changes to GitHub:
- Click the “Sync Changes” button in the Source Control view.
- This pushes your local commits to the remote GitHub repository.
-
Update GitHub Pages:
- GitHub Pages automatically rebuilds your site with the latest changes.
- Visit your public website at https://
.github.io/student to see the updates.