Windows VS Code and Kernels with Anaconda
Guide to get Anaconda and Jupyter Notebooks to work with VS Code on Windows (Focus was IJava kernel).


- Installing and Setting Up VS Code
- Installing and Setting Up Anaconda
- Installing IJava Kernel
- Installing an Appropriate JDK for IJava
- Ending Checks and How to Run
- Setup JavaScript and Bash Kernels
Installing and Setting Up VS Code
This guide was created by Anthony Vo and Sahil Samar as they were having problems with VS Code and IPython. This was related to conflicting Tool dependencies that were introduced to their machines.
-
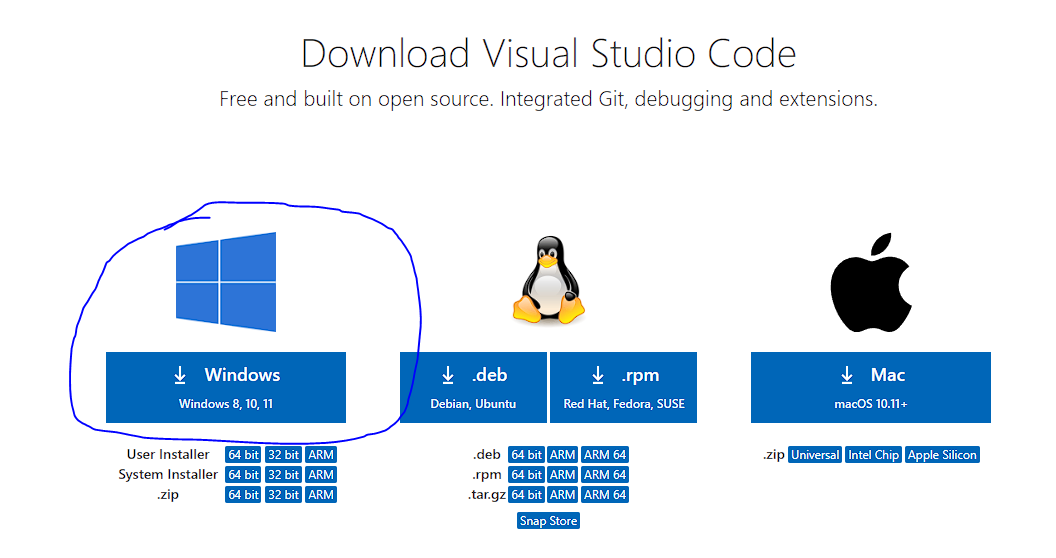
Install VS Code to edit your code Navigate to this site and install VS Code for Windows.
-
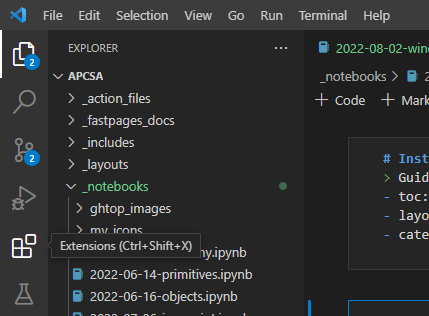
Once it's downloaded, navigate to the left sidebar and click Extensions. Download some necessary extensions:
- Java extensions to debug Java (Maven, Project Manager, Debugger, Extension Pack, and Test Runner for Java by Microsoft are good options)
- Jupyter notebook extensions (Jupyter, Jupyter Keymap, and Jupyter Notebook Renderers by Microsoft are good options)
Installing and Setting Up Anaconda
Installing Anaconda to help configure and manage Jupyter kernels. Anaconda uses the concept of creating environments, it brings many tools into a simple setup.
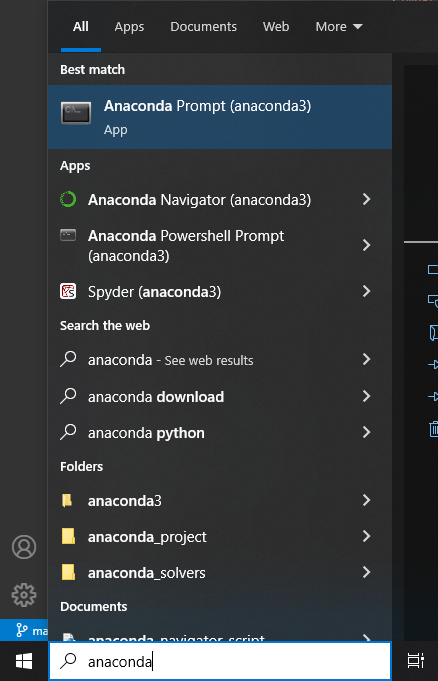
- Install Anaconda from their website. Follow the steps to install, and then open the Anaconda command prompt from your search bar.
Run the following commands:
conda install jupyter
jupyter notebook .
A website should pop up in your browser which contains your file hierarchy. This is the Anaconda Jupyter Notebook editor! You can edit notebooks from here, but we'll using VS Code to edit notebooks instead.
Installing IJava Kernel
To run Java on our notebooks, we need a Java kernel. Github user SpencerPark has created a Java kernel for us to use, as it notebooks do not support Java by default.
- Navigate to SpencerPark's README and follow the instructions to install IJava. I would recommend following the steps under Install pre-built binary.
- Ensure that running the command
jupyter kernelspec listin your Anaconda prompt shows an output containing Java.
Installing an Appropriate JDK for IJava
IJava requires a newer JDK, but some operating systems and Java downloads automatically come with JDK 8. This will help to make sure IJava works.
-
Go to this website and download the newest JDK. I downloaded the Windows/x64 build for JDK 18. Unzip the contents of the folder. Then, move the jdk folder from the extracted zip folder into C:/Program Files/Java. (Note: if you don't have Program Files/Java, then you'll need to download Java from Oracle or a different open source website)

-
Next, edit the kernel.json file that comes with IJava for it to use the newly downloaded JDK. Run
jupyter kernelspec listin the Anaconda prompt to find where the kernel is located (in my case, it's C:\Users\amv76\AppData\Roaming\jupyter\kernels\java). To access AppData, you can use Win + R and type in the command%appdata%. Open kernel.json (which might just be named kernel on your system) with VS Code. Replace the "java" argument with the path to your JDK, as seen below.
{
    "argv": [
        "java", ----> "C:\\Program Files\\Java\\jdk-18.0.2\\bin\\java.exe",
        "-jar",
        "C:\\Users\\amv76\\AppData\\Roaming\\jupyter\\kernels\\java/ijava-1.3.0.jar",
        "{connection_file}"
    ],
    "display_name": "Java",
    "env": {},
    "interrupt_mode": "message",
    "language": "java"
}
Make sure to use two \\ instead of one \, as one \ is an escape character and will not work in file paths.
Setup JavaScript and Bash Kernels
Some other kernels for different languages
- JavaScript:Installation Guide - Choose a method that works best for you (remember that Anaconda prompt help manage tools). Also note that you need the Desktop Development with C++ Workload for VS Code; you can download it by accessing Visual Studio Installer > Modify and selecting Desktop Development with C++.
- Bash: Go to Anaconda command prompt and input the following two lines of code:
pip install bash_kernel
python -m bash_kernel.install