Cockpit Setup
A guide to setting up Cockpit
- Setting up Cockpit
- Install Cockpit
- Accessing
- Configure subdomain
- Nginx
- Cockpit Navigation
- Congratulations!
Setting up Cockpit
Overview
Cockpit is a tool that provides a GUI interface on the web. It allows an administrator to manage applications and services running on the server. While Linux configurations are mostly done through a command line, Cockpit provides a helpful visualization for features such as CPU and memory utilization. Cockpit also provides a terminal on the web interface, making it helpful if you need to access the server remotely.
Install Cockpit
sudo apt update
sudo apt install cockpit
Start the Cockpit service
Start the Cockpit service
Accessing
Cockpit runs on port 9090. This port needs to be allowed on the EC2 instance. Click on “Security Groups” in the left sidebar:
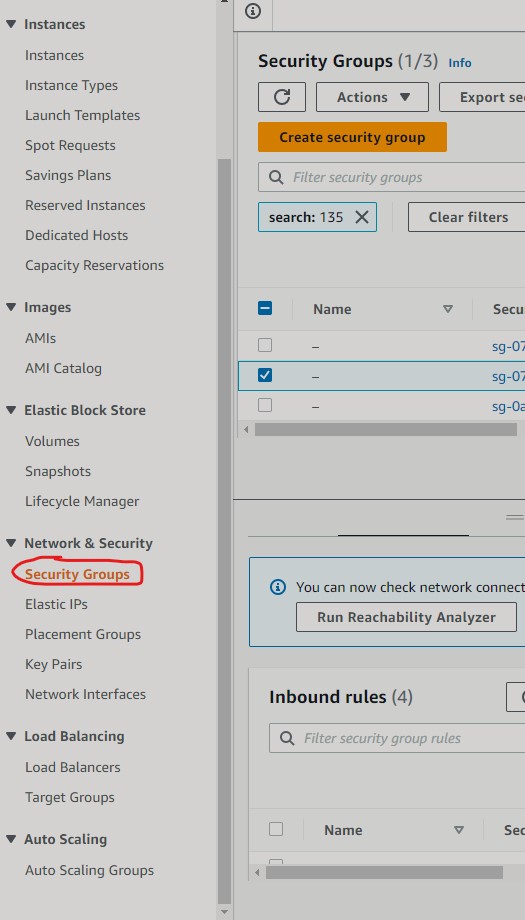
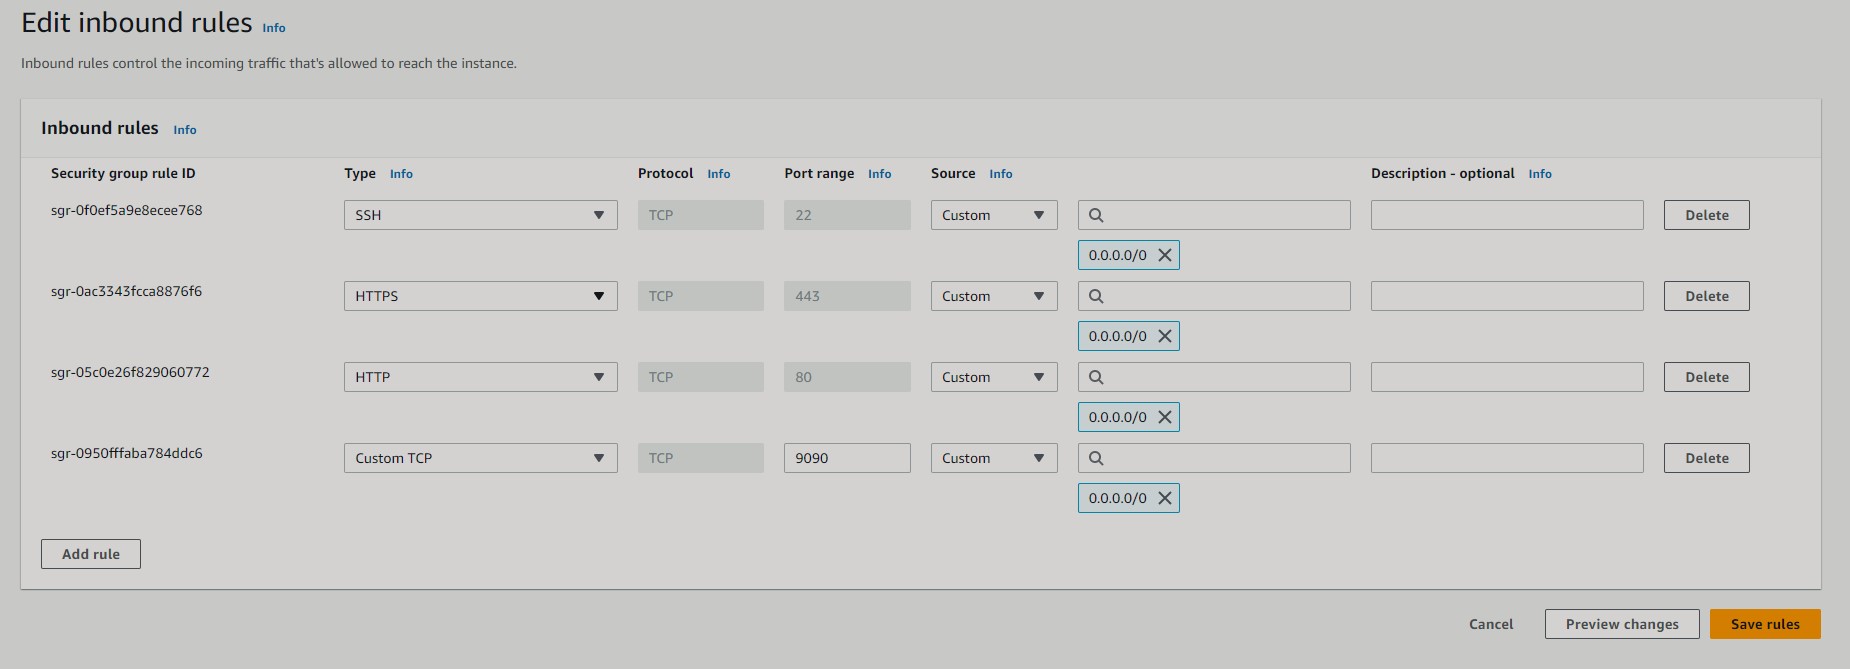
Next, search for your security group. Click the check box next to the group name, scroll down, and click on “Inbound rules”. Click on “Edit inbound rules”, and add a rule that allows “Port range” of 9090 and “Source type” of Anywhere-IPv4.
Access Cockpit with the link: <EC2 IP address>:9090. There are a variety of ways to find the IP address of the instance. One way is to locate the IP address under “Public IPv4 address” on the “Instances” page:

In this case, the IP address of the instance is 3.145.69.15. Accessing http://3.145.69.15:9090 shows the Cockpit login screen:
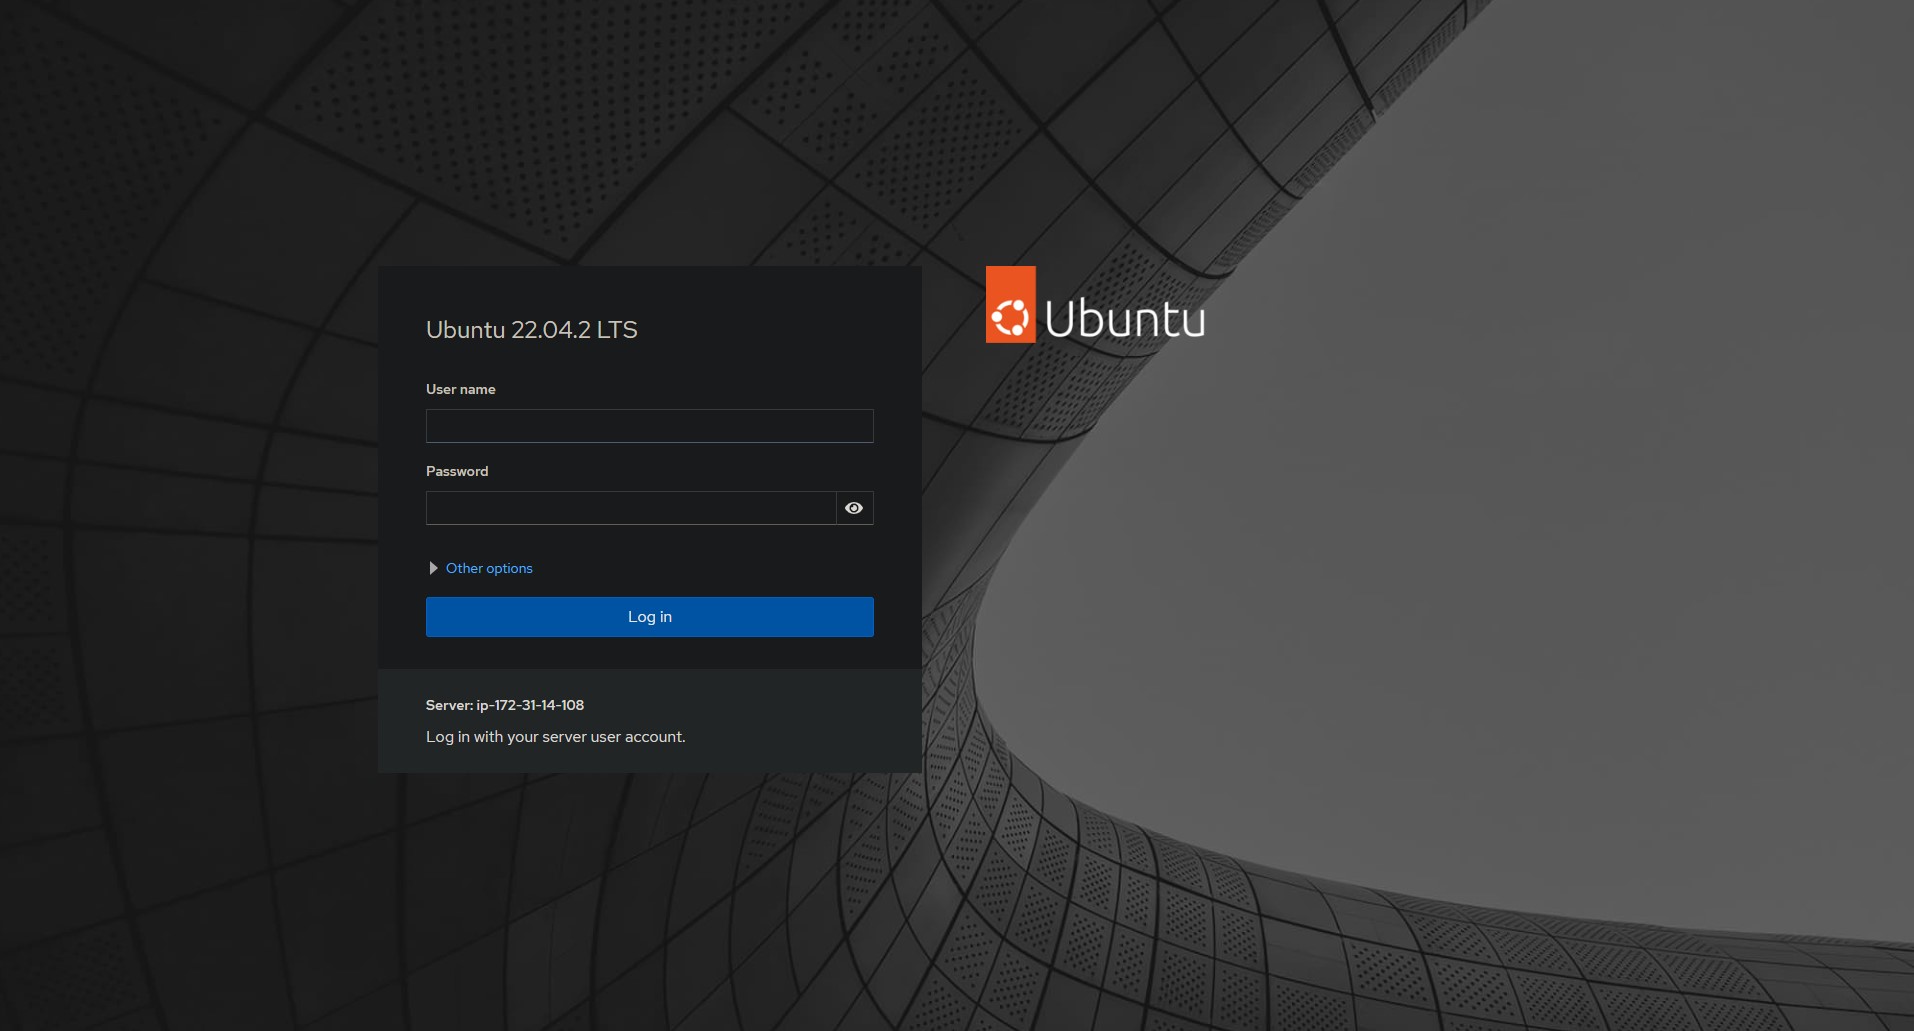
Login with the same username and password used to login to the EC2 instance.
Configure subdomain
-
Go to AWS Route 53 -> Hosted zone -> nighthawkcodingsociety.com
-
Click on “Create record”
-
Configure a subdomain, keep the “Record type” as “A”, and add the IP address of the instance in the “Value” section.
Now you can access Cockpit at <subdomain>:9090.
Nginx
Use Nginx to configure a reverse proxy for Cockpit:
Create an nginx file in /etc/nginx/sites-available/<your file name> and add the following lines for Cockpit. Be sure to replace <your domain name> with the subdomain you configured:
server {
    server_name    <your domain name>;

    location / {
        # Required to proxy the connection to Cockpit
        proxy_pass https://127.0.0.1:9090;
        proxy_set_header Host $host;
        proxy_set_header X-Forwarded-Proto $scheme;

        # Required for web sockets to function
        proxy_http_version 1.1;
        proxy_buffering off;
        proxy_set_header Upgrade $http_upgrade;
        proxy_set_header Connection "upgrade";

        # Pass ETag header from Cockpit to clients.
        # See: https://github.com/cockpit-project/cockpit/issues/5239
        gzip off;
    }
}
Activate the Nginx configuration with:
sudo ln -s /etc/nginx/sites-available/<your file name> /etc/nginx/sites-enabled/<your file name>
Create a certificate for the website to access over HTTPS.
# Make Certbot edit Nginx configuration to enable HTTPS
sudo certbot --nginx

# Restart Nginx
sudo systemctl restart nginx
Cockpit Navigation
This portion will cover Cockpit’s features. Login to Cockpit by accessing your subdomain.
The left navigation bar in Cockpit presents a few options that you can select:
Overview
The overview section provides a summary of health, usage, system, and configuration information. Click on “View details and history” to check CPU, memory, and network settings.
Logs
These provide information about the system, such as a failed login. Logs can be filtered based on criteria such as time or priority.
Storage
See disk read and write settings and storage logs.
Networking
This portion shows the network traffic of the server and interface information. VLANs and bridges can also be added here.
Accounts
This setting allows the administrator to create and manage accounts. You can click on a user to edit user settings, such as changing the password and adding SSH keys.
Services
Click on a service to view its settings. A service can be reloaded, restarted, or stopped by clicking on the three dots. The dropdown under “Show relationships” includes information such as a service’s dependencies and when it starts in relation with other services (what services start before and after this service)
Software Updates
If you are running Ubuntu 17.10 or later, a “Loading available updates failed” error message will appear. This is because Ubuntu changed the network management from network-manager to netplan.io, which has not been updated in Cockpit. A way to fix this is to change netplan’s configuration file to manage one interface with network-manager.
sudo nano /etc/netplan/50-cloud-init.yaml
Next, add the following line under network:
renderer: NetworkManager
Then, execute
sudo netplan try
Refresh Cockpit, and the “Software Updates” page should work. Updates can now be installed.
Terminal
A command line interface that is the same as the machine’s terminal on AWS EC2.
Update hostname and system time
Go to Overview -> Configuration -> Click on “edit” next to “Hostname” and configure a hostname for the server.
Click on the time next to “System time” to set the time zone.
User account settings
Go to Accounts -> Click on “Create new account” and fill out the boxes
After the user is created, click on the user. You can check “Server administrator” to give the user sudo privileges.
You can also configure account expiration and password expiration settings by clicking on “edit” next to the two settings.
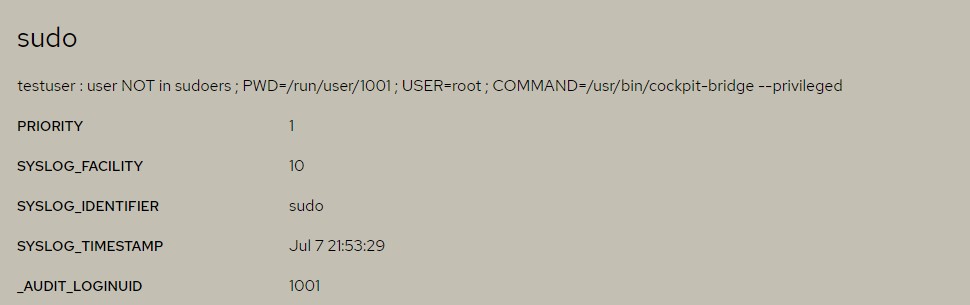
To test the new user account created, logout, and then login with the new user credentials. If the user has administrative privileges, you can click on the button that says “Limited access” at the top right corner to gain those privileges.
Note: If the user was not configured as a “Server administrator” and tried to gain admin privileges by clicking the button, the attempt will fail and will be logged. You can view the log by clicking on “Logs” in the sidebar:
Congratulations!
Congratulations on deploying your site and setting up Cockpit with AWS! A special thanks to Azeem Khan, Samit Poojary, Ethan Tran, Sophie Park, Edwin Abraham, Mr. Mortensen and Jeffrey Fonseca for helping put this together.