Deployment | Student | P3
Lesson on AWS Deployment by RIFT. Made by Rachit
- Deployment
- Accessing AWS Instances
- Launching an Instance (Done for you)
- Connect to an Instance
- Configuring an Instance (Done for you)
- Adding Websites, Part 1: Onto EC2
- Adding Websites, Part 2: Route 53
- Adding Websites, Part 3: nginx
- Certbot Configuration
- Deployment Updates
- Troubleshooting
- Suggestions and Closure
- Framework of the CSA Server
Deployment
Ever wonder why you cannot use your really cool dynamic API page to transfer and store data?
It obviously works on localhost, but you cannot access it from anywhere else. The address is also in some stupid (not really) form. Let’s change that!
Accessing AWS Instances
We deploy our instances through Amazon Elastic Compute Cloud (EC2), a service which allows us to have scalable web servers in the cloud. EC2 is better than a dedicated server or servers in a couple different ways, which are…
- Deployment time reduced to mere minutes
- Pay for what you use
To access AWS EC2 Instances, you have to log into Amazon AWS with the credentials Mr. Mortensen provided you at the start of the year (if you don’t have these, what are you doing?), which were your Github username and password.
To depoly, you first sign in through this page: AWS Console
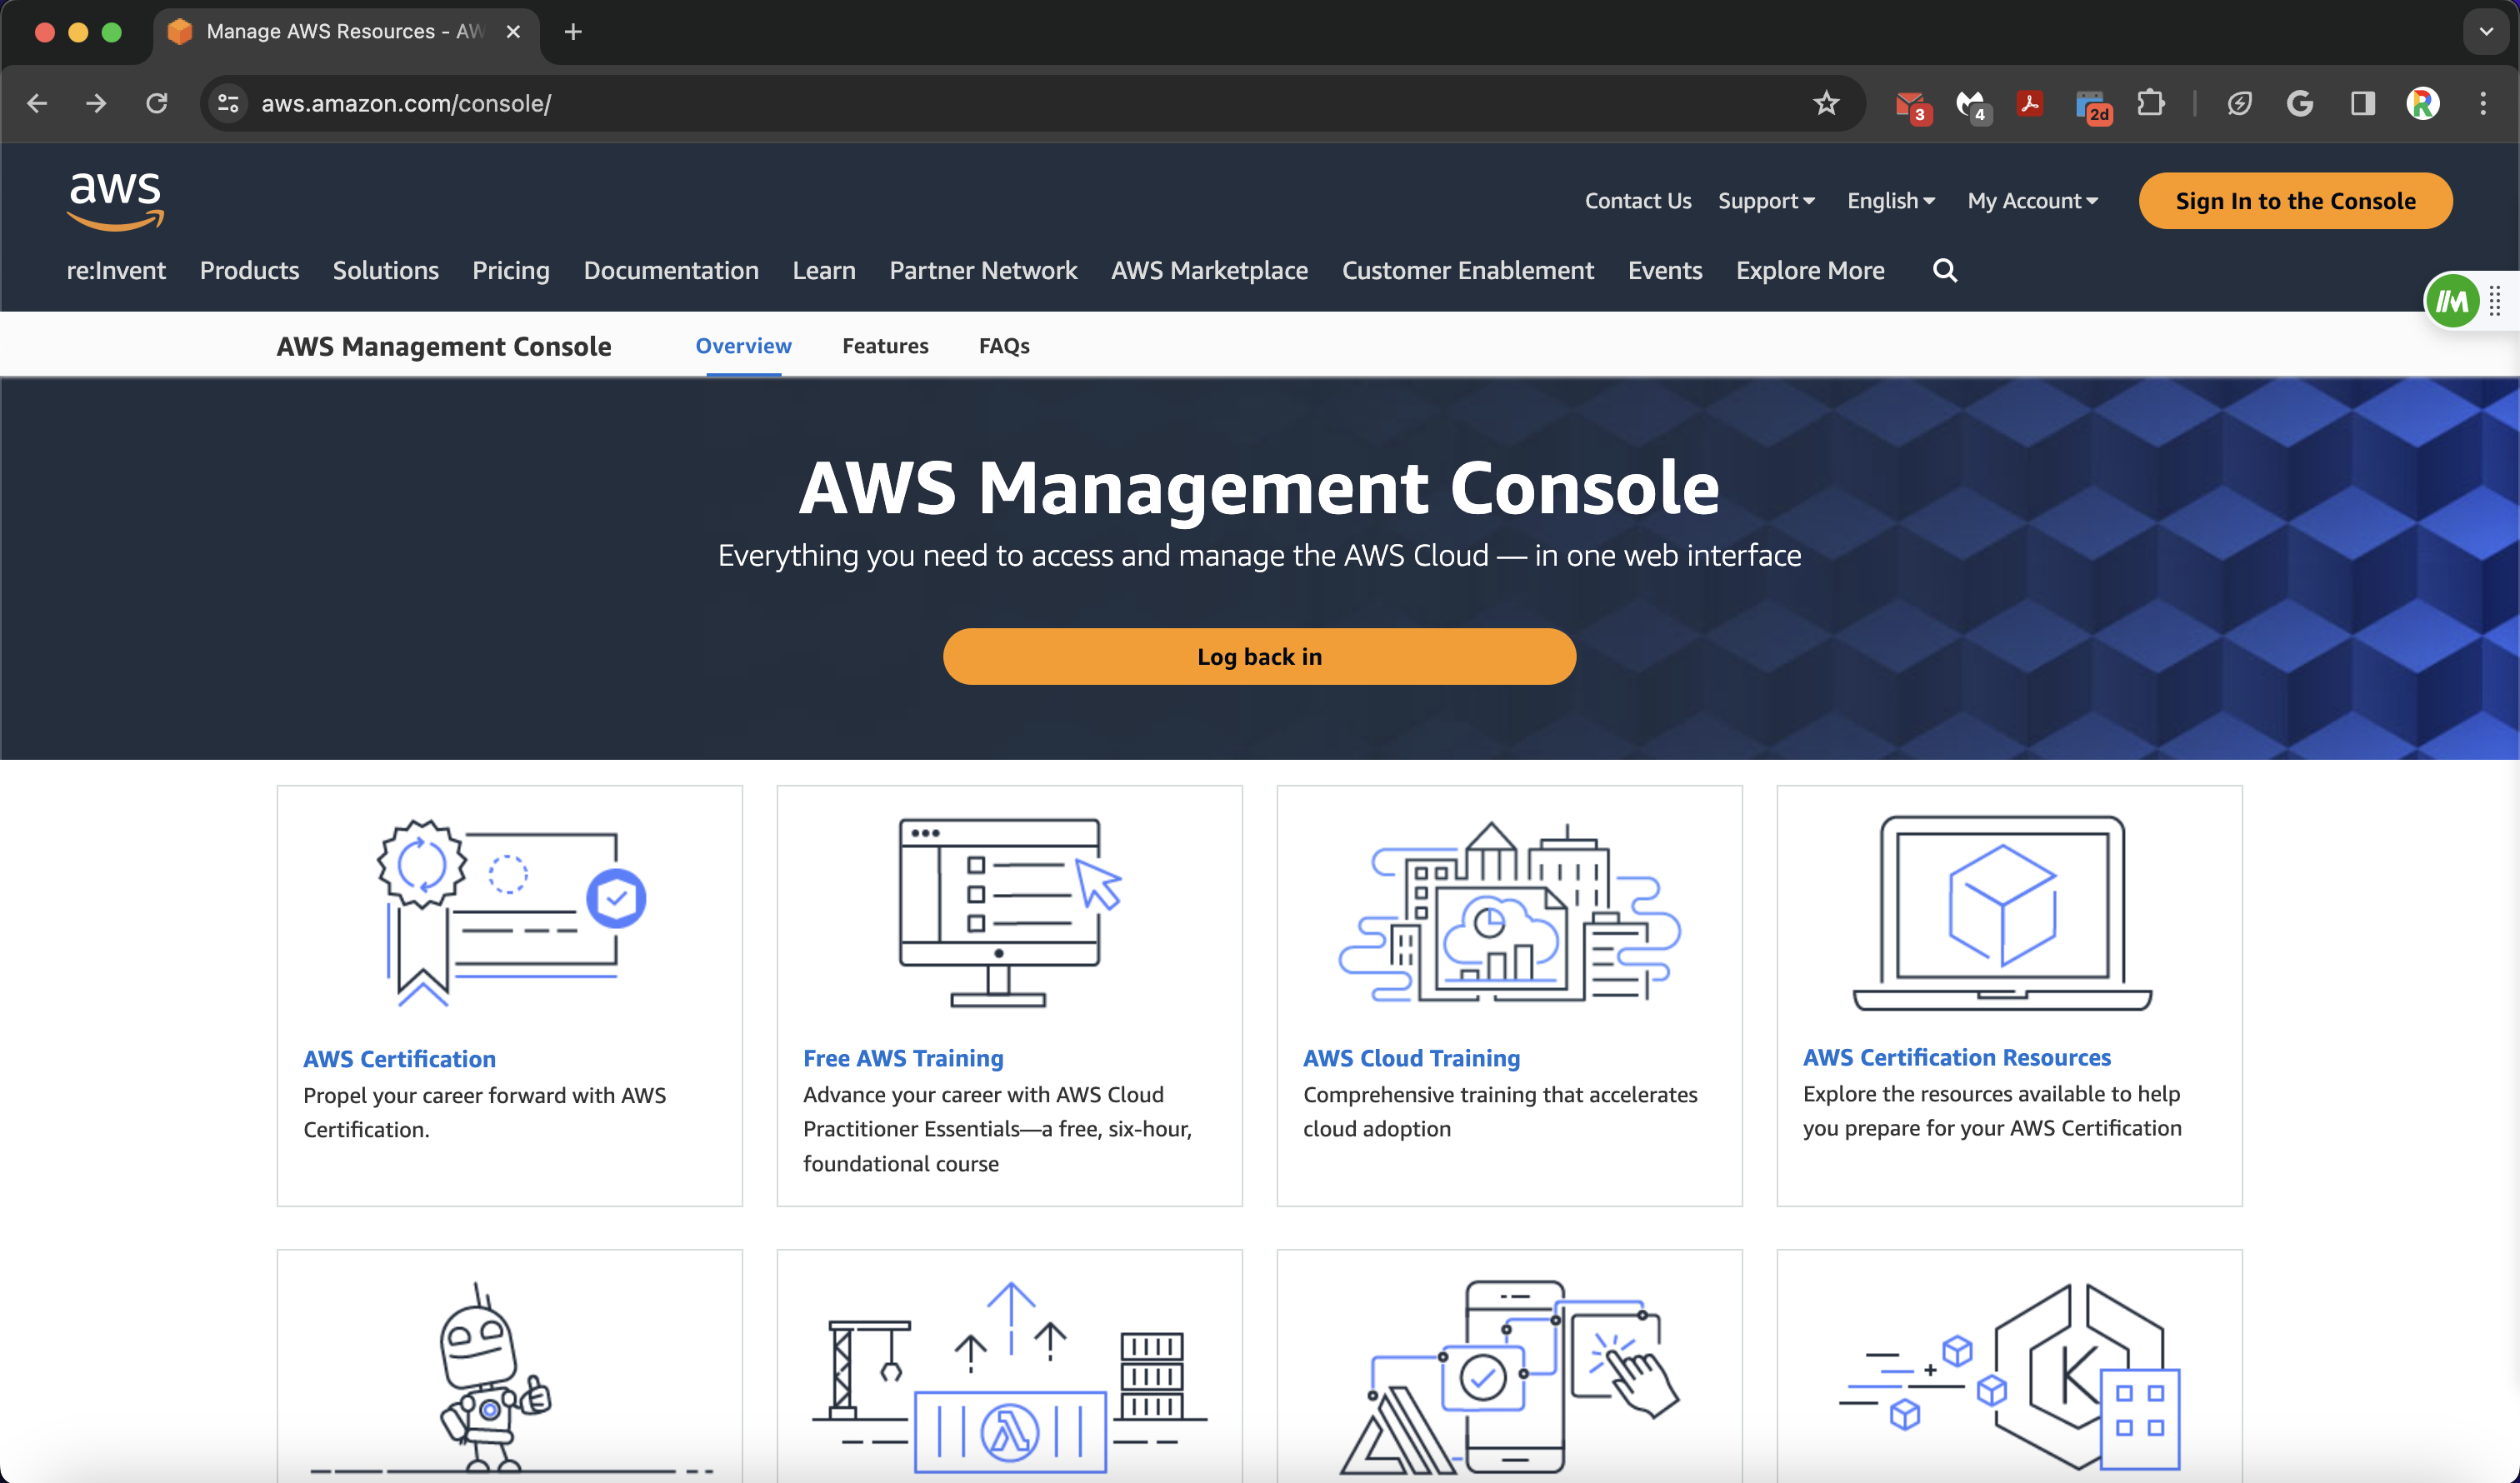
You will then be redirected to a page like this
Our AWS organization is called NighthawkCodingSociety, so in the Account ID tab of the sign in page, you will put “nighthawkcodingsociety”. Then, you put in your Github username/password into their respective fields and log in.
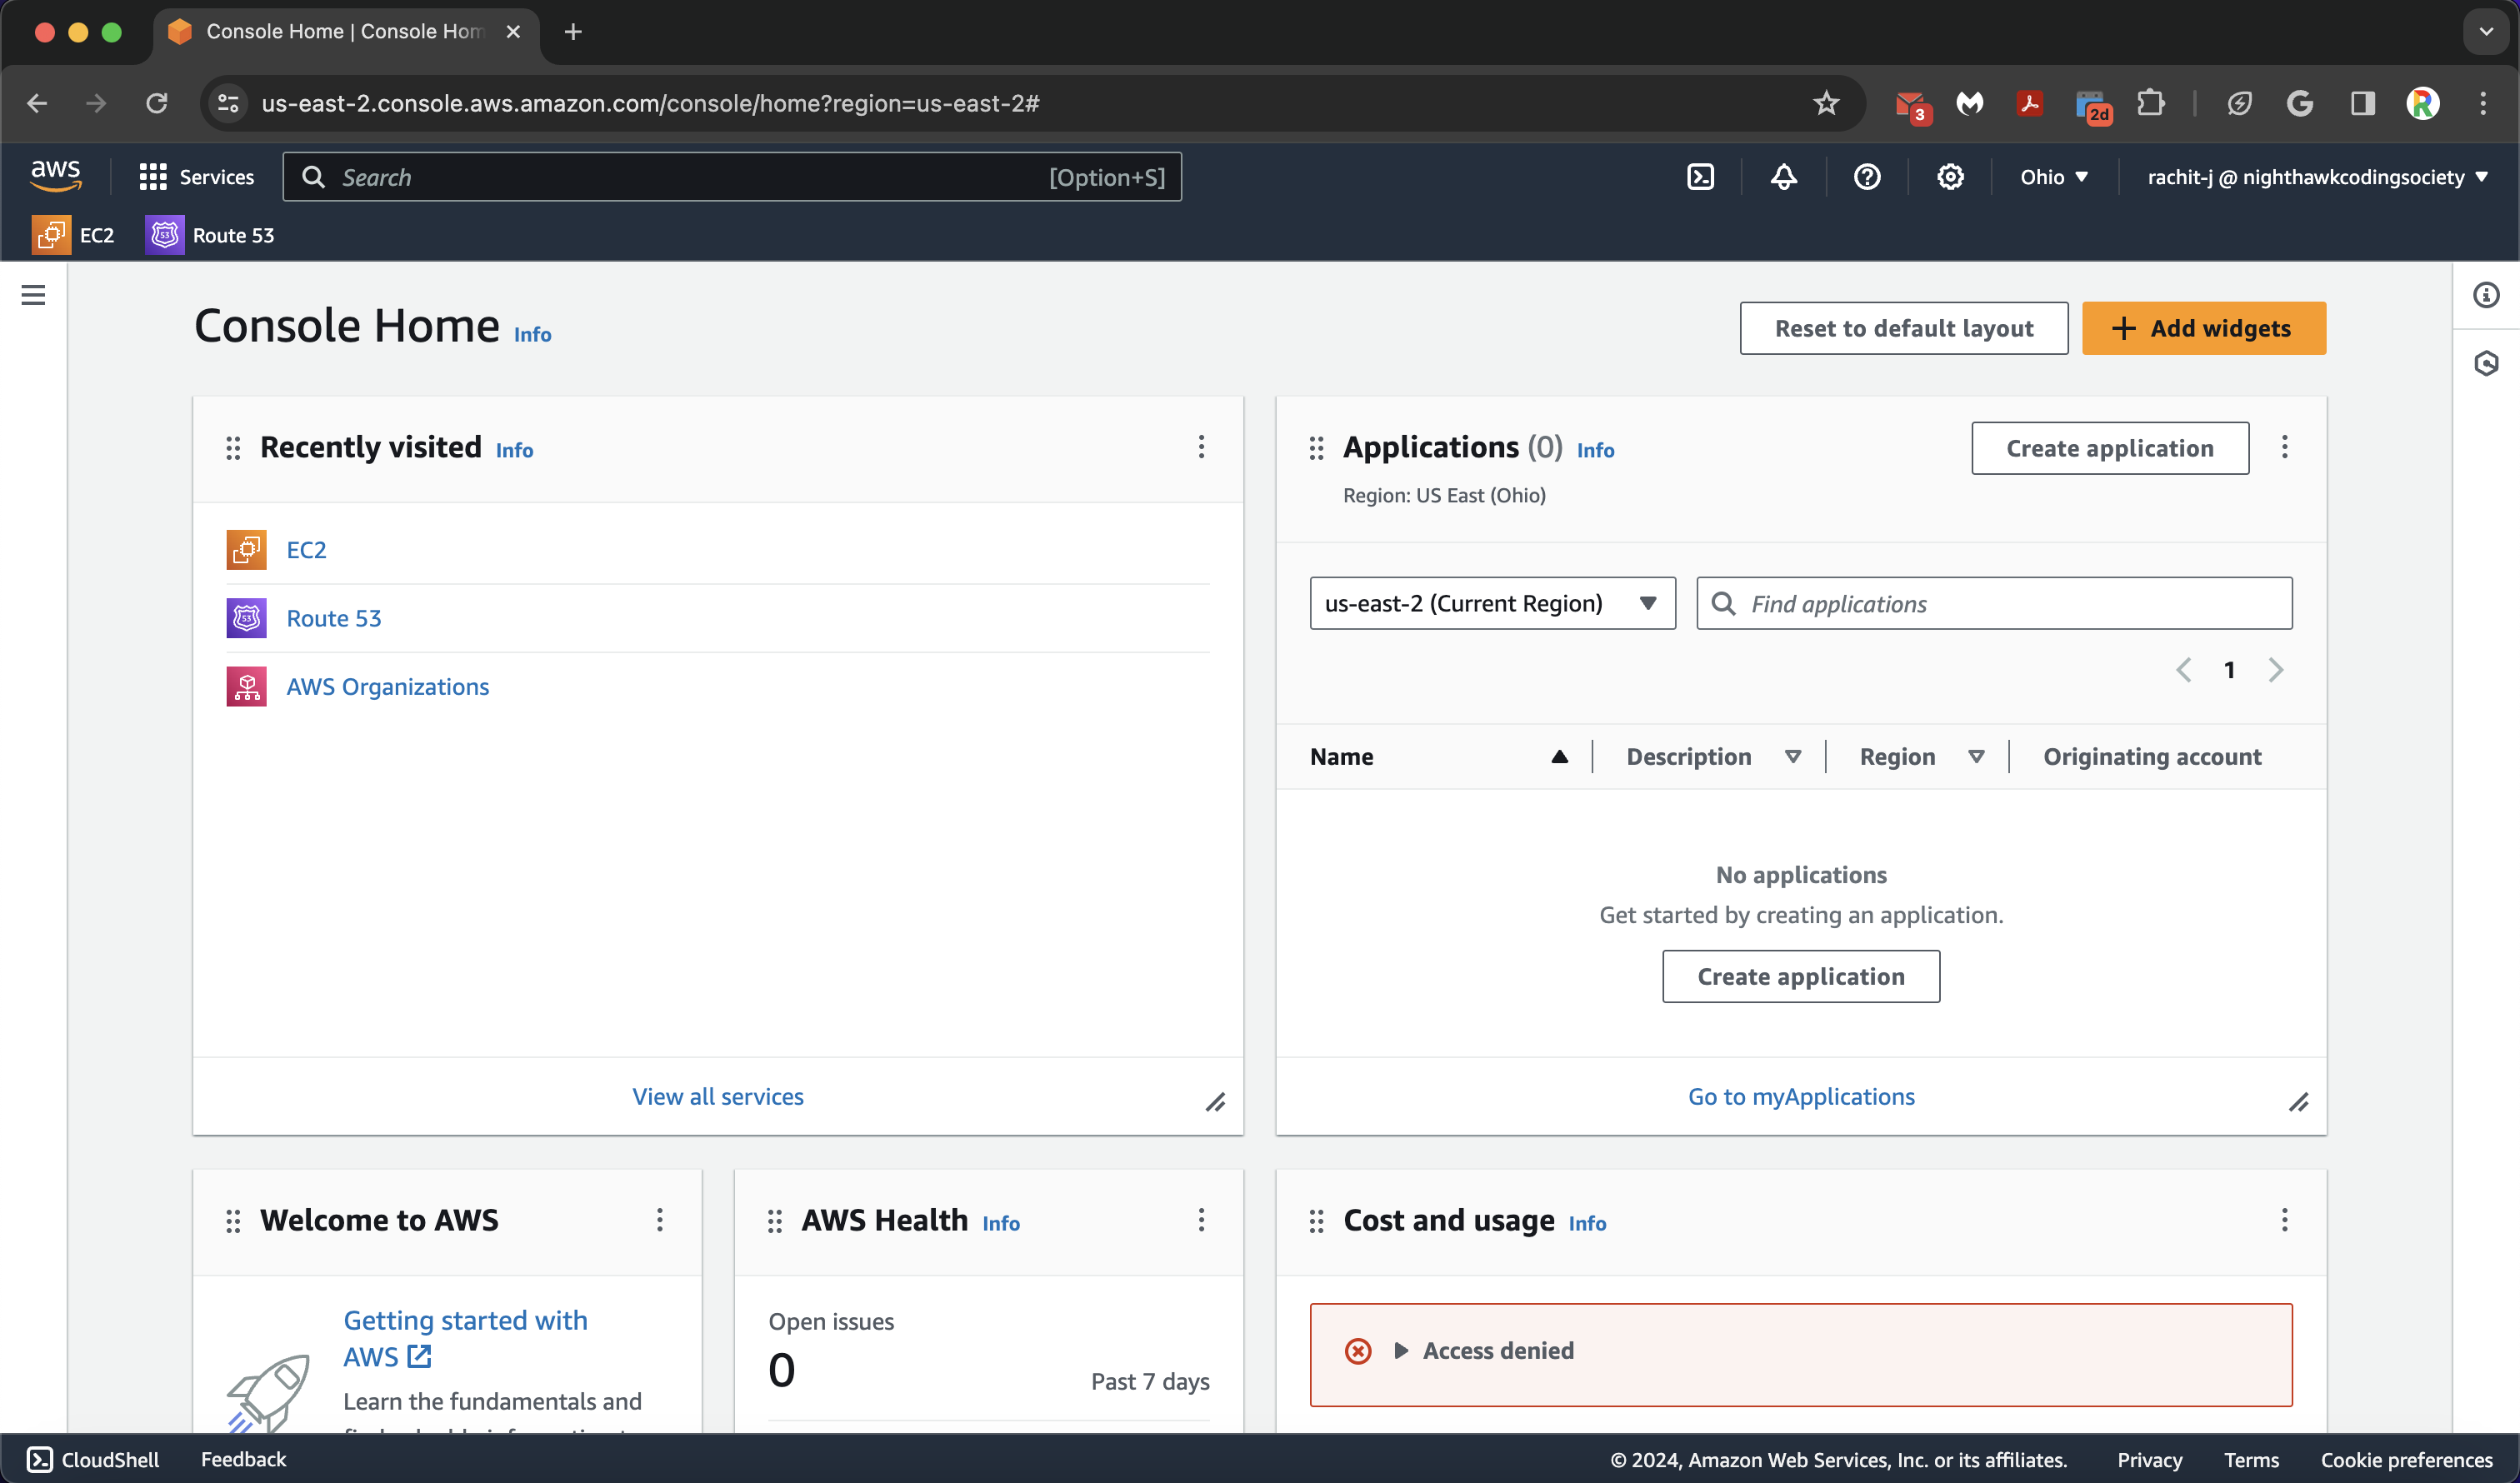
You will then be greeted by a screen similar to this
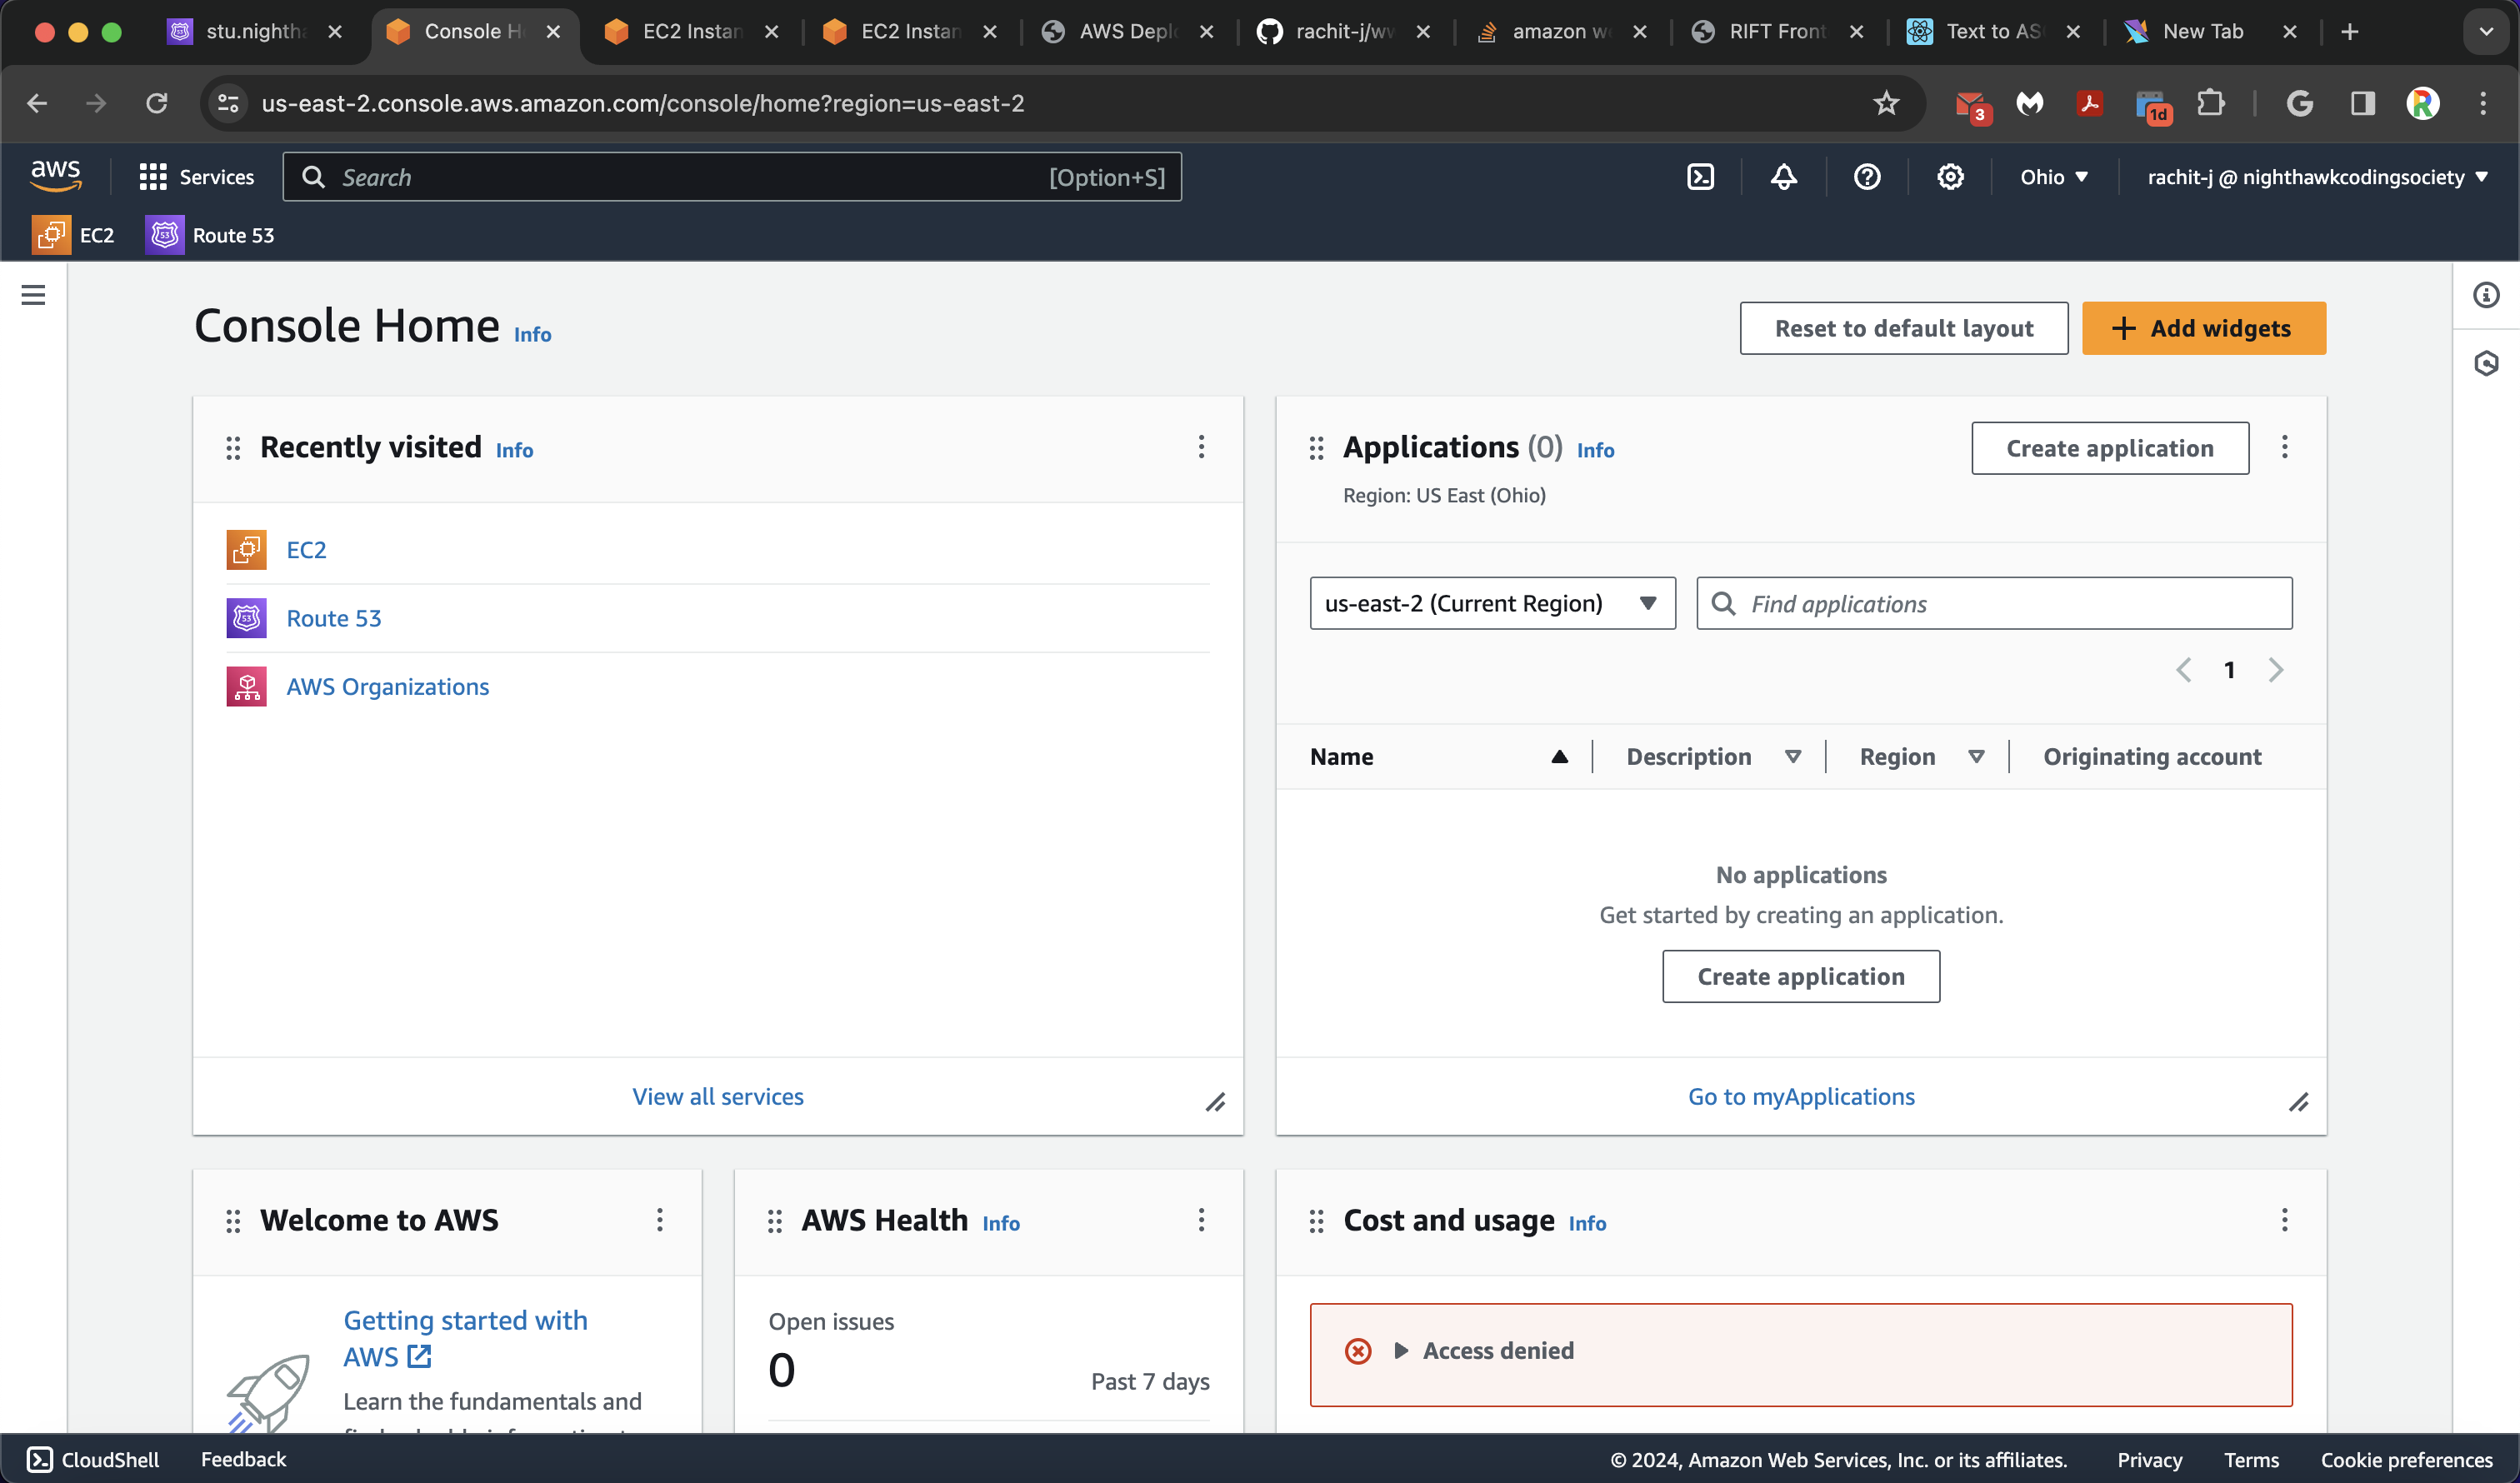 I have a couple extra customizations on AWS since I have used it quite a bit before. I have starred EC2 and Route53 (coming later) so it appears in my taskbar, and since I use it a bit, I have a recently visited tab
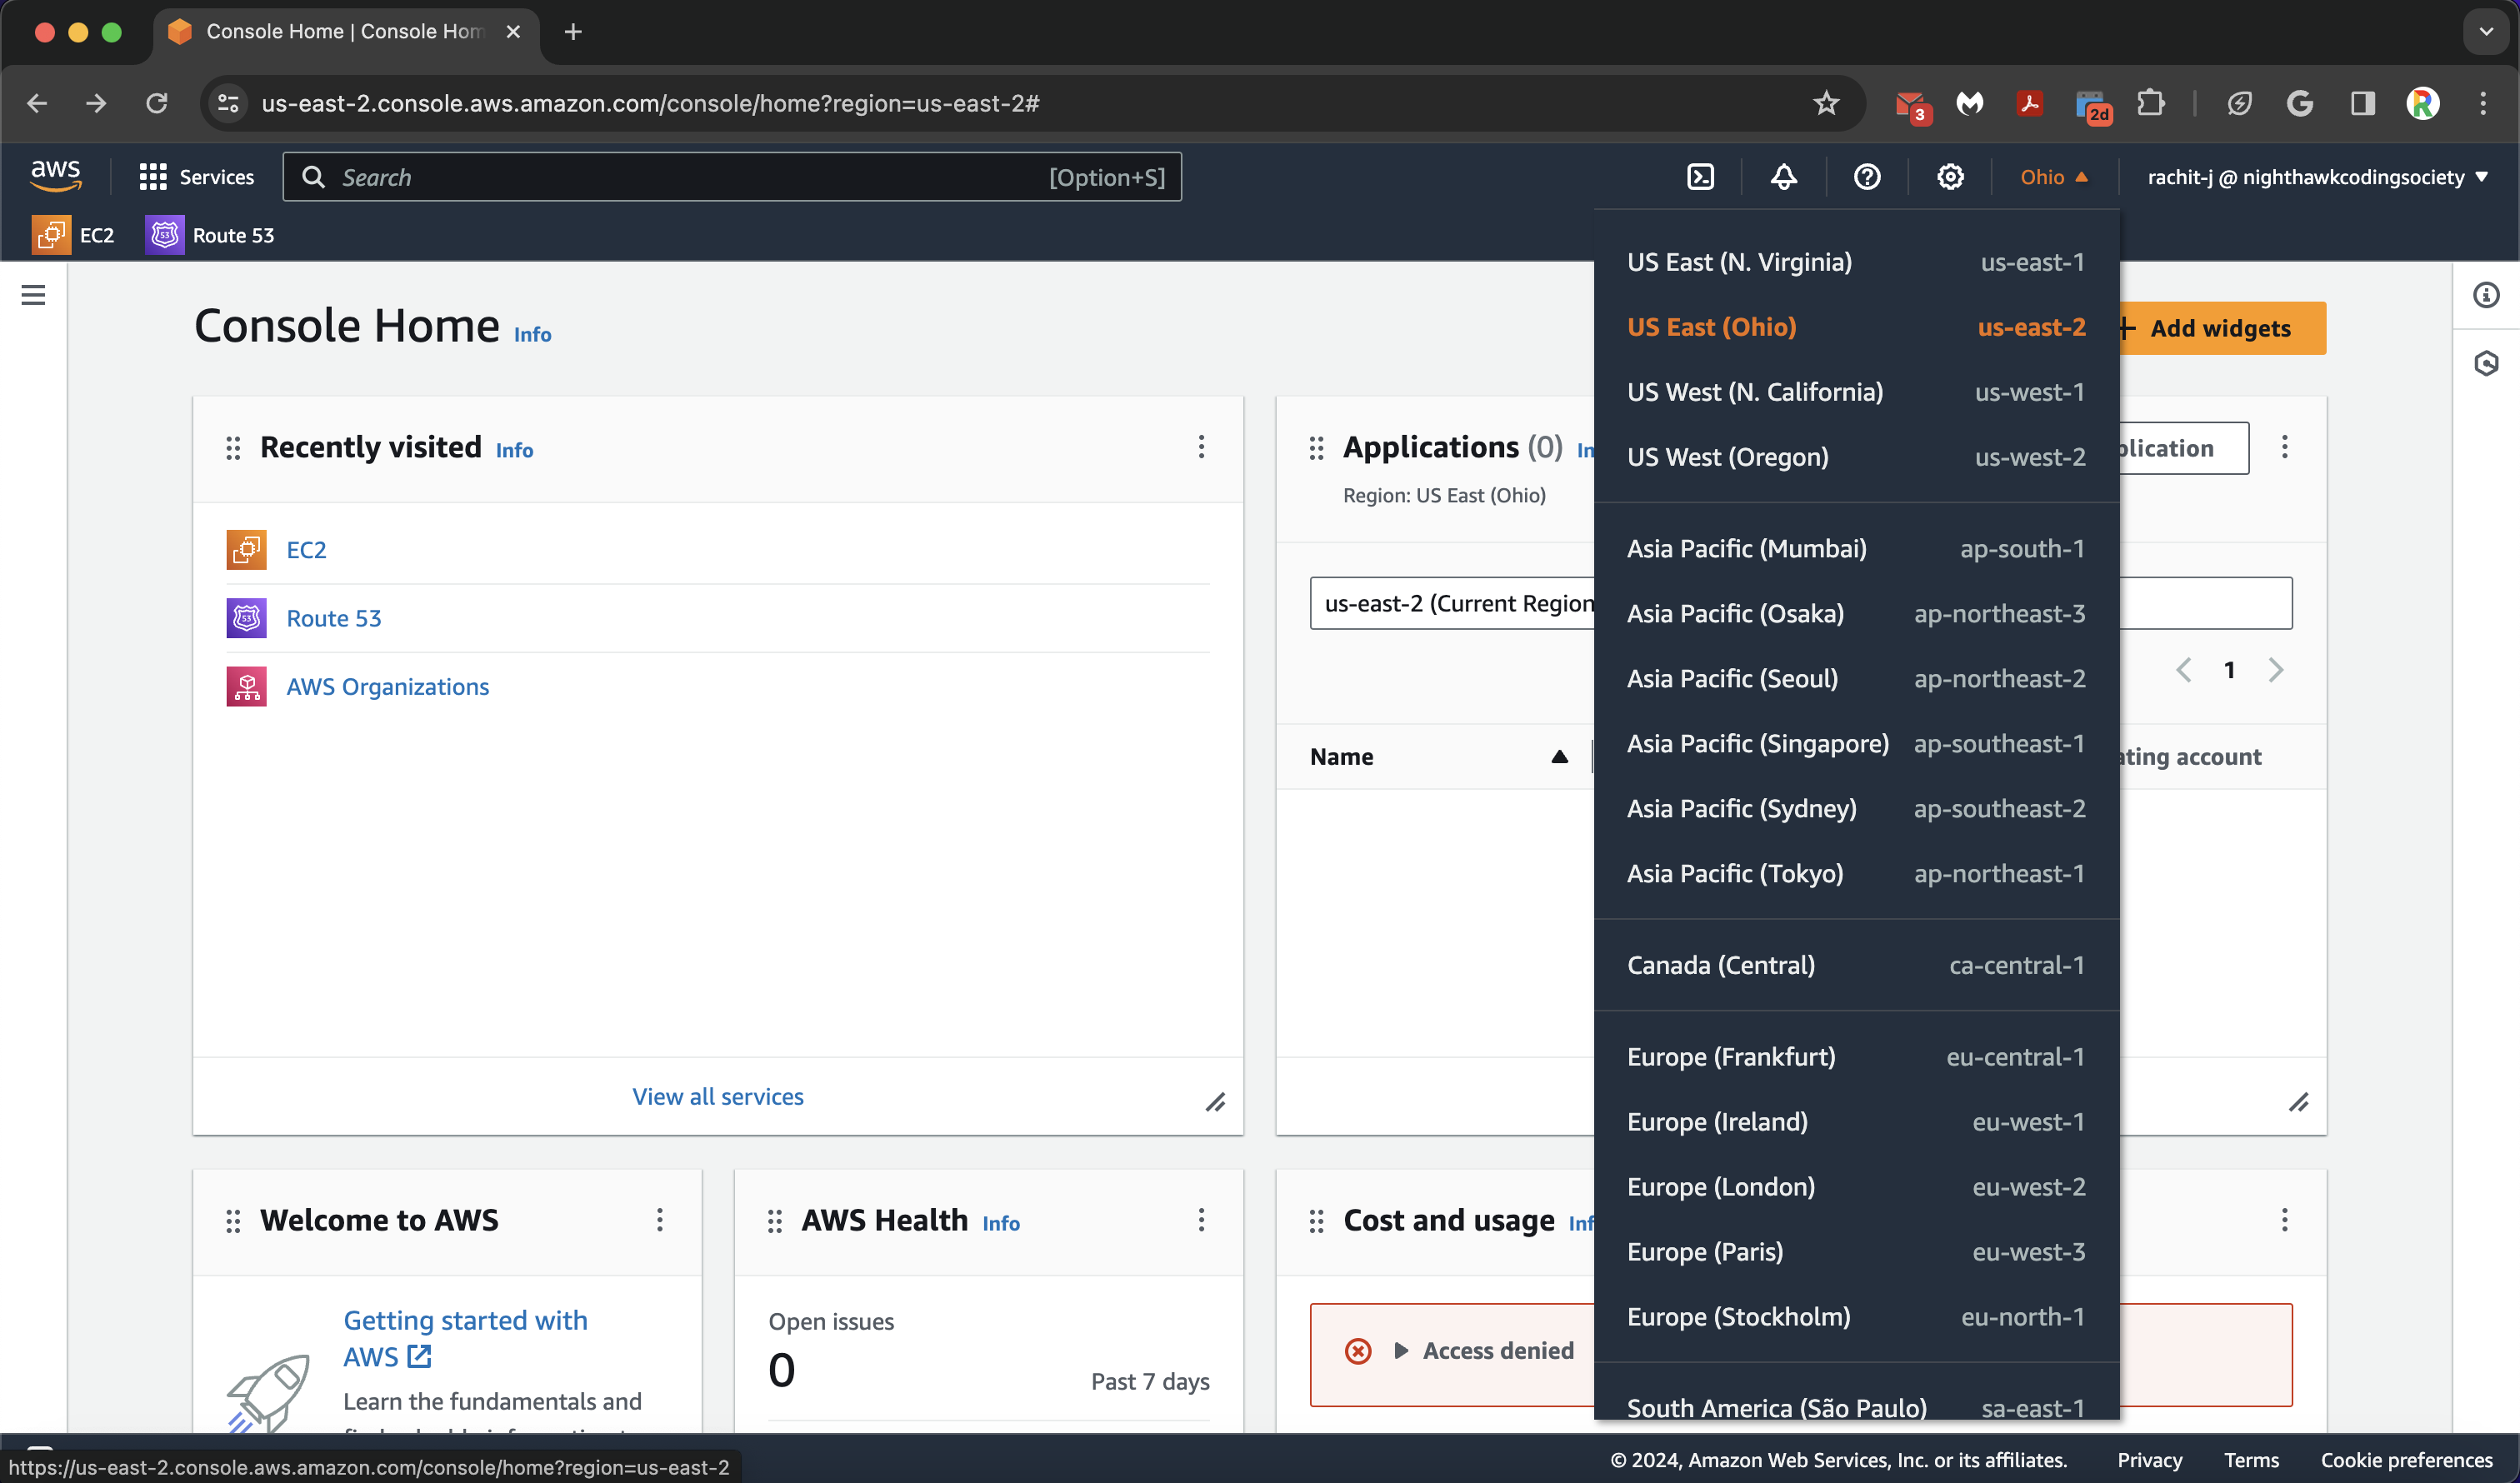
Make sure you change your reigon from any default to US East (Ohio). This is where we will be running our servers.
To access the EC2 servers, go to the top search bar and type in “EC2” (you should star this so it appears in your favorites bar).Click on the starred one in the image below.
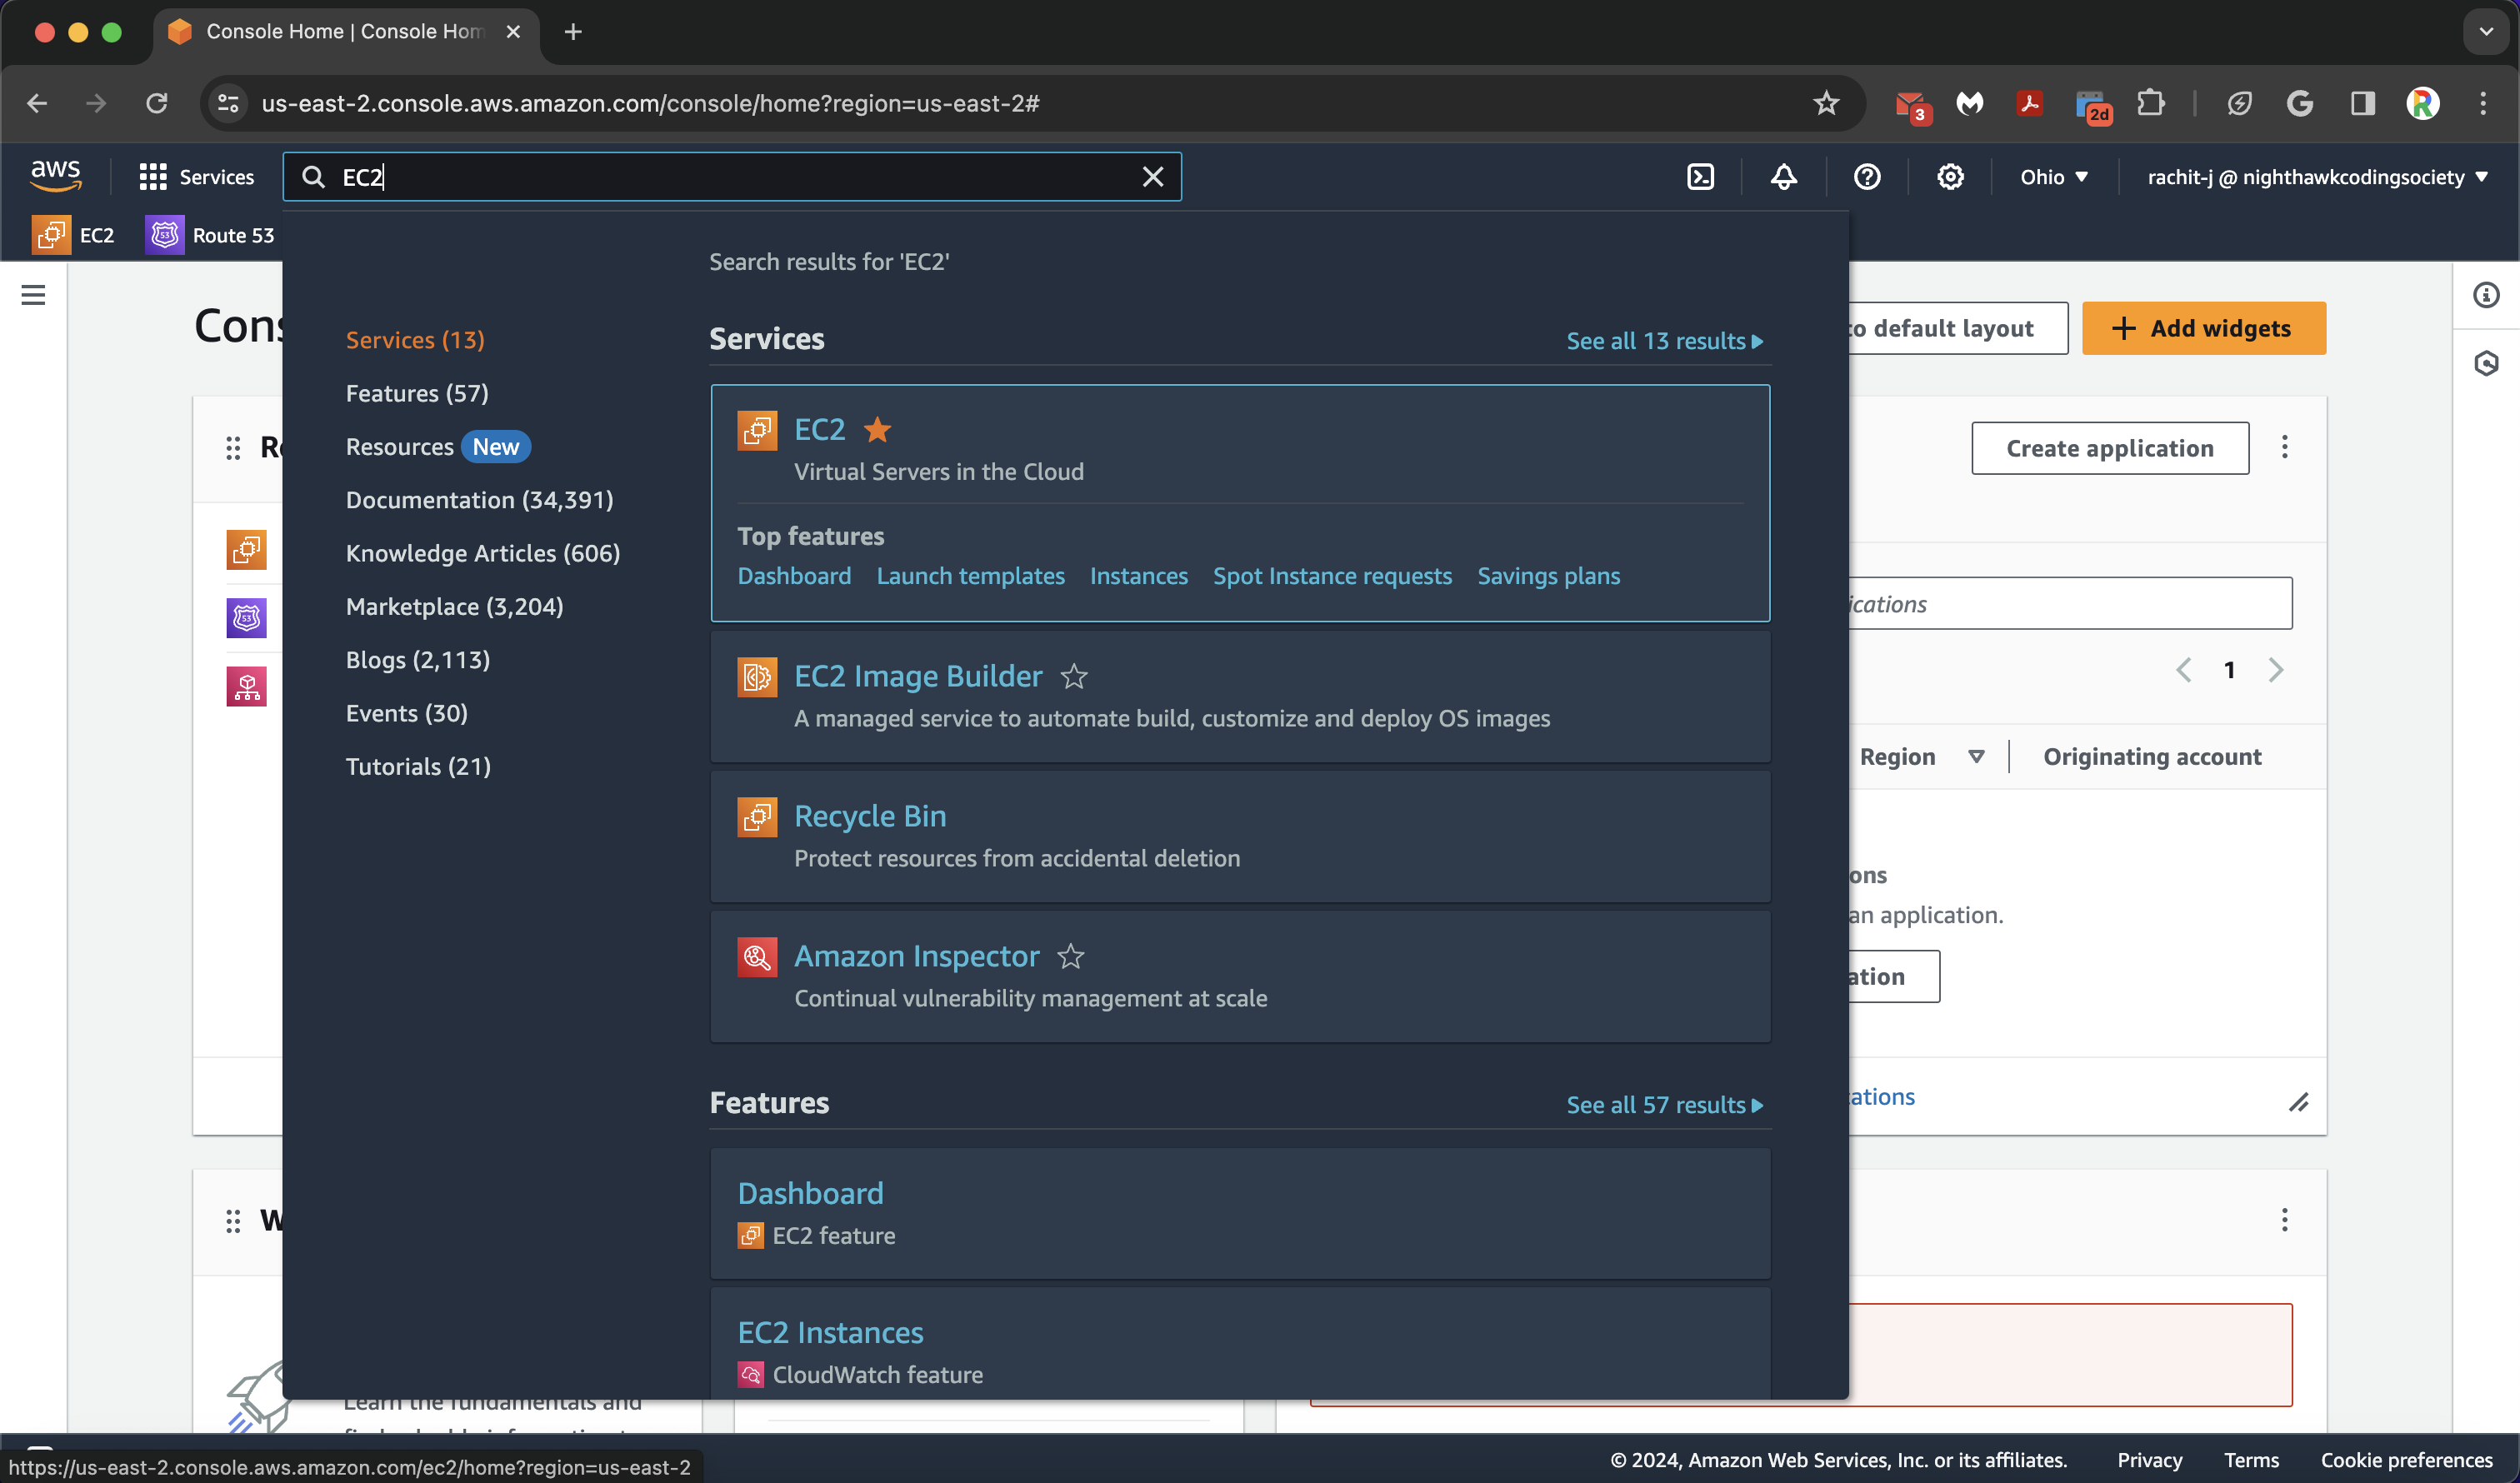
You will be greeted with a nice information page. Either on the sidebar or on the resources tab, click the Instances button. You will then be brought to a page similar to this.
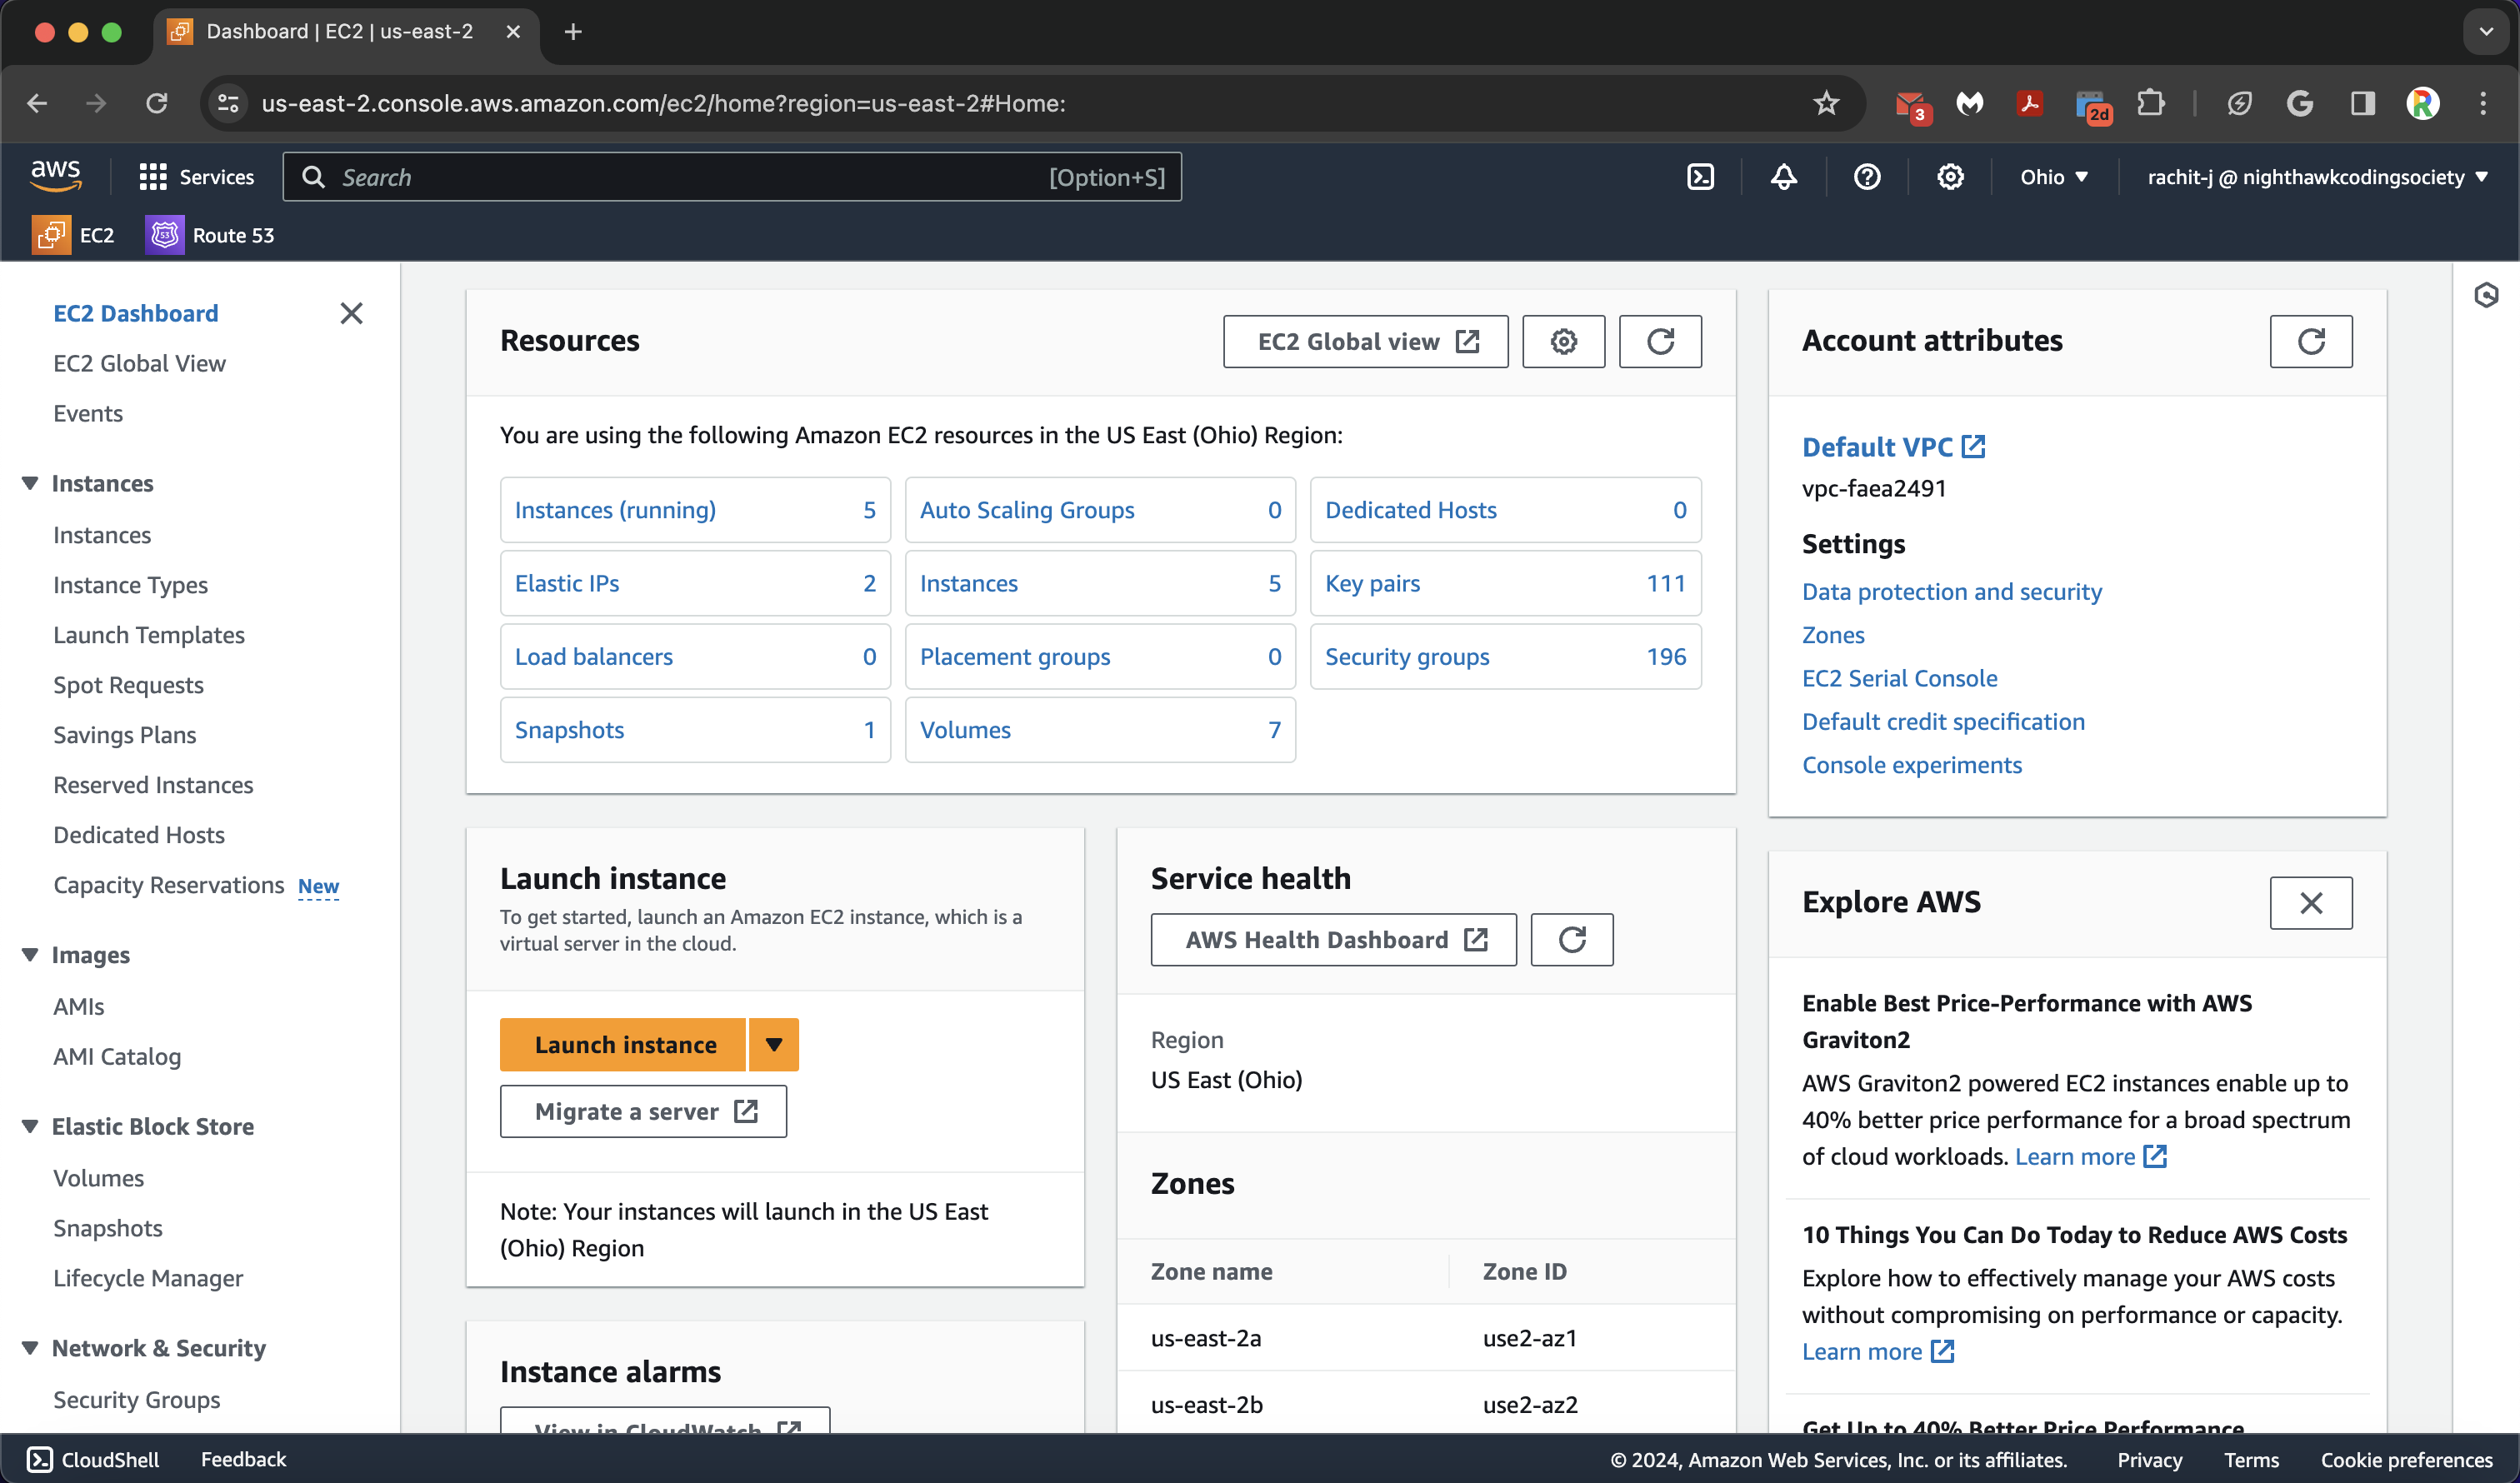
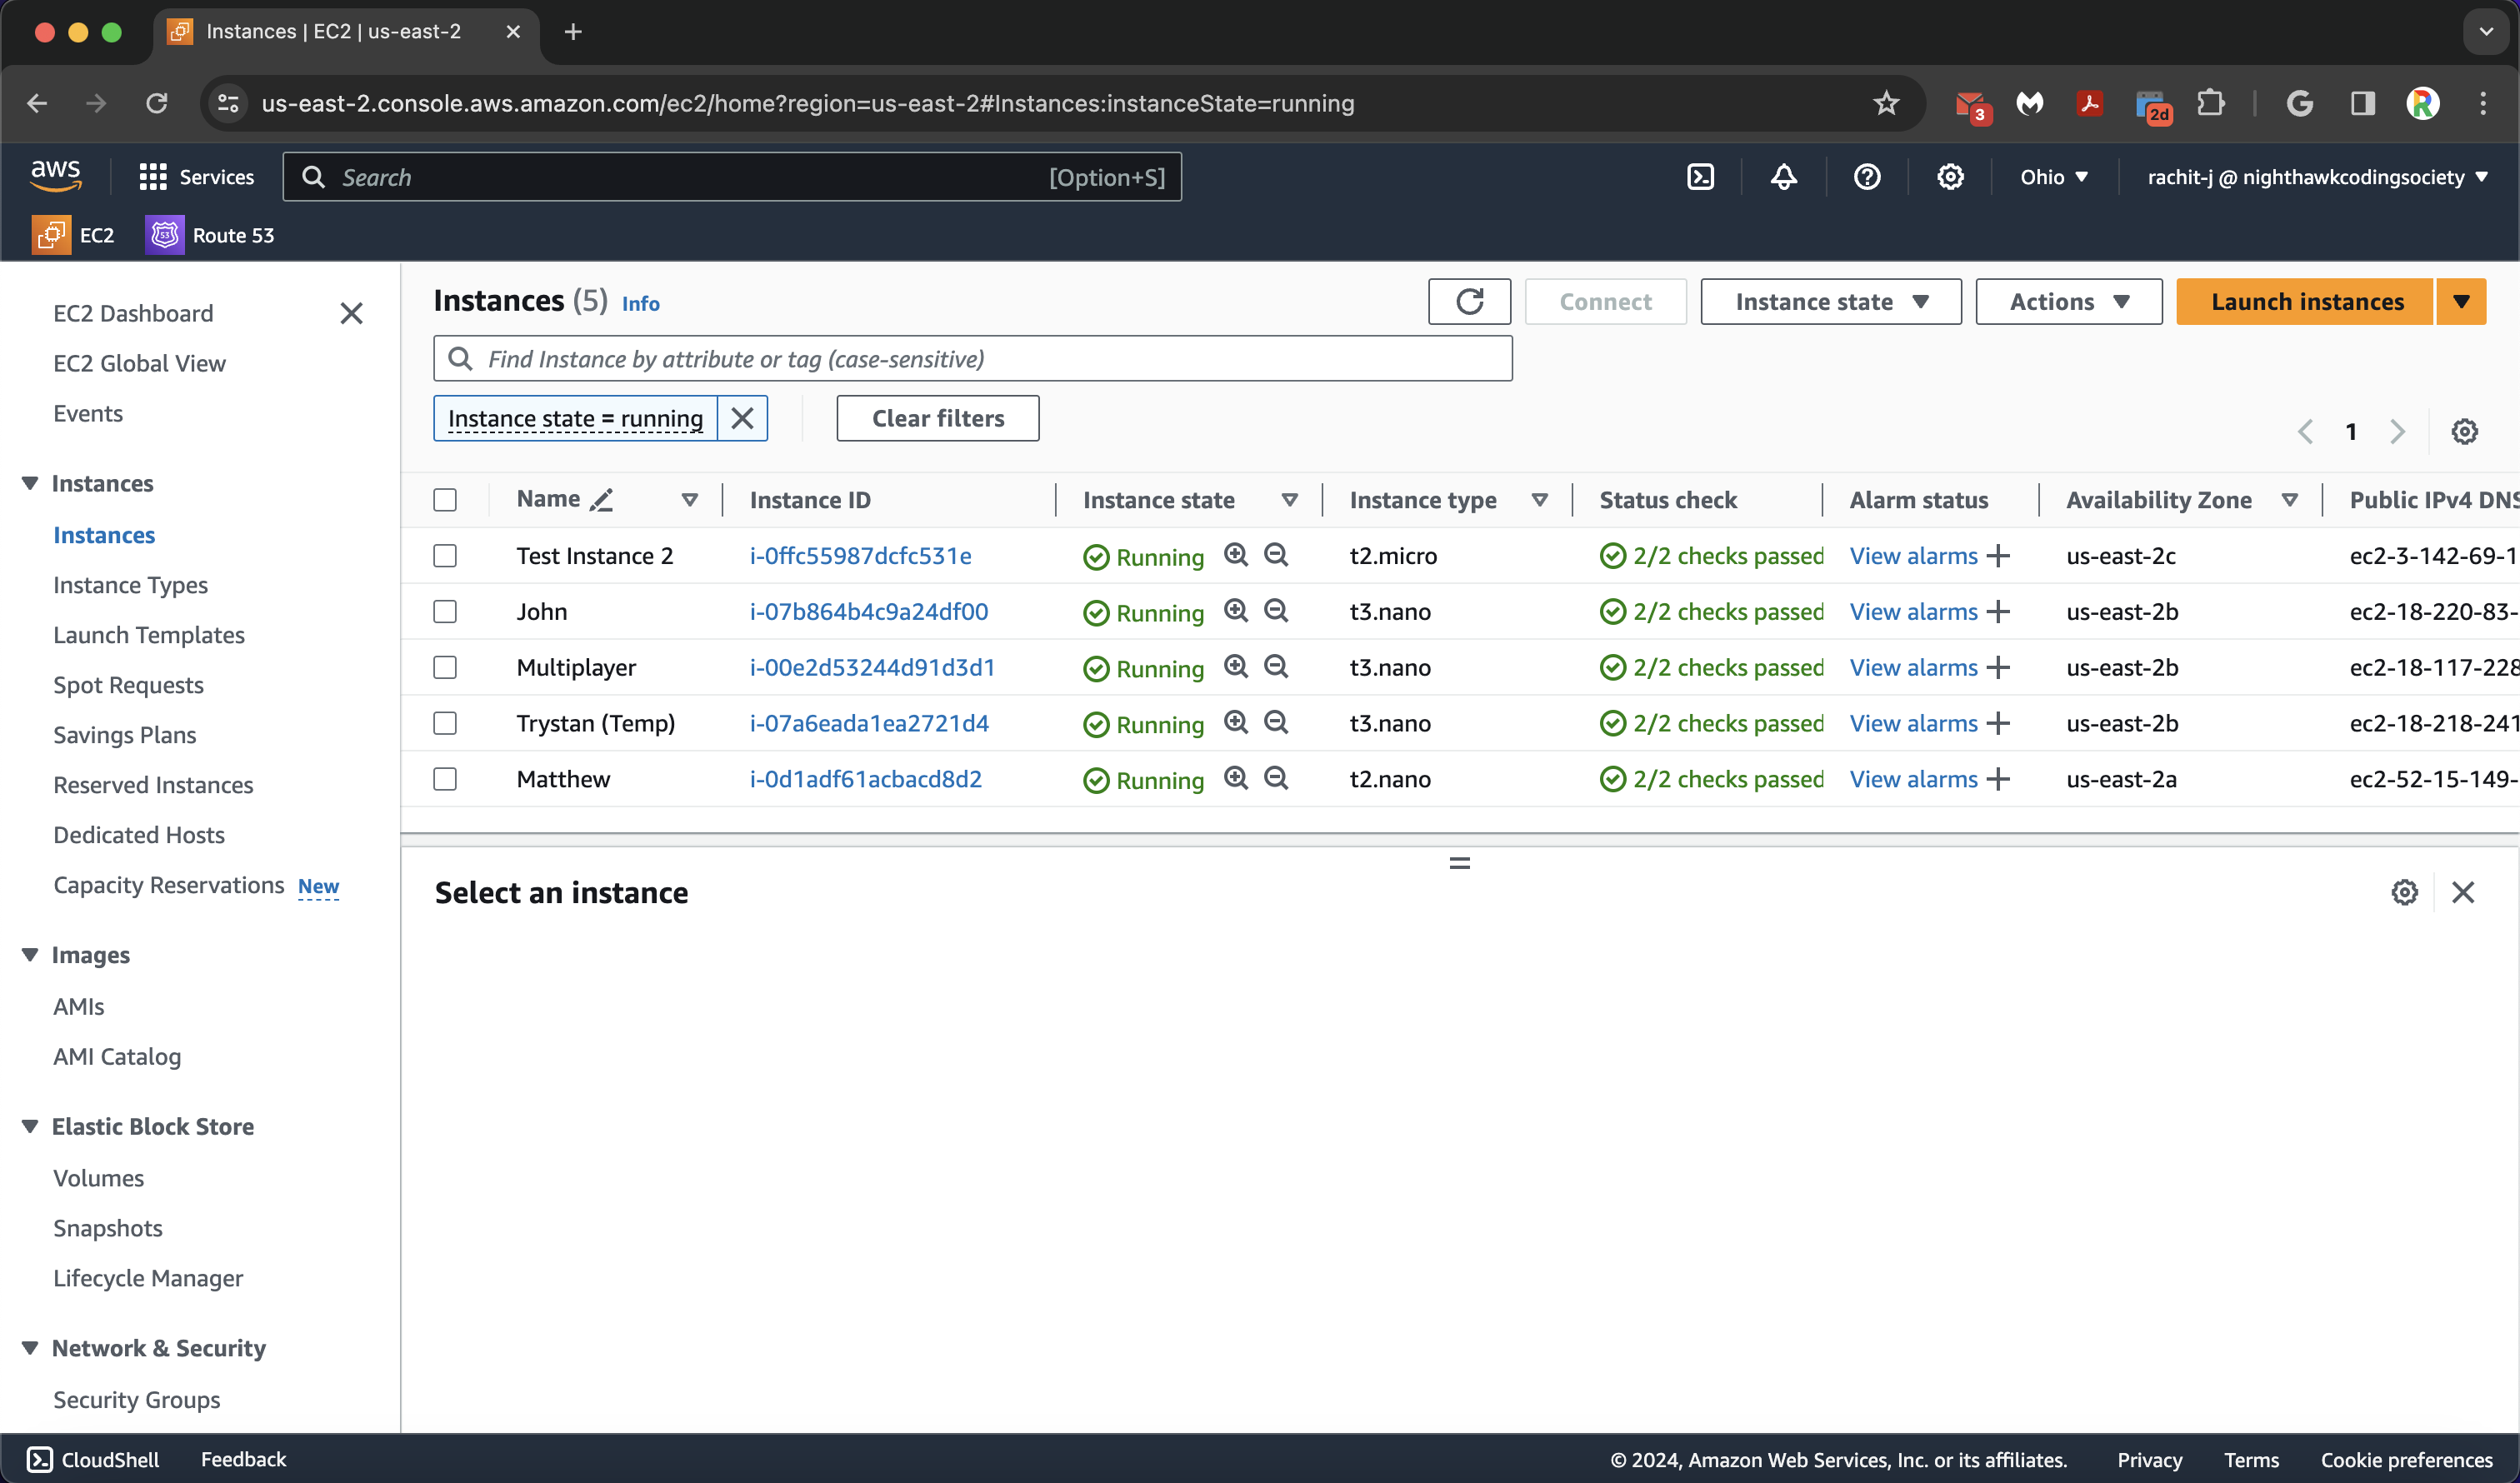
From here, we will be digressing shortly on how to start an AWS instance (in theory). We will all be sharing one deployed AWS Instance to reduce costs and system stress.
Launching an Instance (Done for you)
We go ahead and click the yellow/orange “Launch Instance” button on the top right to launch a new instance. There are many instances we can choose from, and each has their own benefits and drawbacks. We will be going with Ubuntu because it is the most applicable for us. Different Linux Distributions
AWS Deployment Page:
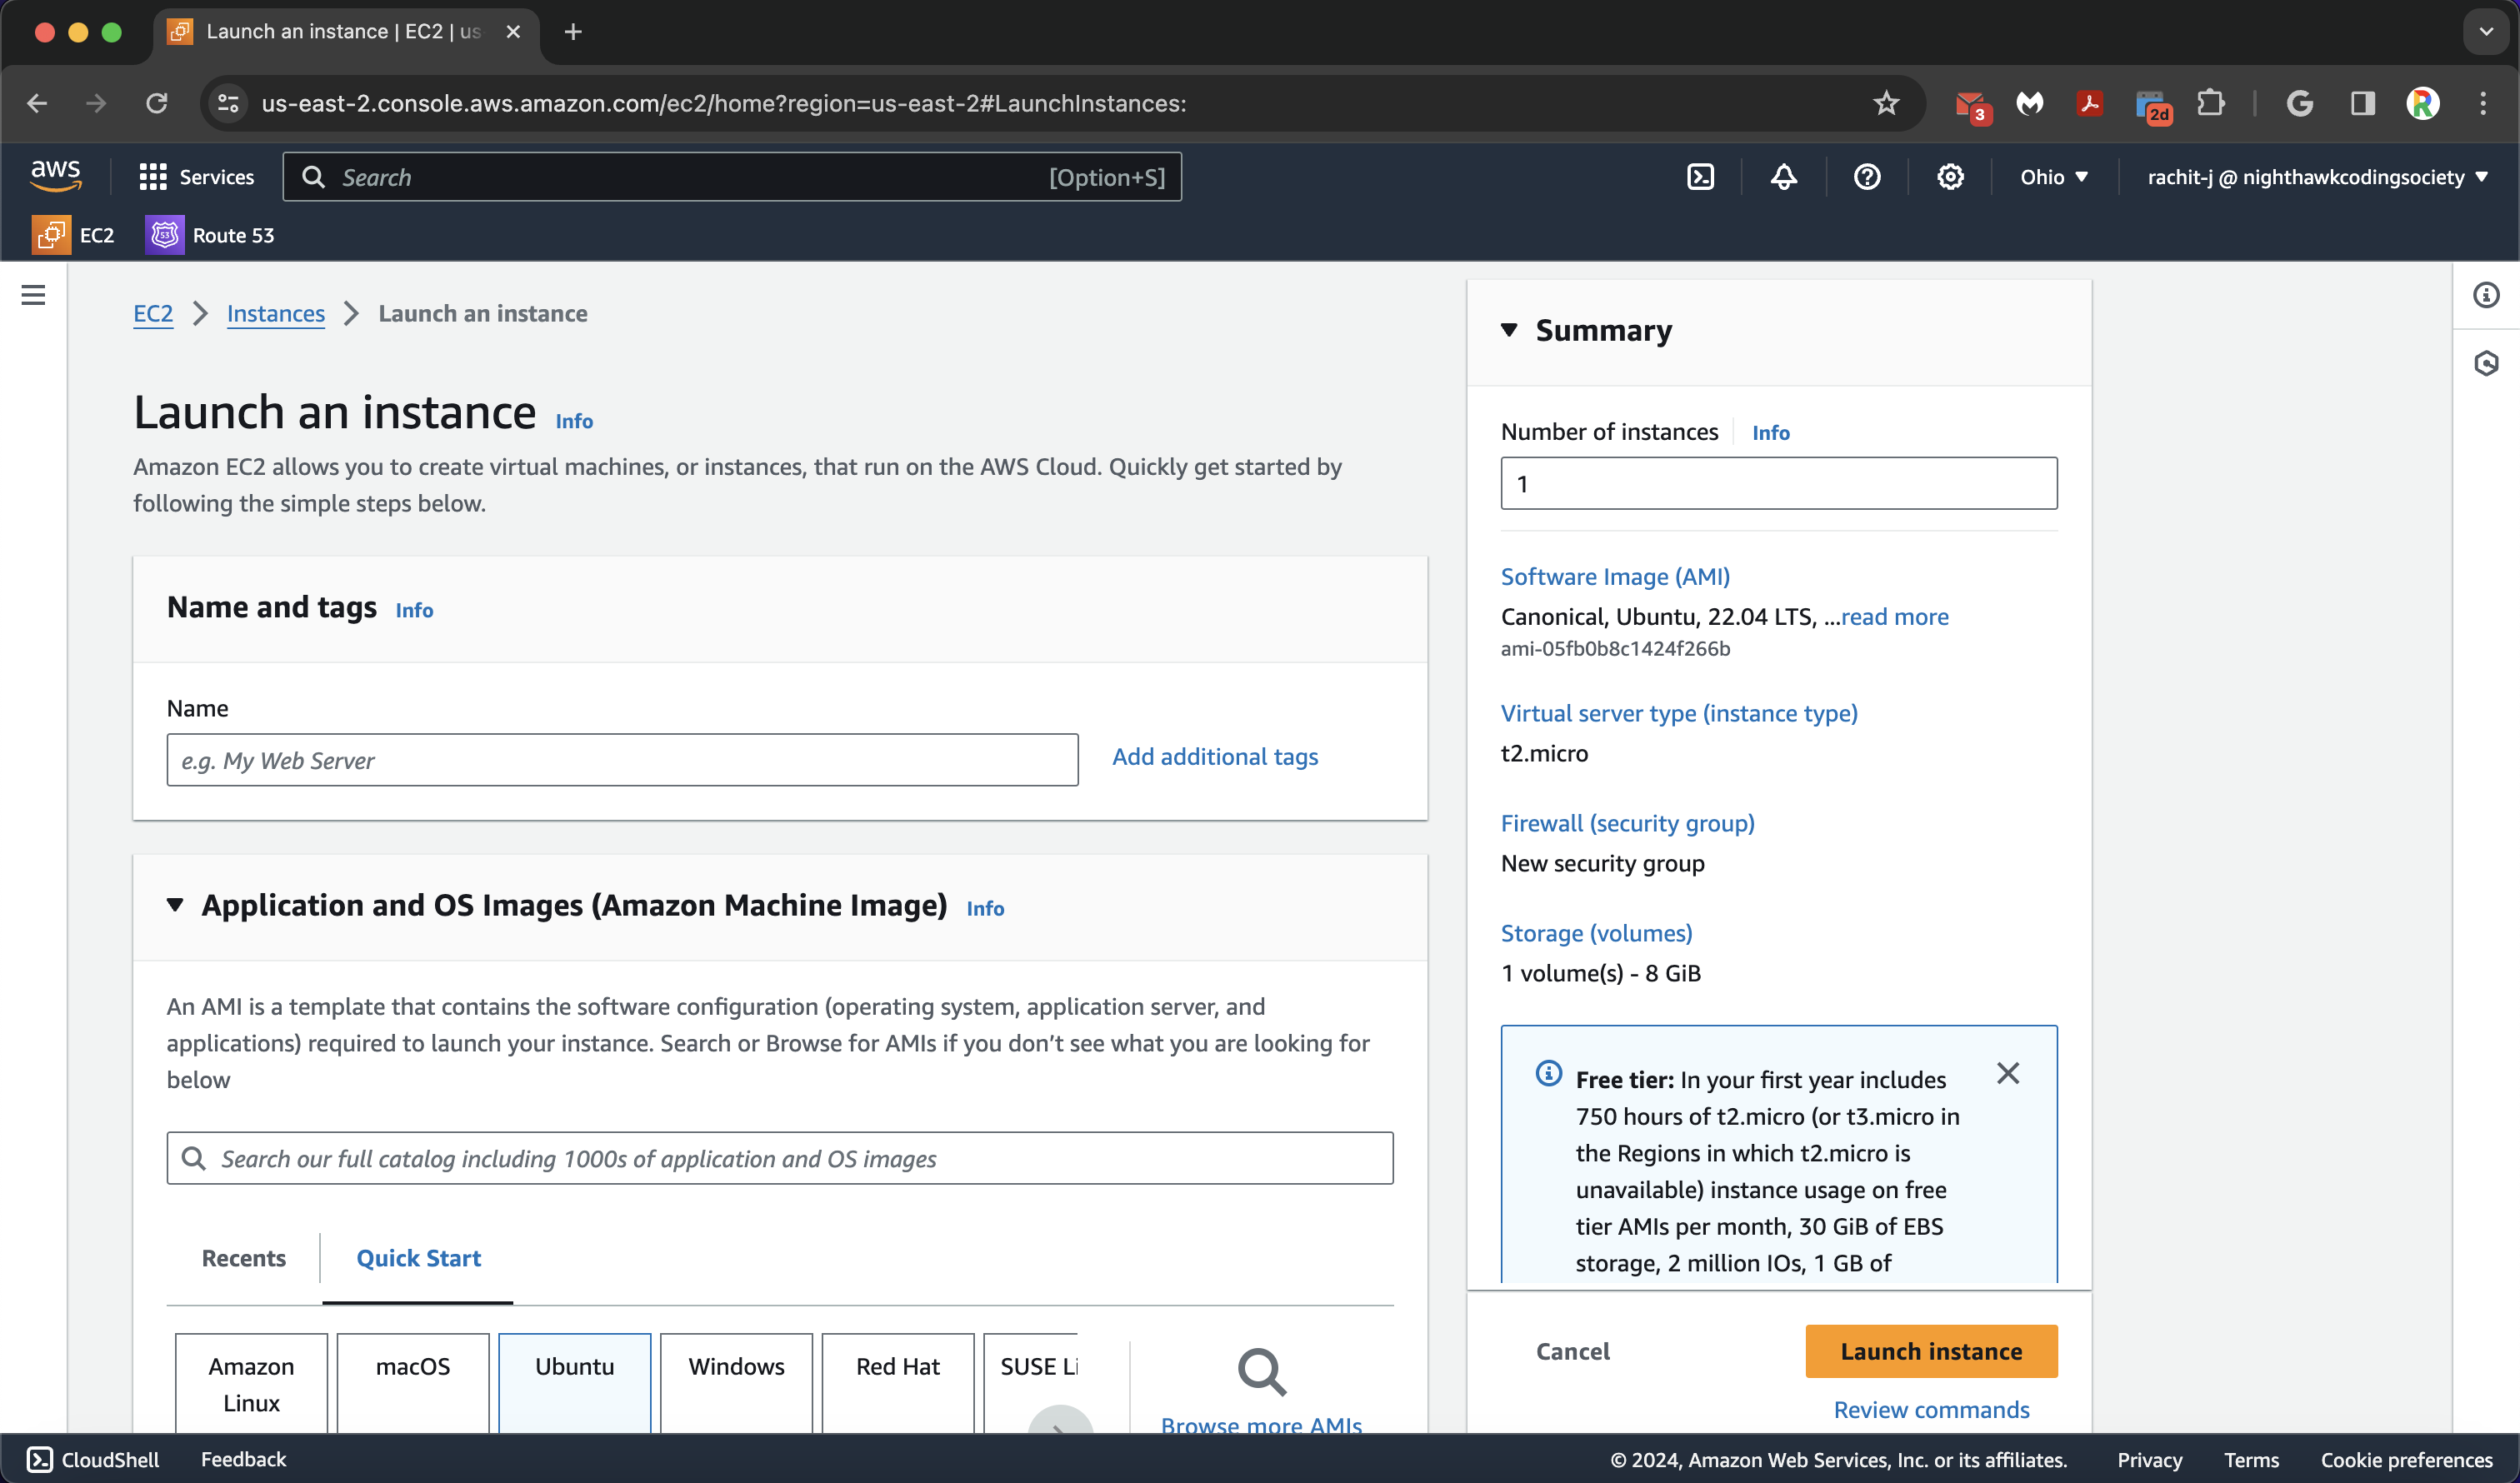
Configurations:
- Name (do not conflict names please)
- Application and OS Machine Image set to Ubuntu 22.04 64 bit x86
- Instance Type set to Default (t2.micro)
- Key Pair (ssh), you do not need these (unless you want to connect over ssh), so set to “Proceed without a key pair”
- Allow SSH (you do not want to change it later), HTTPS, and HTTP. It will ask you to make or use a new ruleset. You may use ours (it does what was just stated) called ‘launch-wizard-145’.
- Leave Configure Storage default
- Launch one instance!
We can then head back to the EC2 Homepage to Connect to the Instance!
Connect to an Instance
We literally click the instance and press the connect button. Select EC2 Instance Connect (should be selected by default) and then press the connect button.
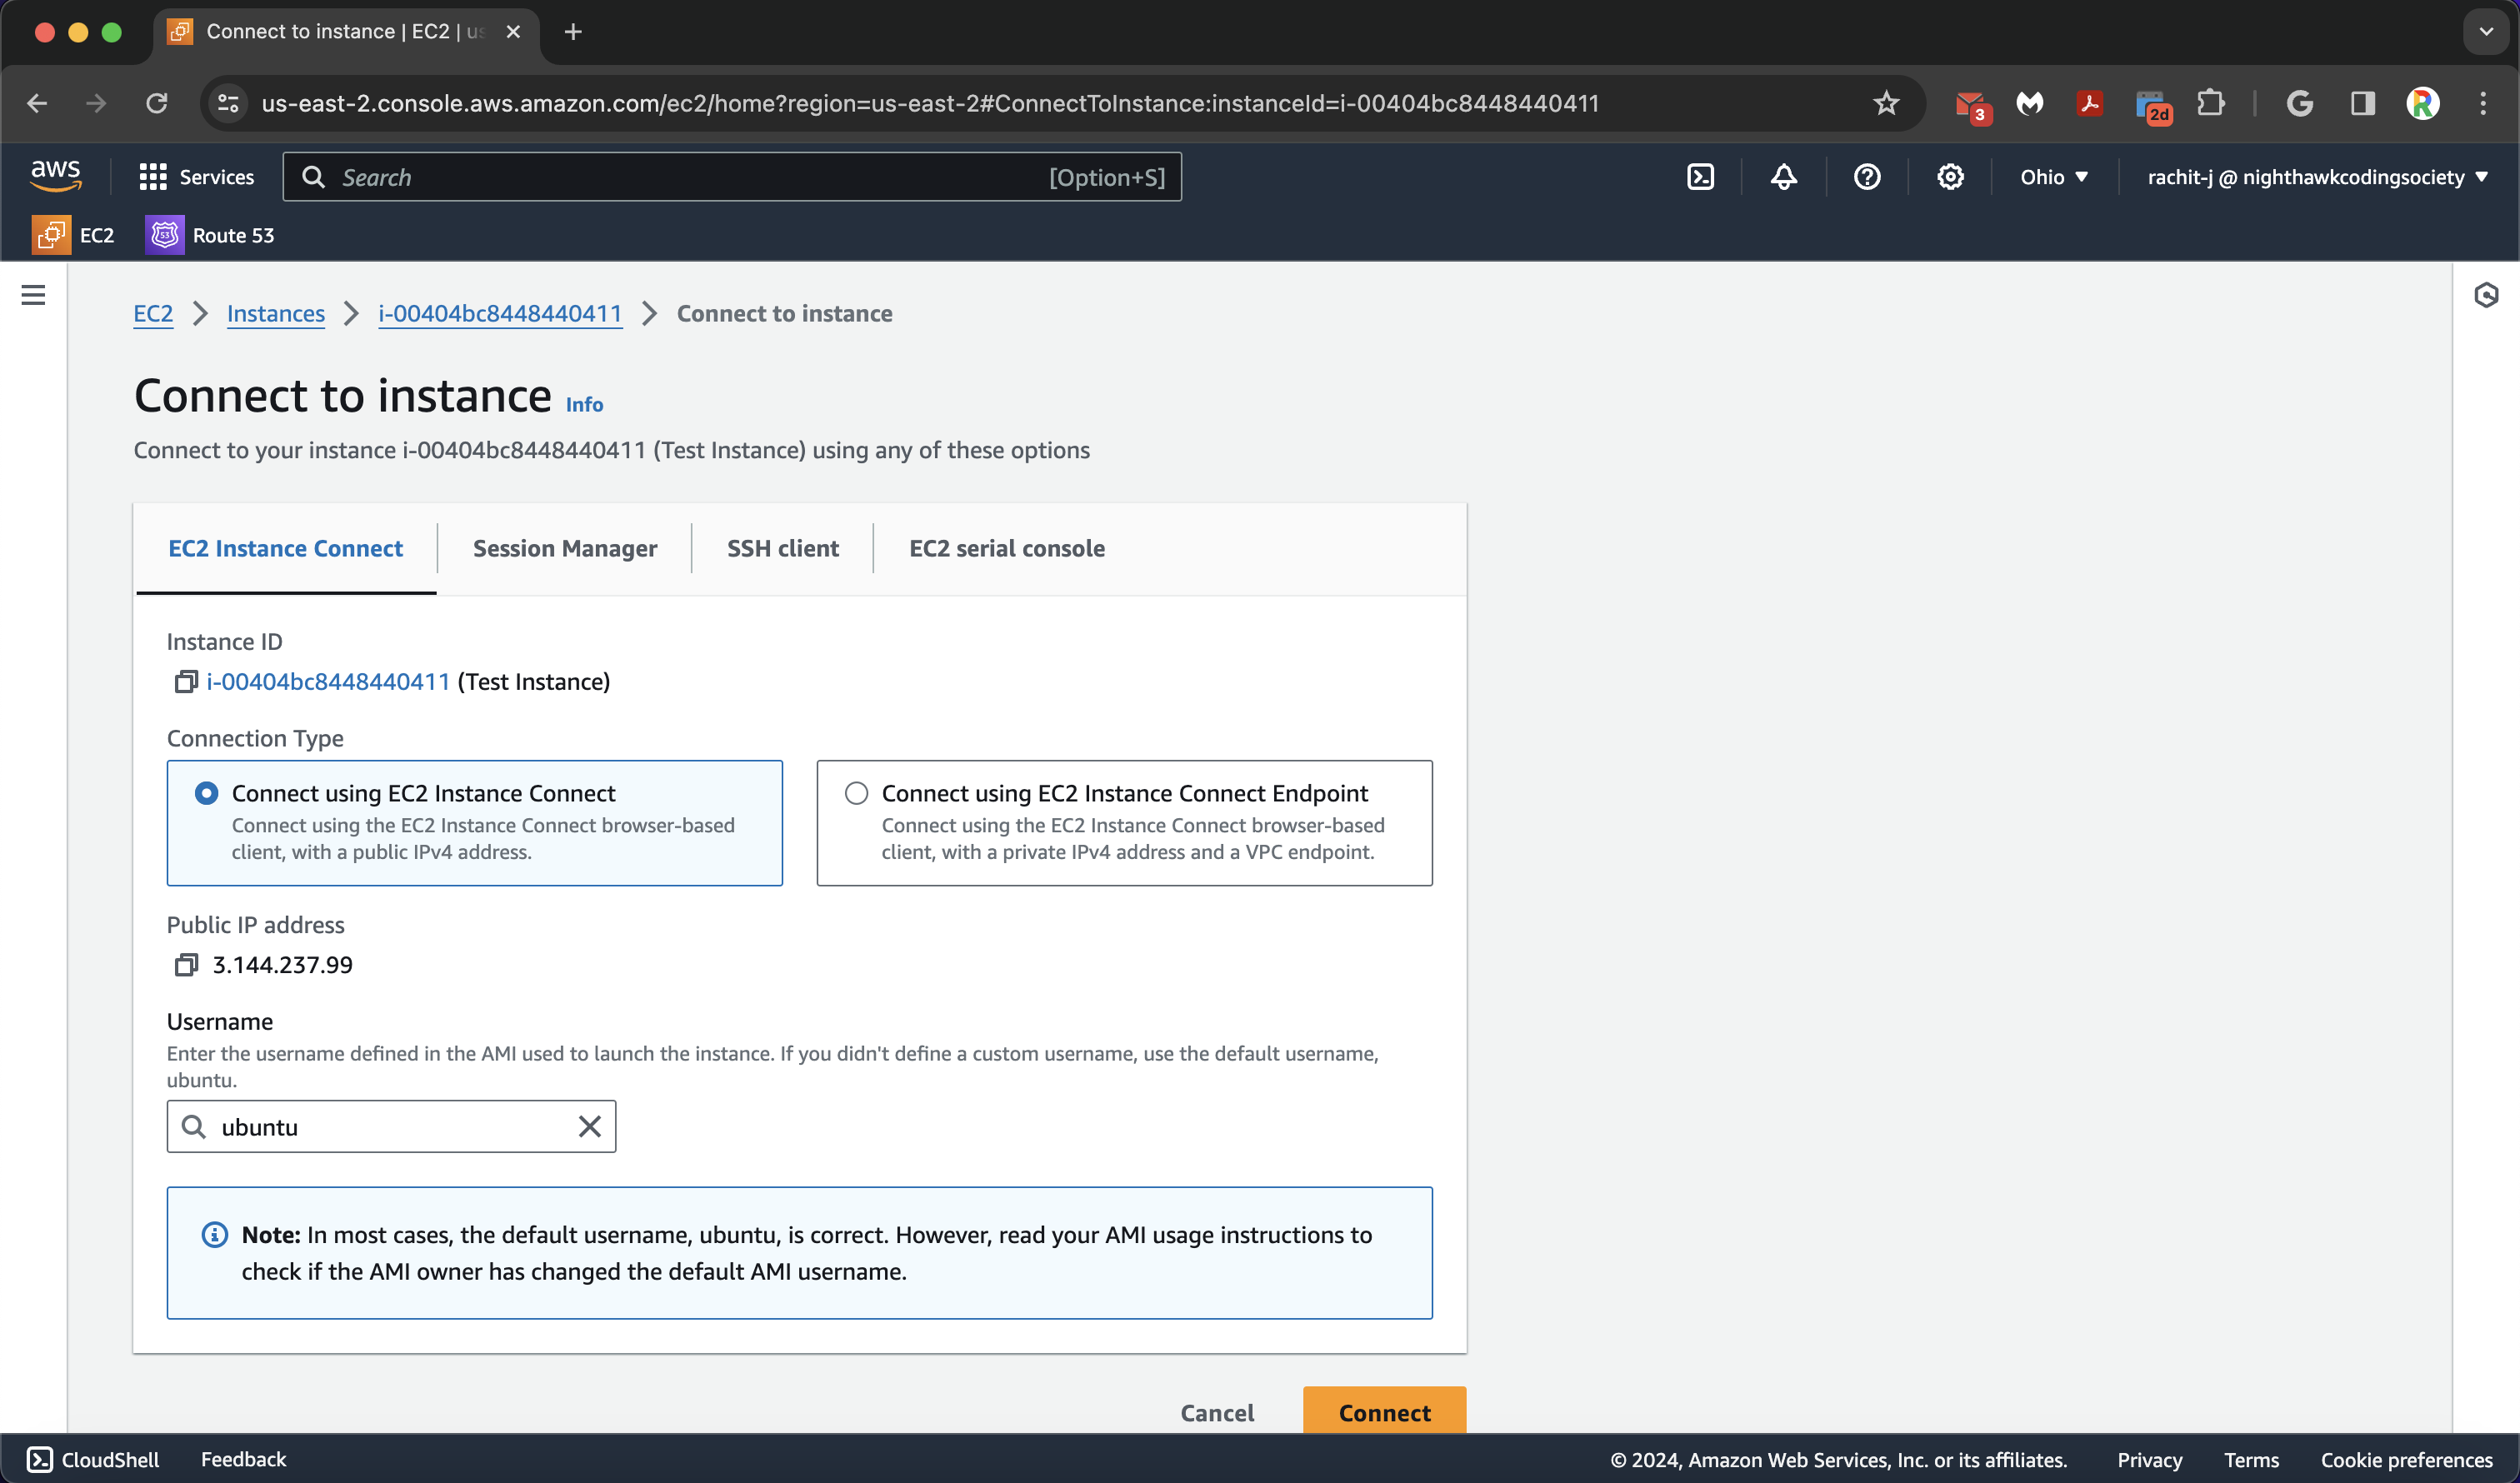
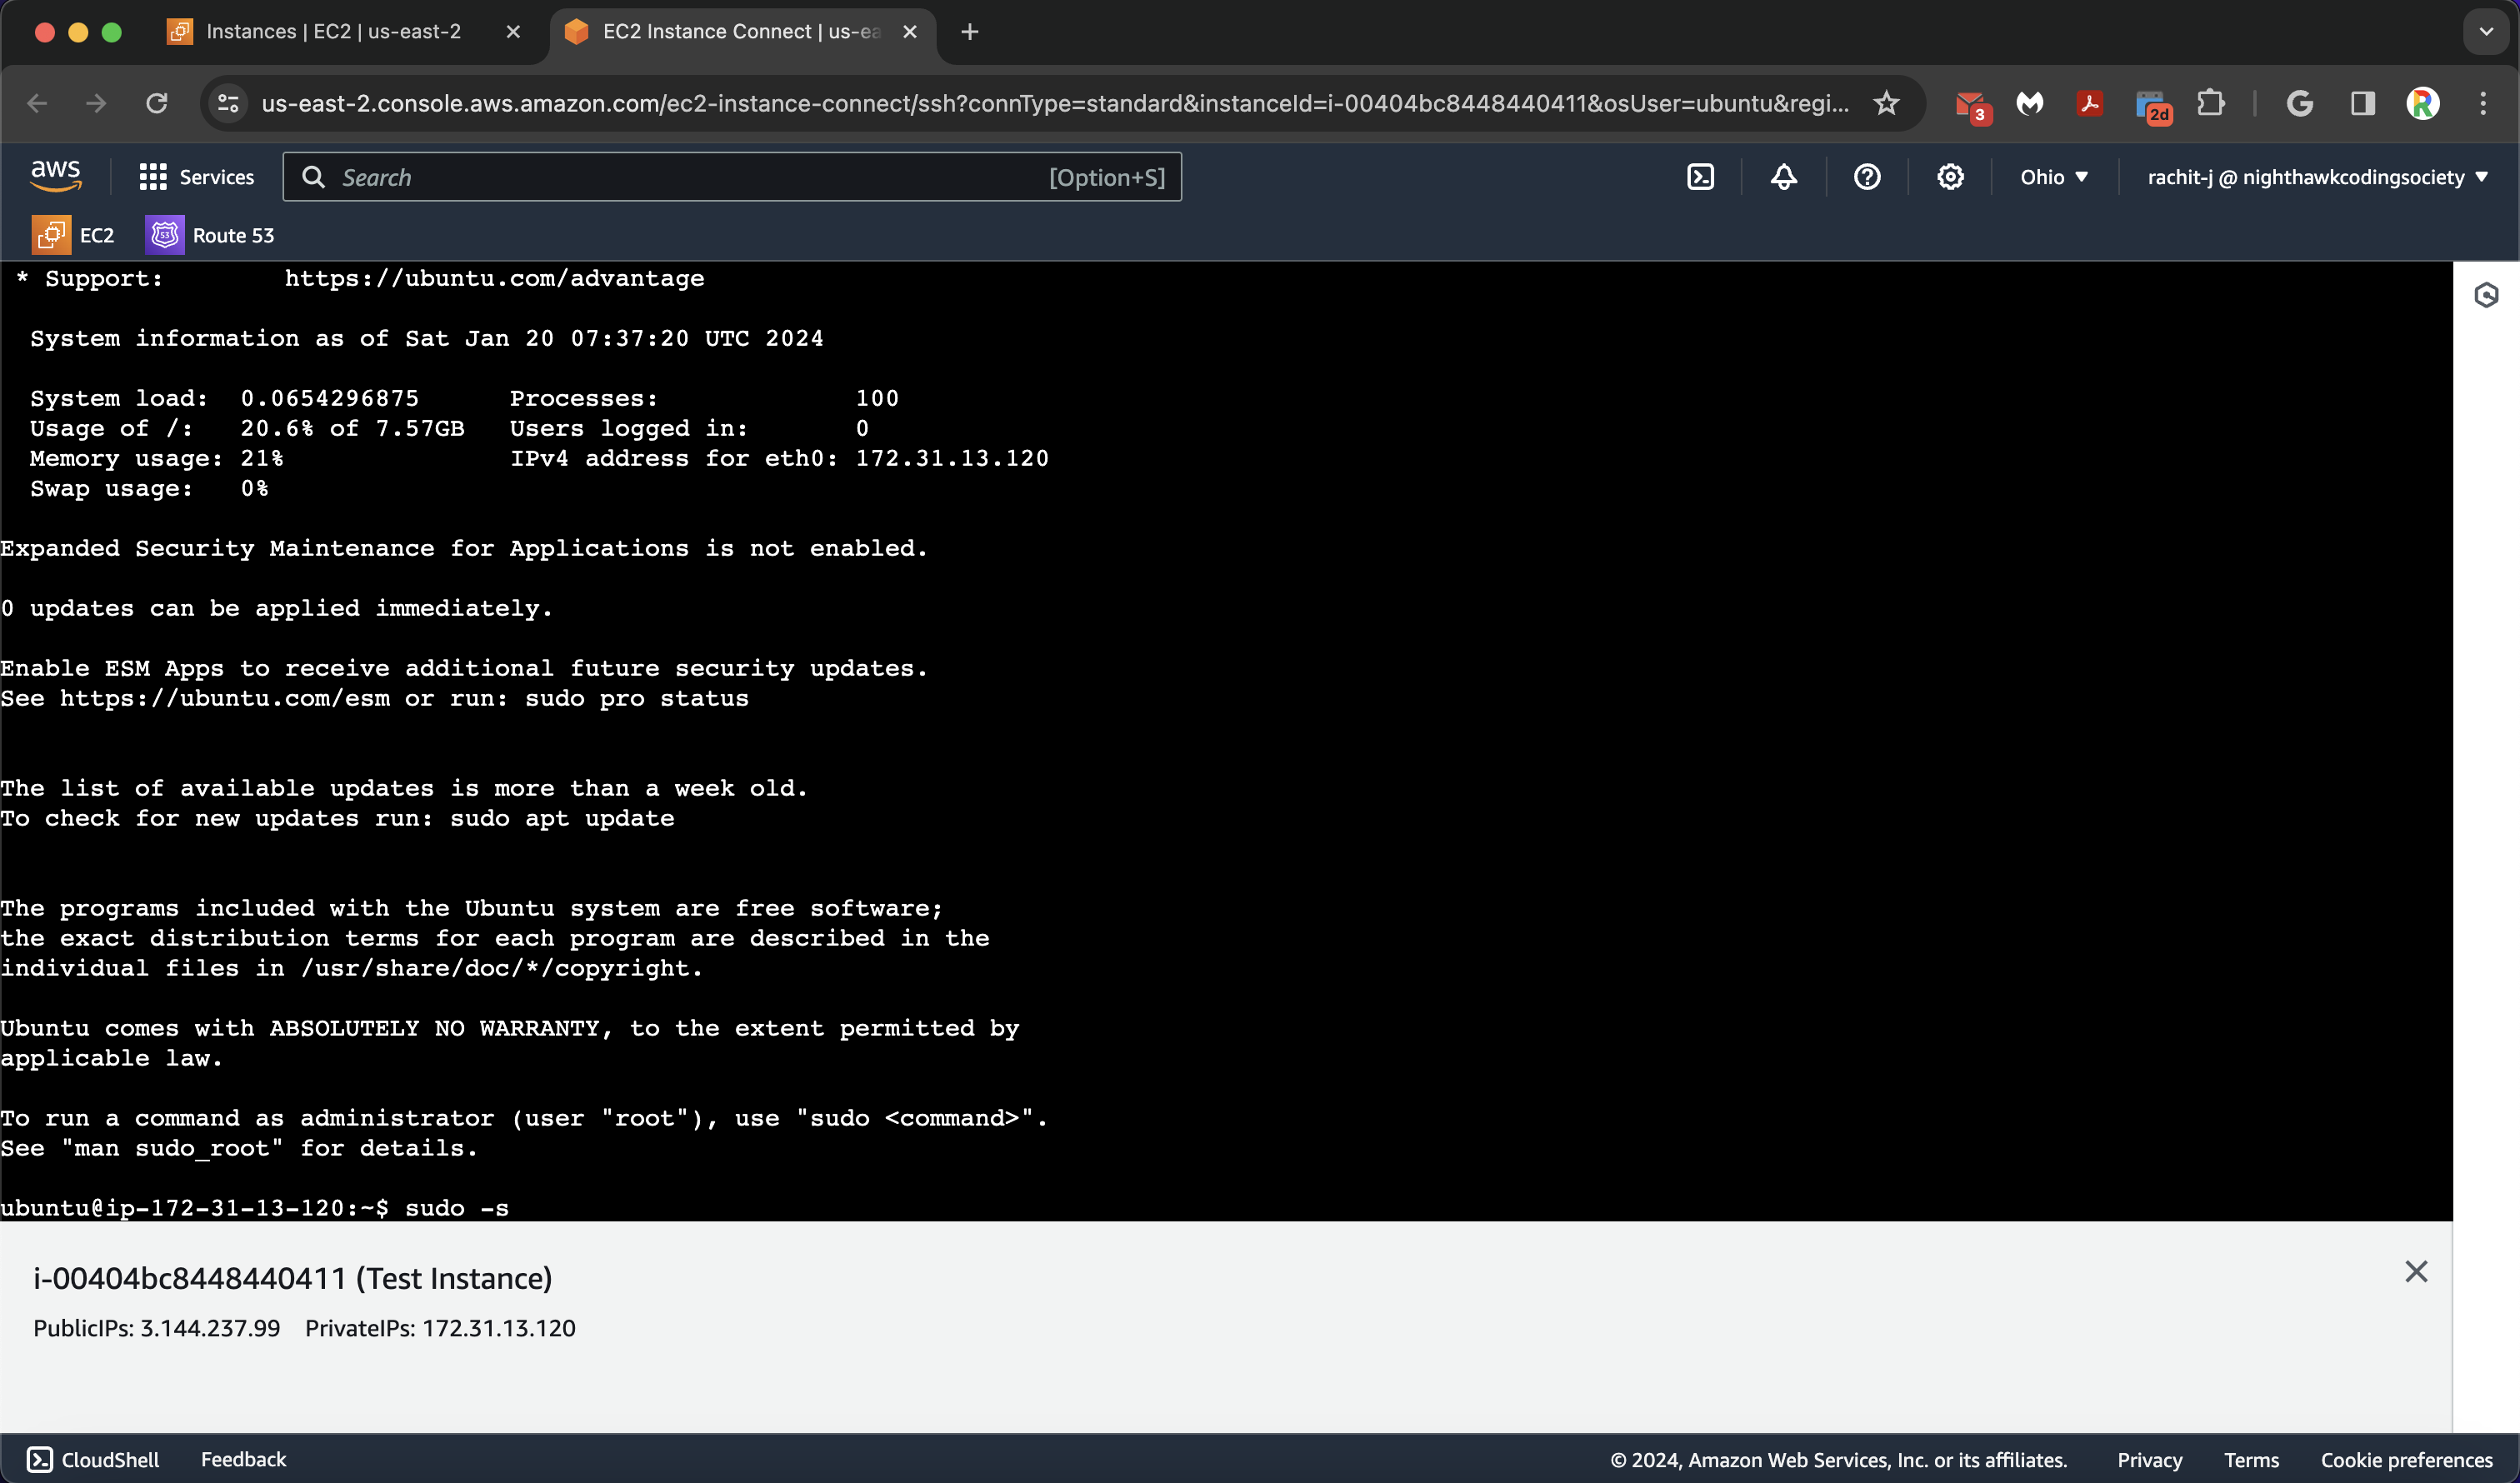
You will then be brought to the command prompt!
Configuring an Instance (Done for you)
To configure an instance, we have to do a couple of things. We have to…
- Install nginx (APT) as a reverse proxy for hosting multiple webpages
- Install certbot (SNAP) for eventually giving our sites SSL certificates
- Install docker (APT) - Run our website
- Install git (APT) - Get our website
- Configure a directory for sites (Organization)
- Configure nginx/everything to allow nginx
To do these, we have documented our commands in a script and will be going over them in a demo.
%%bash

cd /

sudo -s # Log into superuser
apt-get update # Update APT repository list (knows what packages are on the web)
# APT can be reconfigured through commands and sources.list but don't mess with it unless you know what you are doing, or you may break it

apt-get install docker docker-compose nginx git -y # install docker-compose for docker, the nginx server that our api's will run on, and git
# Technically git is already installed but for the purpose of the script we check
snap install certbot --classic # SNAP adds the 'classic' flag to warn you about risks. You place the flag to accept them.
# Cerbot uses SNAP because it is depricated on APT

# Now we can organize our server with a designated deployments folder
mkdir deployments

# Now we configure the firewall
ufw allow openssh # Allow SSH Access
ufw allow 'Nginx Full' # Allow full Nginx access
ufw delete allow 'Nginx HTTP' # This does not exist but we check to make sure there are no conflicting rules
ufw enable # Turn on the firewall (off by default)

# To test if the server is working
curl localhost
Curling our current localhost should return an html page that looks like this:
<html>
<head>
<title>Welcome to nginx!</title>
<style>
    body {
        width: 35em;
        margin: 0 auto;
        font-family: Tahoma, Verdana, Arial, sans-serif;
    }
</style>
</head>
<body>
<h1>Welcome to nginx!</h1>
<p>If you see this page, the nginx web server is successfully installed and
working. Further configuration is required.</p>

<p>For online documentation and support please refer to
<a href="http://nginx.org/">nginx.org</a>.<br/>
Commercial support is available at
<a href="http://nginx.com/">nginx.com</a>.</p>

<p><em>Thank you for using nginx.</em></p>
</body>
</html>
However, we will see it in html since HTML is processed into a webpage by the browser, while we are accessing it from a serverisde command line interface (CLI). We can now proceed onto the next step, which is deploying a physical github spring-boot server onto the backend.
This overall step will be done for you since we are not going to be starting 20 different instances. We have created a new CSA instance for you to put your code on.
Adding Websites, Part 1: Onto EC2
This process should be somewhat familiar to y’all. Here is our procedure:
- Clone backend onto server
- Start up the backend with docker-compose so it runs on the server
- The docker-compose will open a port which we can use nginx to forward to
- Test the port to make sure our backend works
- Link the backend to nginx so it forwards our port to our (eventual) domain name
So lets do it!
Before we run our script, we run docker ps to see which ports are open for use, and we use ports not shown as ports that we can put our websites on (except other system and program reserved ports).
%%bash

# Get backend in right spot
cd /deployments
git clone {mybackend.git}
cd {mybackend}

# Build and test backend
docker-compose up -d --build
curl localhost:{configured_port} # PORTS MUST NOT OVERLAP

# Checkpoint -- does the backend work?
# put exact all caps YES to proceed or else the script will exit (safety)
echo -n "CHECKPOINT. Does the curl command return the right page? YES/NO: "
read checkpoint
if [checkpoint == "YES"]; then
    # In future scripts, we will not exit here, but assuming we have done R53 we will continue
    echo "CHECKPOINT PASSED. Proceed."
    exit 0 # This will exit without displaying the output as an error
else
    echo "CHECKPOINT FAILED. Must fix issues."
    exit 1 # This will exit while displaying the output as an error
fi
Adding Websites, Part 2: Route 53
You should get the IP address of your instance and save it somewhere before this. You will see why soon.
Navigate back to your AWS homepage, the one you just landed on when you logged in (click the AWS button in the top left corner).
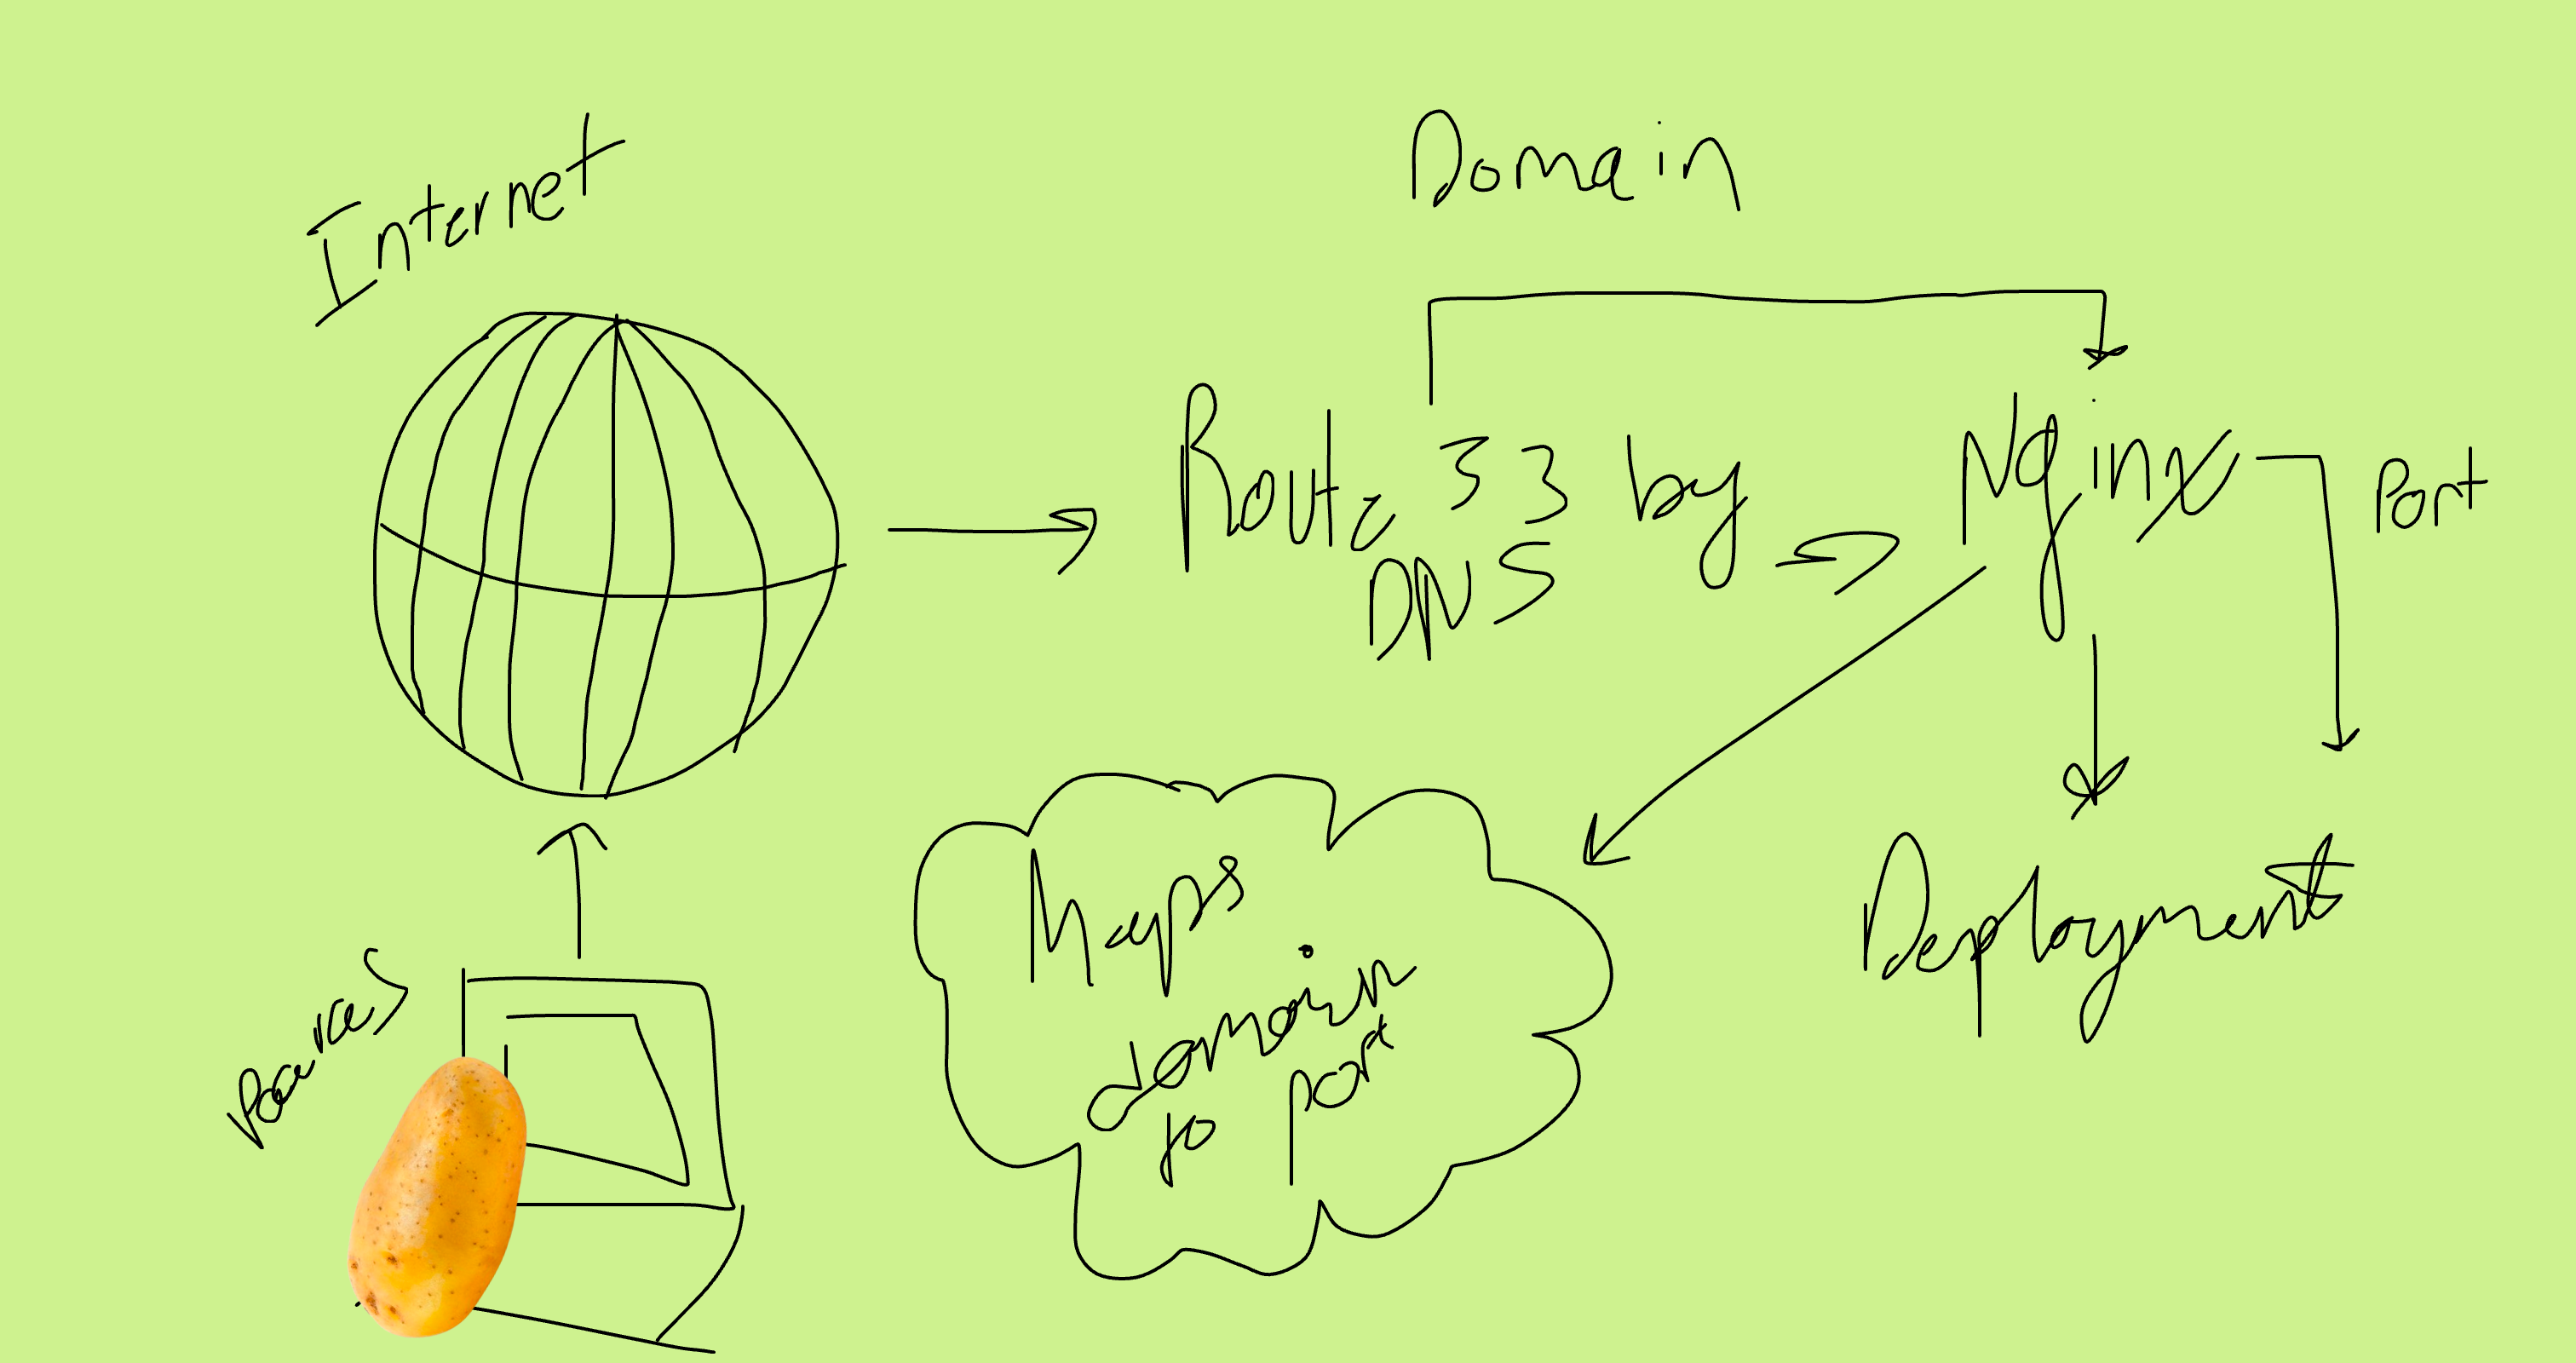
Now is the time for us to configure our domain names (or subdomains) so that we can actually see our site. Our reverse proxy needs the domain name to link our actual site to the name, and without that, our deployment will not work (there is a long story why, if you want to know please ask!).
We use domain names to point text towards our IP’s that are hosting our servers. The process is called DNS resolution.
 Taken from AWS
If you have any further questions about DNS, consult this link (and do some Googling y’all have it in you) before asking us (if a lot of people ask we will give an explanation of DNS in a blog): AWS DNS Explanation.
Taken from AWS
If you have any further questions about DNS, consult this link (and do some Googling y’all have it in you) before asking us (if a lot of people ask we will give an explanation of DNS in a blog): AWS DNS Explanation.
AWS Route 53 allows us to take one domain and split it into multiple domains while linking them to our EC2 instances by the IP Adresses and the nginx configuration of the instances.
First, we go to the search bar and search “Route 53”. We then click on it (I would also star it) so it takes us to the Route 53 Homepage.
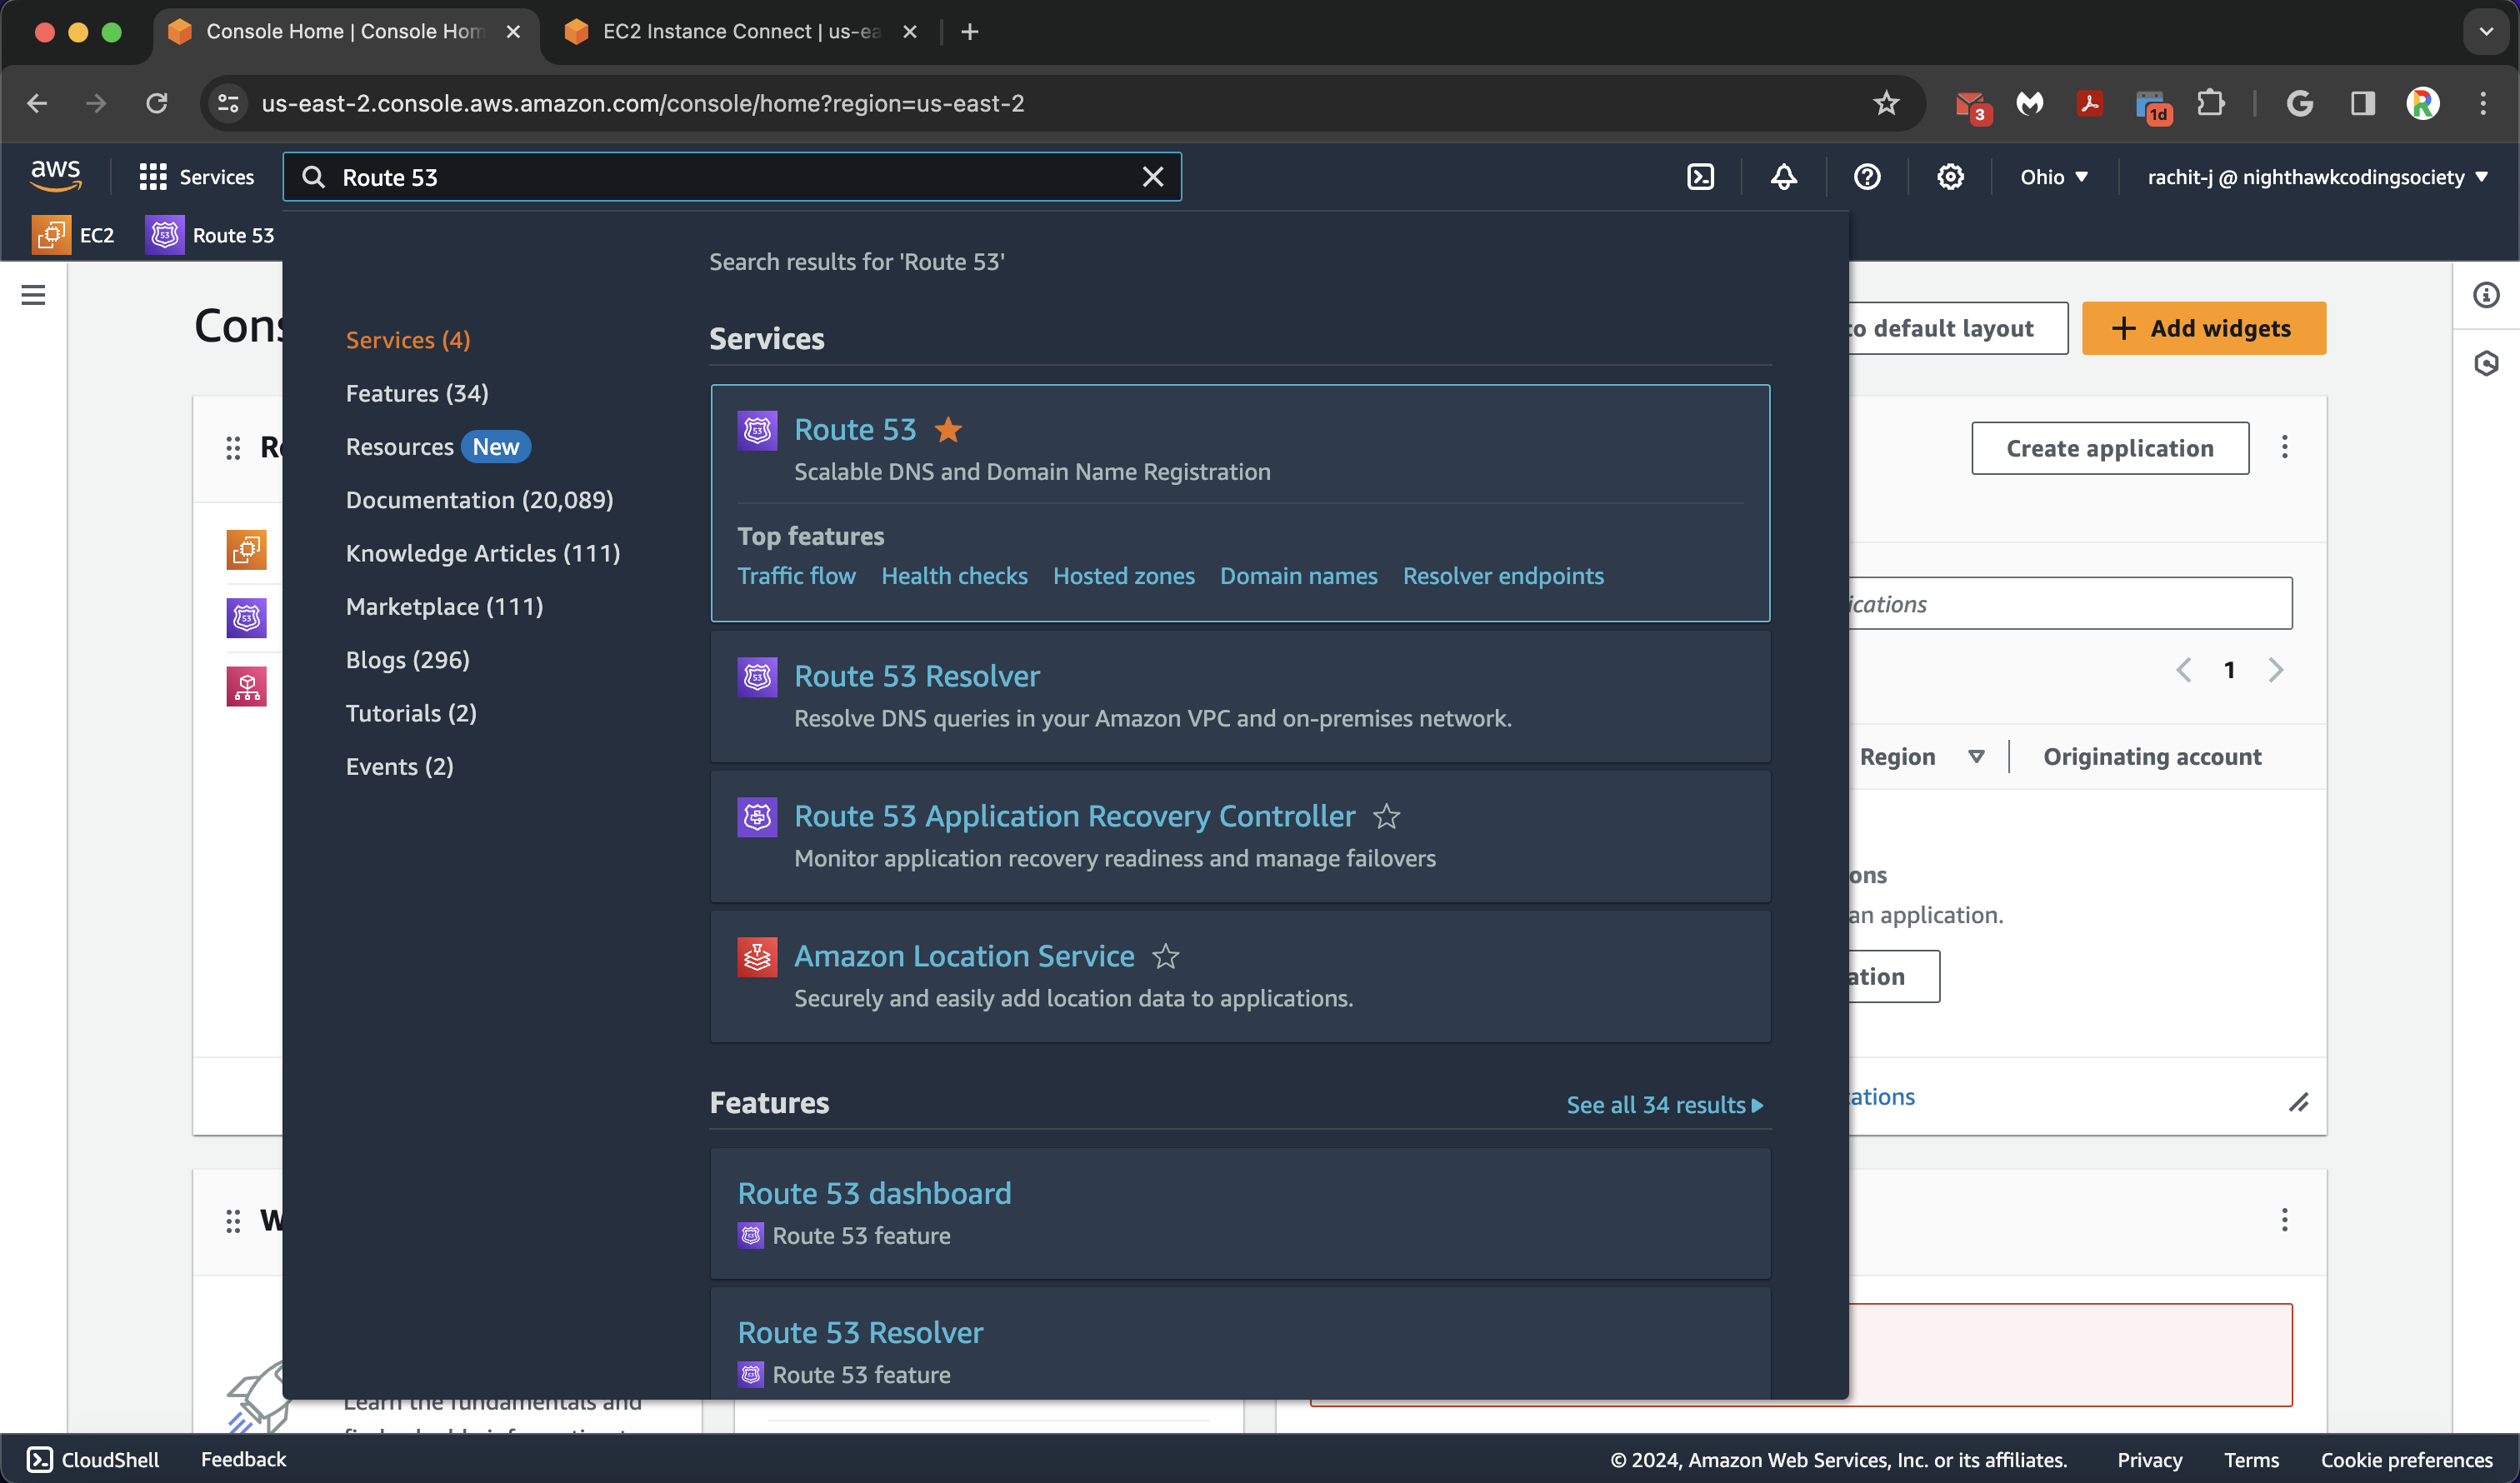 The one with the star
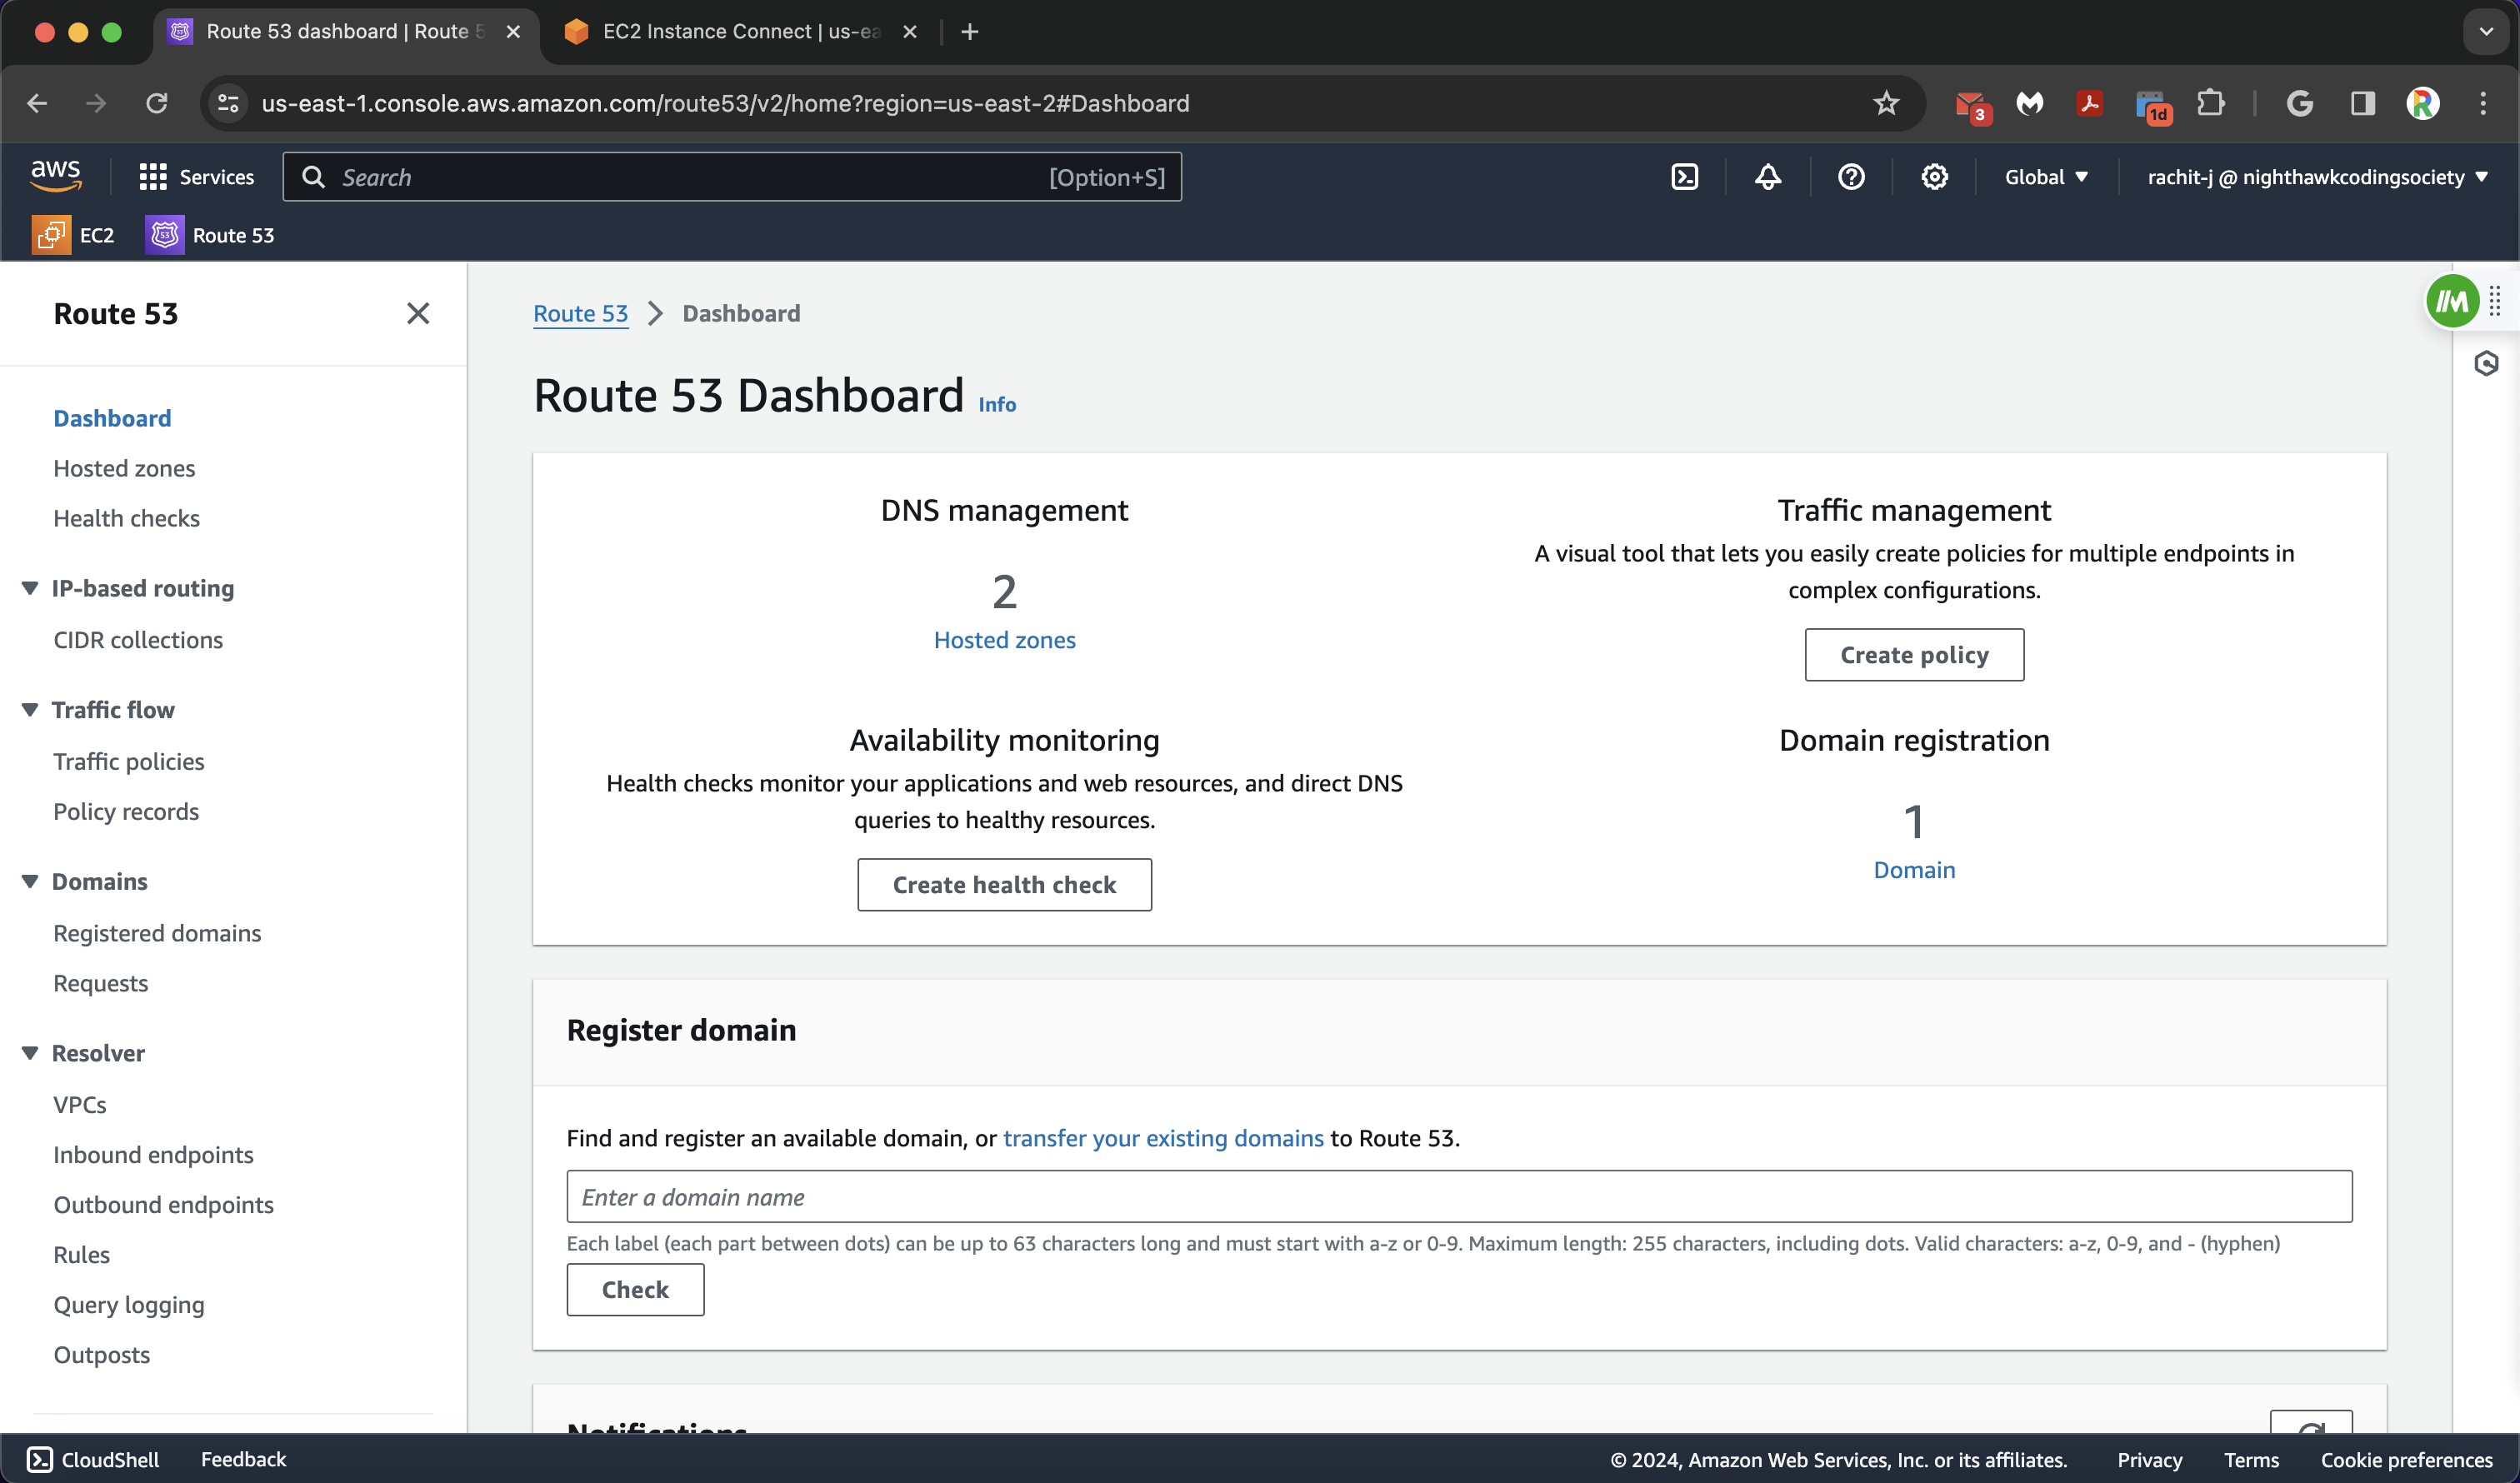
Then, we click the page on the sidebar (or in the middle) called “Hosted Zones”. This is where our domain configuration will be.
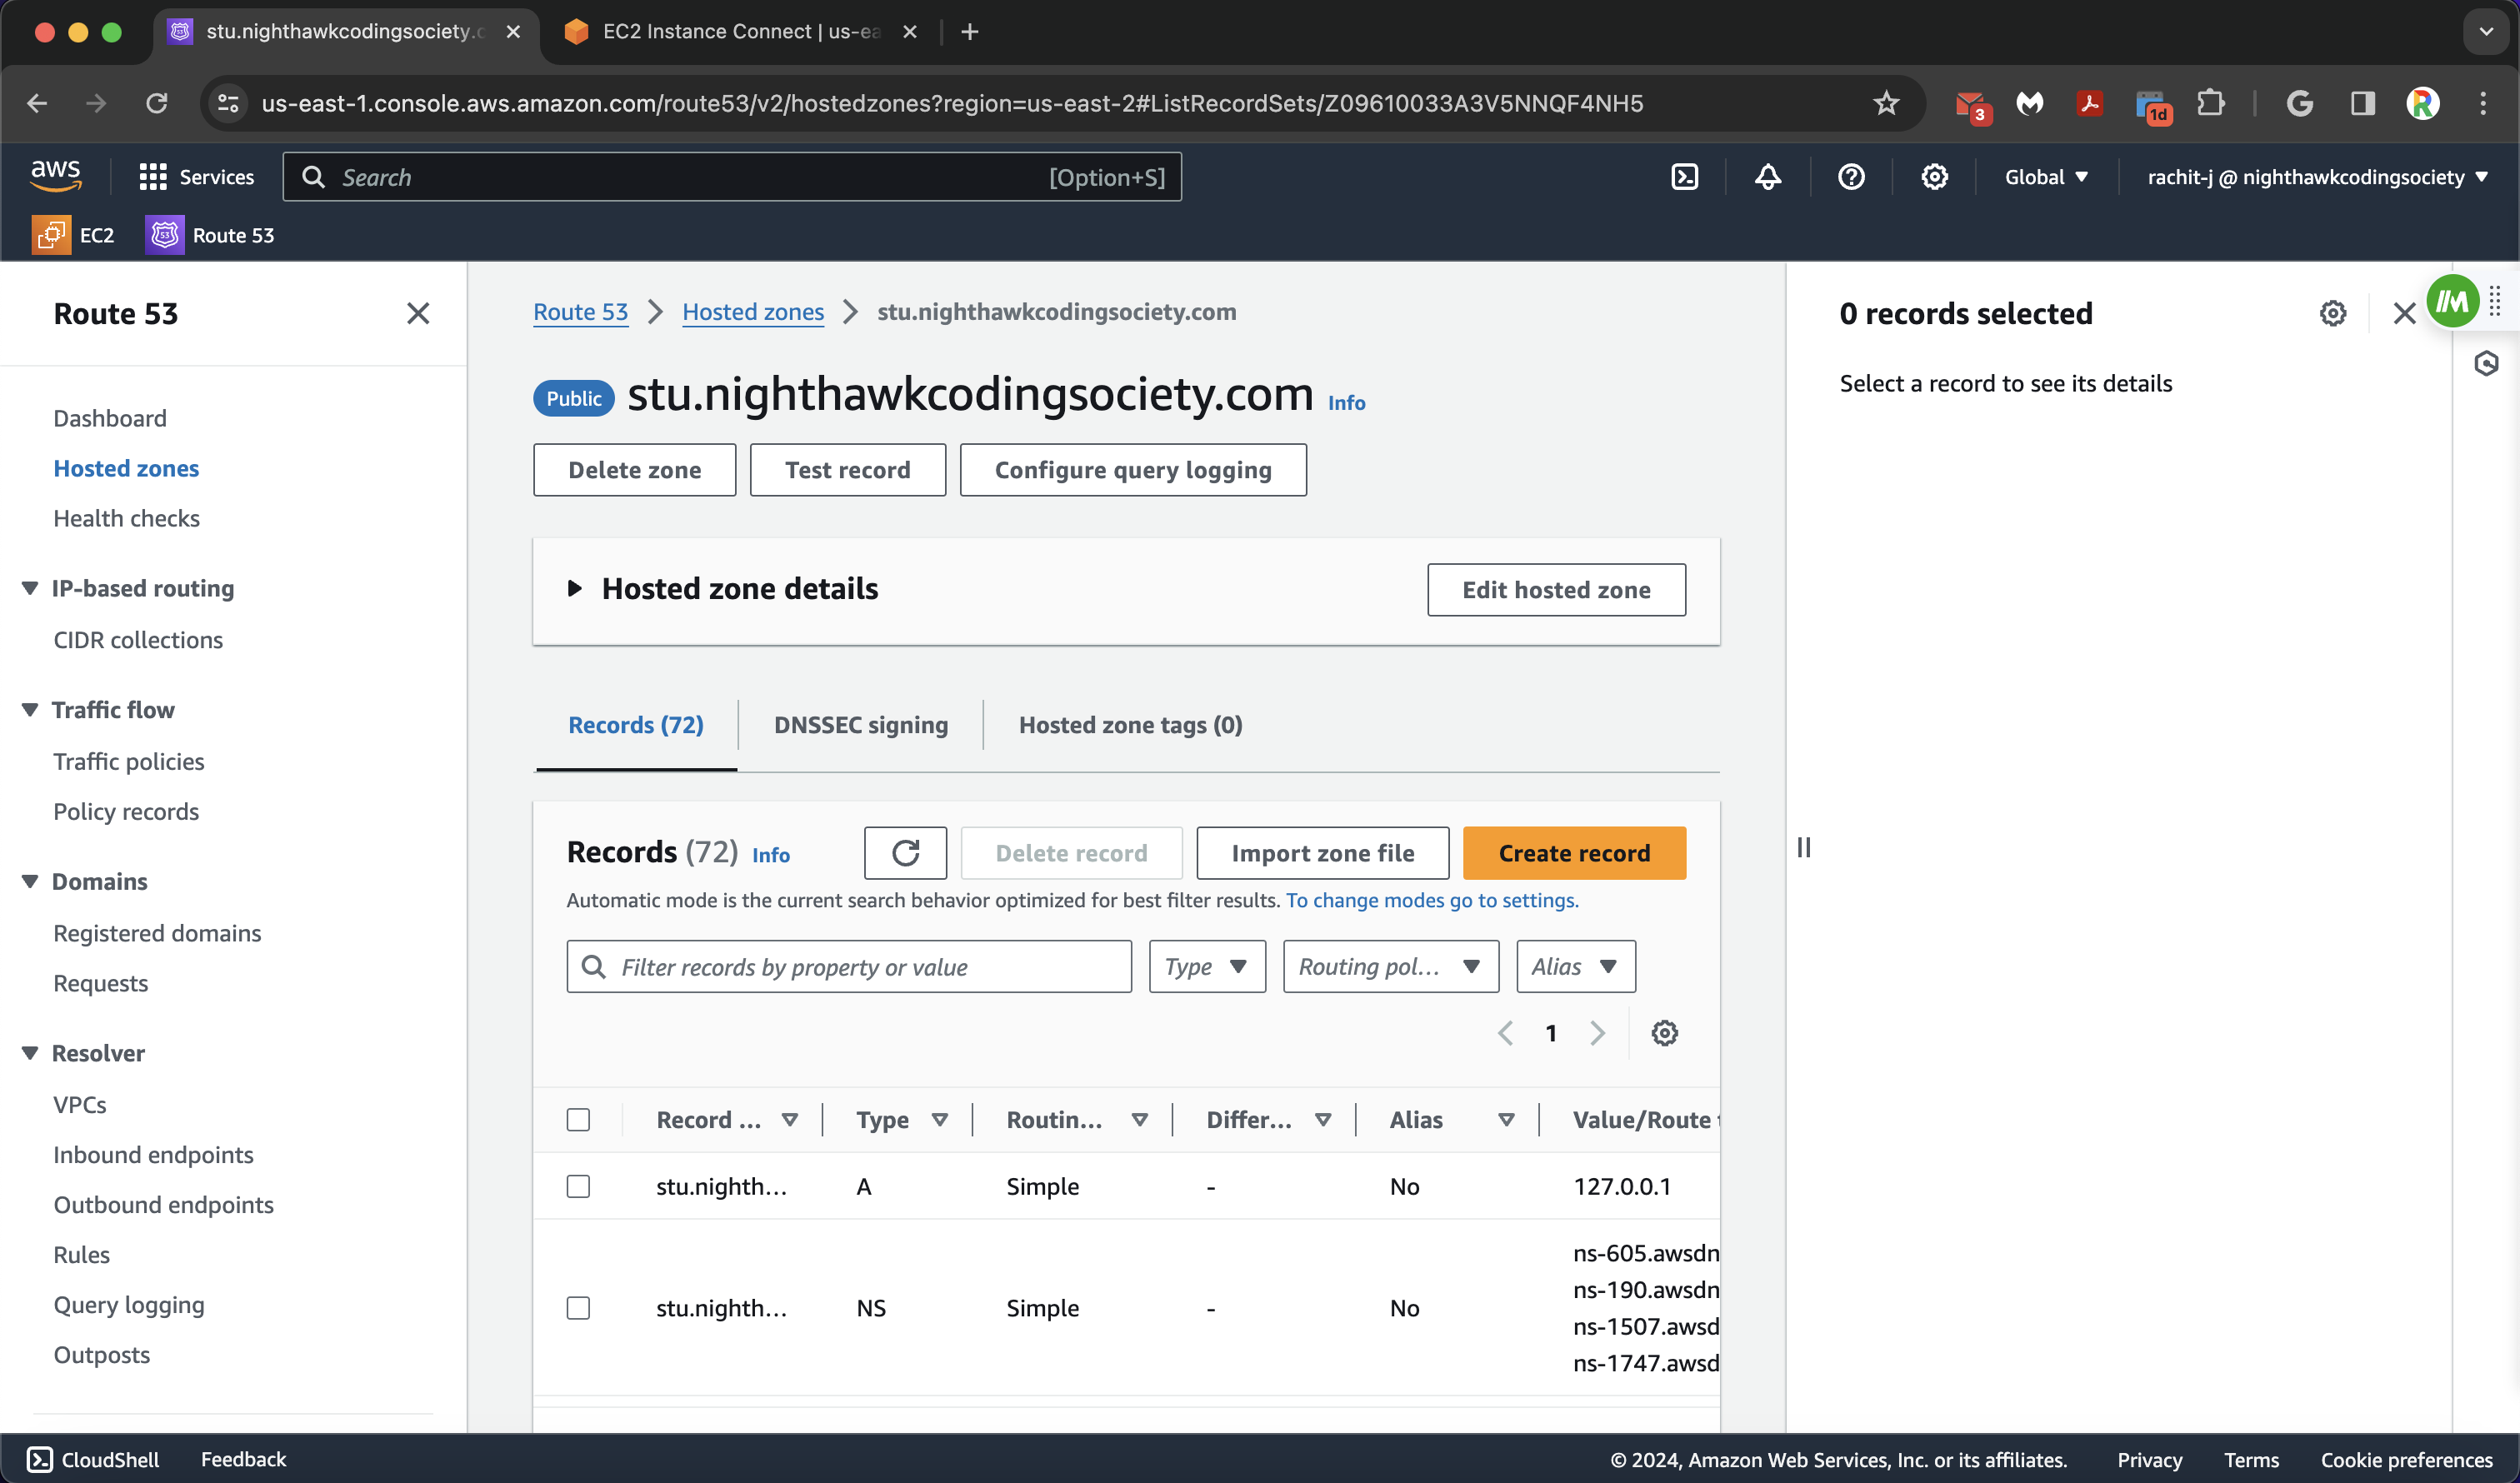
Our projects are student projects, so they will be subdividing the (division) domain stu.nighthawkcodingsociety.com (helps with organization with only one domain). Click on the blue link on AWS to take you to the next page.
This next page is where we create our subdomain with a record. Add a subdomain title (you should save this somewhere too), and it must be something different than all the other subdomains shown on the records page. Then configure the record type as A, which routes traffic to IPv4 Addresses and (some) AWS Resources. In the value box, put in the public IPv4 address of your EC2 Instance (the one you have your website on). Everything else can remain default, and you can create your record.
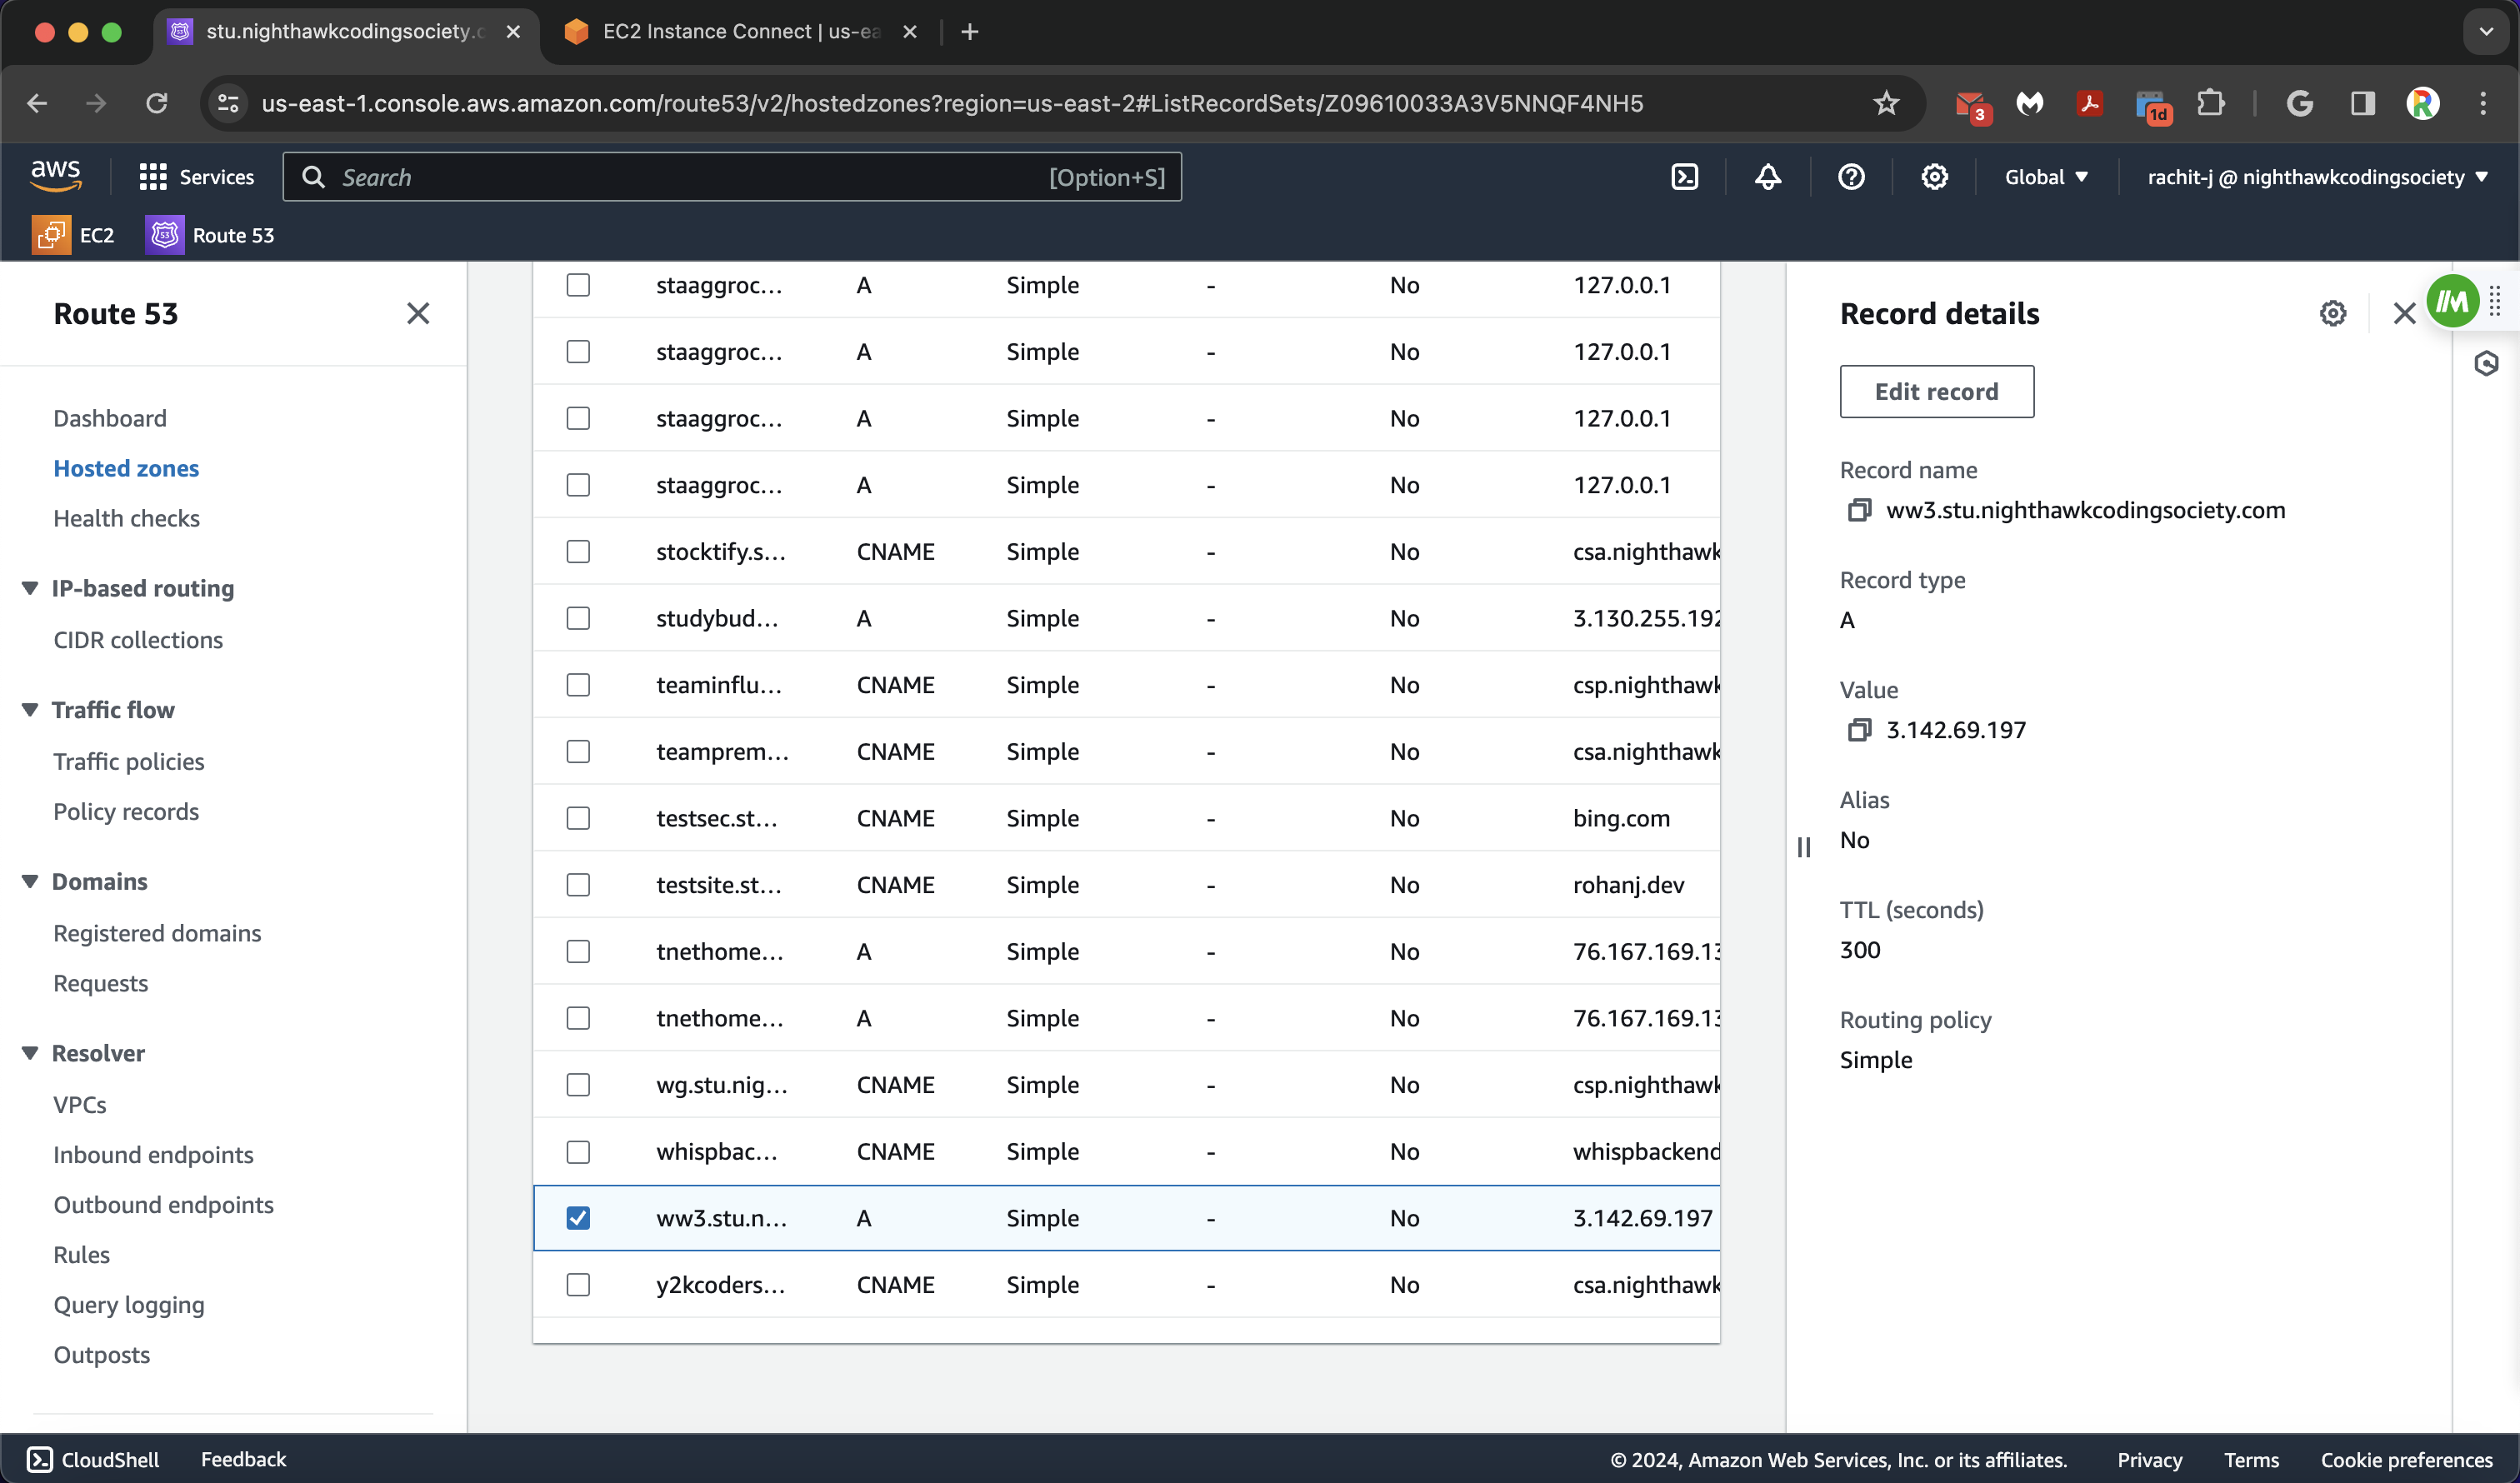
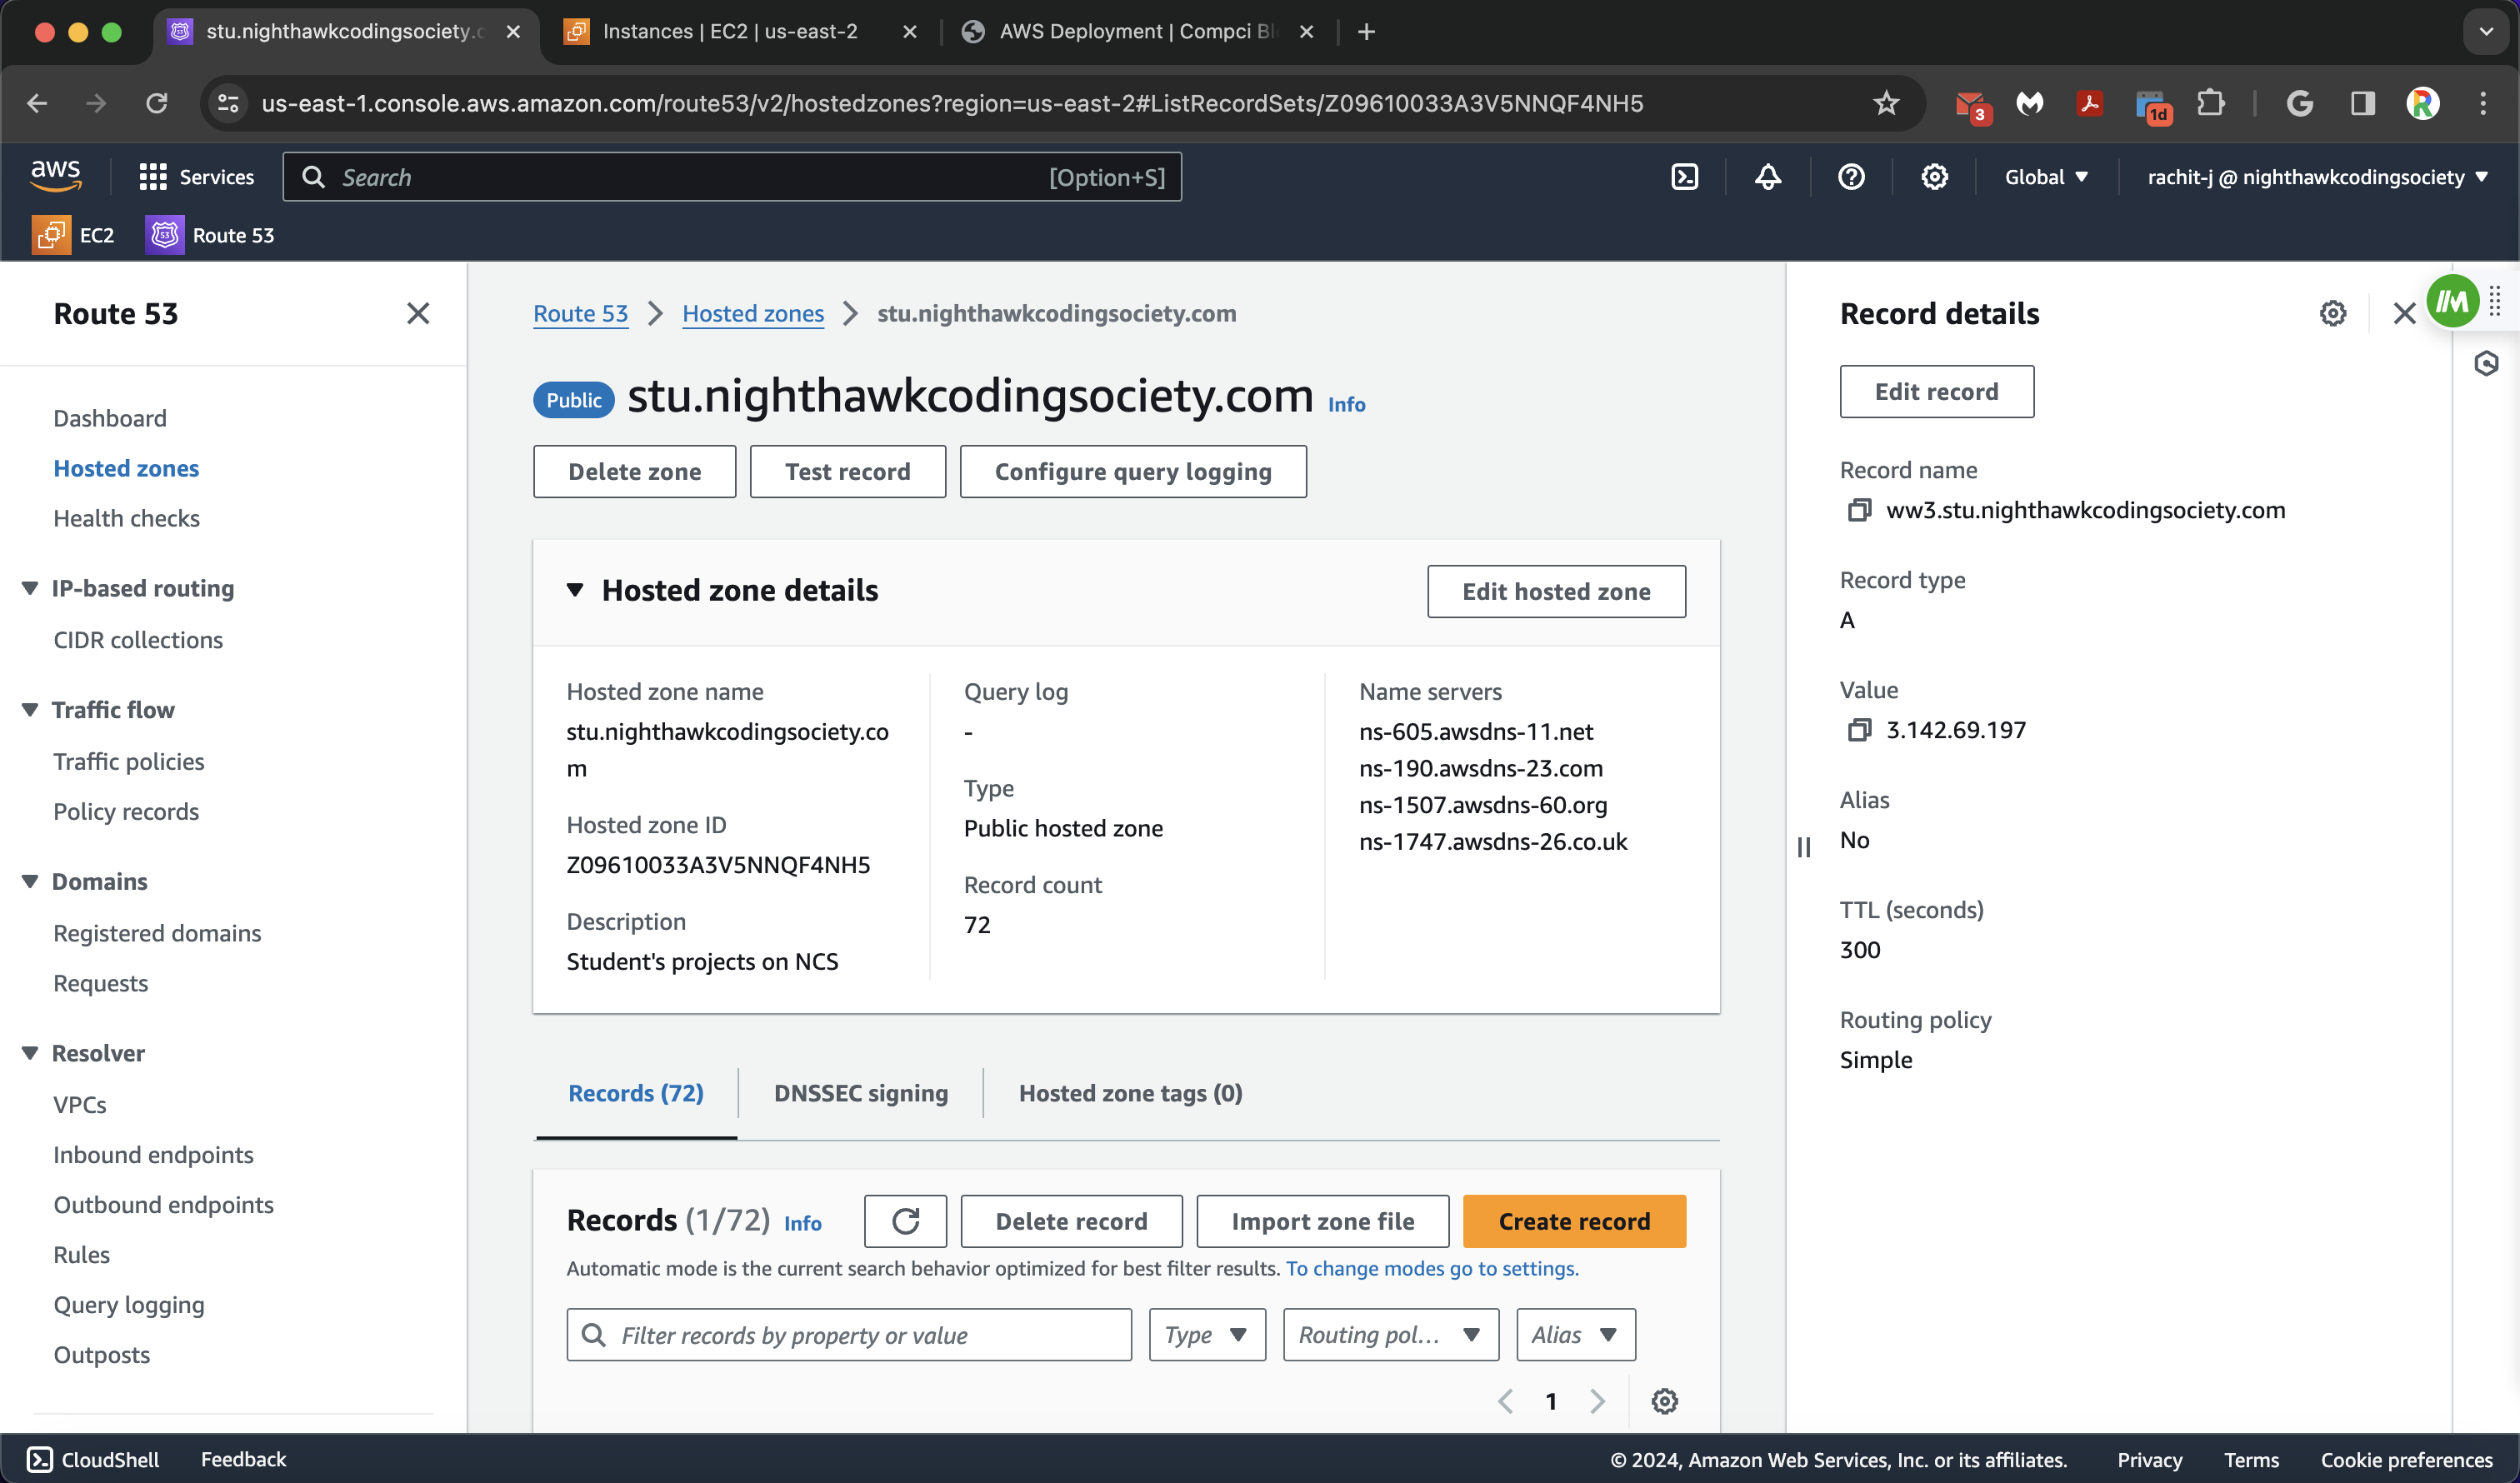
Example ww3 site record
Route 53 is now configured. We can finally set up the middle man, or our reverse proxy server: nginx.
Adding Websites, Part 3: nginx
Navigate back to the EC2 Instance. We will now be configuring nginx for our site, which is the final part of the deployment stage.
Step 1: Navigate to /etc/nginx/sites-availible
cd /etc/nginx/sites-availible/
Step 2: Make a unique project file
touch {someuniqueprojectname}
Step 3: Open the new file with nano
nano {someuniqueprojectname}
Step 4: Paste in the nginx configuration, modifying it for your site and what you have configured
server {
   listen 80;
    listen [::]:80;
    server_name -----.stu.nighthawkcodingsociety.com ; # Change server name to the one on R53
    # Configure CORS Headers
    location / {
        proxy_pass http://localhost:8---; # Change port to port on docker
        # Simple requests
        if ($request_method ~* "(GET|POST|PUT|DELETE)") { # Customize Request methods based on your needs
                add_header "Access-Control-Allow-Origin"  *;
        }
        # Preflighted requests
        if ($request_method = OPTIONS ) {
                add_header "Access-Control-Allow-Origin"  *;
                add_header "Access-Control-Allow-Methods" "GET, POST, PUT, DELETE, OPTIONS, HEAD"; # Make sure the request methods above match here
                add_header "Access-Control-Allow-Headers" "Authorization, Origin, X-Requested-With, Content-Type, Accept";
                return 200;
        }
    }
}
A quick explanation: this nginx block is the configuration that links nginx to your docker process using a reverse proxy to forward the configured domain to the configured port. For CORS Headers, there are two modes: simple requests and preflighted requests. Simple requests are requests that have no implications and are not dangerous for the user or for the server, or simple data. Preflighted requests handle more complex and sensitive data, where the browser first sends a request through the OPTIONS method, and then the server responds to determine if the request is safe to proceed.
There are two directives to this example: server_name and proxy_pass.
server_name basically links the domain name to nginx for the server configuration. proxy_pass will then forward the requests made to the server with the “tag” for the domain name to the proxy_pass, which is the address for the localhost backend server corresponding to the domain name with server_name.
Take it as nginx forwarding the domain to the port, acting as an intermediary, or the middle man.
Save changes by CTRL/CMD-X, y, ENTER
Step 5: Activate configuration by linking the file to the active site directory.
cd /etc/nginx/sites-enabled
ln -s /etc/nginx/sites-available/{someuniqueprojectname} /etc/nginx/sites-enabled/ (as root)
Step 6: Validation. nginx will check itself
nginx -t (as root)
Step 7: Restart nginx for changes to take place
sudo systemctl restart nginx
service nginx status (check status after)
If all goes smoothley, you will now have an HTTP website deployed to AWS. Here is how we turn it into HTTPS (secure).
Certbot Configuration
Certbot configuration is important because it gives us an SSL certificate, which allows our browser to trust our site. It keeps user data secure, verifies ownership of the website, prevents attackers from creating a fake version of the site, and conveys trust to users.
 borrowed from hostinger
Guys, you literally have to run this command:
sudo certbot --nginx
and follow what it says. If it succeeds, GREAT. If not, NOT GREAT. Do what it says.
Deployment Updates
On your localhost, you should test your deployment by running:
docker-compose down- Take down docker server so nothing breaks and it can recompiledocker-compose up -d --build- Rebuild Docker
Optional step between steps 1 & 2: ./mvnw clean - Cleans maven (I struggled with this)
On EC2, update your deployment with the following commands:
docker-compose down- Take down docker server so nothing breaks and it can recompilegit pull- Fetch Latest Data./mvnw clean- Clean Maven (optional but recommended)docker-compose up -d --build- Rebuild docker- IF no changes are shown, run
service nginx restart
Troubleshooting
curl localhost:{some port}(is this my page?)docker-compose ps(is docker good?)docker ps(is everything okay?)
Suggestions and Closure
As you may have noticed, many of these things can be automated. Our team has automated many of these processes, and we encourage you to do the same. We will be posting our scripts through our blogs after a two days or so for you to learn how to deploy, and we will let you know when we do so. We encourage you to make your own to speed up the deployment process.
We have created a new CSA server for everyone to deploy on because we do not want 60 instances. The framework and guidelines for using the instance are below, as well as on a seperate blog.
If you have any questions, please message us on slack, ask chatgpt, or google the question. We will be blogging and maintaing the CSA server, just please don’t destroy it.
PS. We understand we can automate deployment updates through cron jobs and stuff. Shoot us a message if you have cool ideas or would like to help us impliment these.
Framework of the CSA Server
- Put all your deployed websites into
/deployments(you will see ww3 there) - Don’t mess with the
/riftdevdirectory - Don’t do something you will regret
- Don’t mess with other people’s stuff
- Don’t crash the server and forget to tell us (PLEASE TELL US)